
My First Crumble
I learned to make crumble from my own grandma. She used whatever fruit was in season. One time, we only had apples and a few cherries from the tree. We mixed them together. I was so surprised by the taste.
It was tart and sweet all at once. The kitchen smelled like a happy autumn day. I still laugh at that memory. It taught me that cooking is about using what you have. That matters more than following rules perfectly.
Why This Combo Works
Apples and cherries are best friends. The apples get soft and cozy. The cherries burst with a little tang. The sugar and lemon juice help them become saucy. Doesn’t that smell amazing while it bakes?
Letting the fruit sit for five minutes is my secret. This lets the juices come out. That juice turns into the best part—the syrupy sauce underneath the crisp topping. What’s your favorite fruit combo for a dessert?
The Joy of the Topping
The crumble topping is my favorite part to make. You get to use your hands! Squishing the butter into the oats and flour is fun. It feels like making sandcastle sand. It should look like little pebbles when you’re done.
This step matters because those little pebbles bake into perfect crunch. They protect the soft fruit underneath. *Fun fact:* Using your hands keeps the butter cold in little bits. This makes the topping extra crispy.
Baking & Sharing
When you put it in the oven, the wait begins. You’ll see bubbles popping at the edges. The topping will turn a warm gold. That’s when you know it’s ready. Letting it rest for ten minutes is hard, but important.
It lets the filling settle so it’s not too runny. Then, you get to choose how to serve it. Ice cream melts into the warm fruit. Whipped cream sits like a cloud on top. Do you prefer yours with ice cream, custard, or plain?
A Lesson in Warmth
This recipe matters to me for a simple reason. It makes a home feel like a home. It’s not a fancy dessert. It’s a humble, comforting one. Anyone can make it, and everyone loves it.
Sharing food you made with your hands is a special kind of love. It says, “I made this for you.” That’s the real magic of cooking. Tell me, what’s a recipe that makes you feel that cozy, happy feeling?
Ingredients:
| Ingredient | Amount | Notes |
|---|---|---|
| apples, peeled, cored and thinly sliced | 3 cups | You can dice the apples rather than slice them if preferred. |
| cherries, pitted | 2.5 cups | Bake them whole or cut in half. |
| lemon, juice of | ½ | |
| white granulated sugar | ½ cup | |
| cinnamon | ½ teaspoon | |
| nutmeg | ½ tsp | |
| all purpose flour | 3 tablespoon | |
| salt | pinch | |
| rolled oats | ⅔ cup | |
| all purpose or plain flour | ⅓ cup | |
| white granulated sugar | ⅓ cup | |
| brown sugar | ⅓ cup | |
| cinnamon | 1 teaspoon | |
| unsalted butter, softened | 6 tablespoon | |
| salt | pinch |
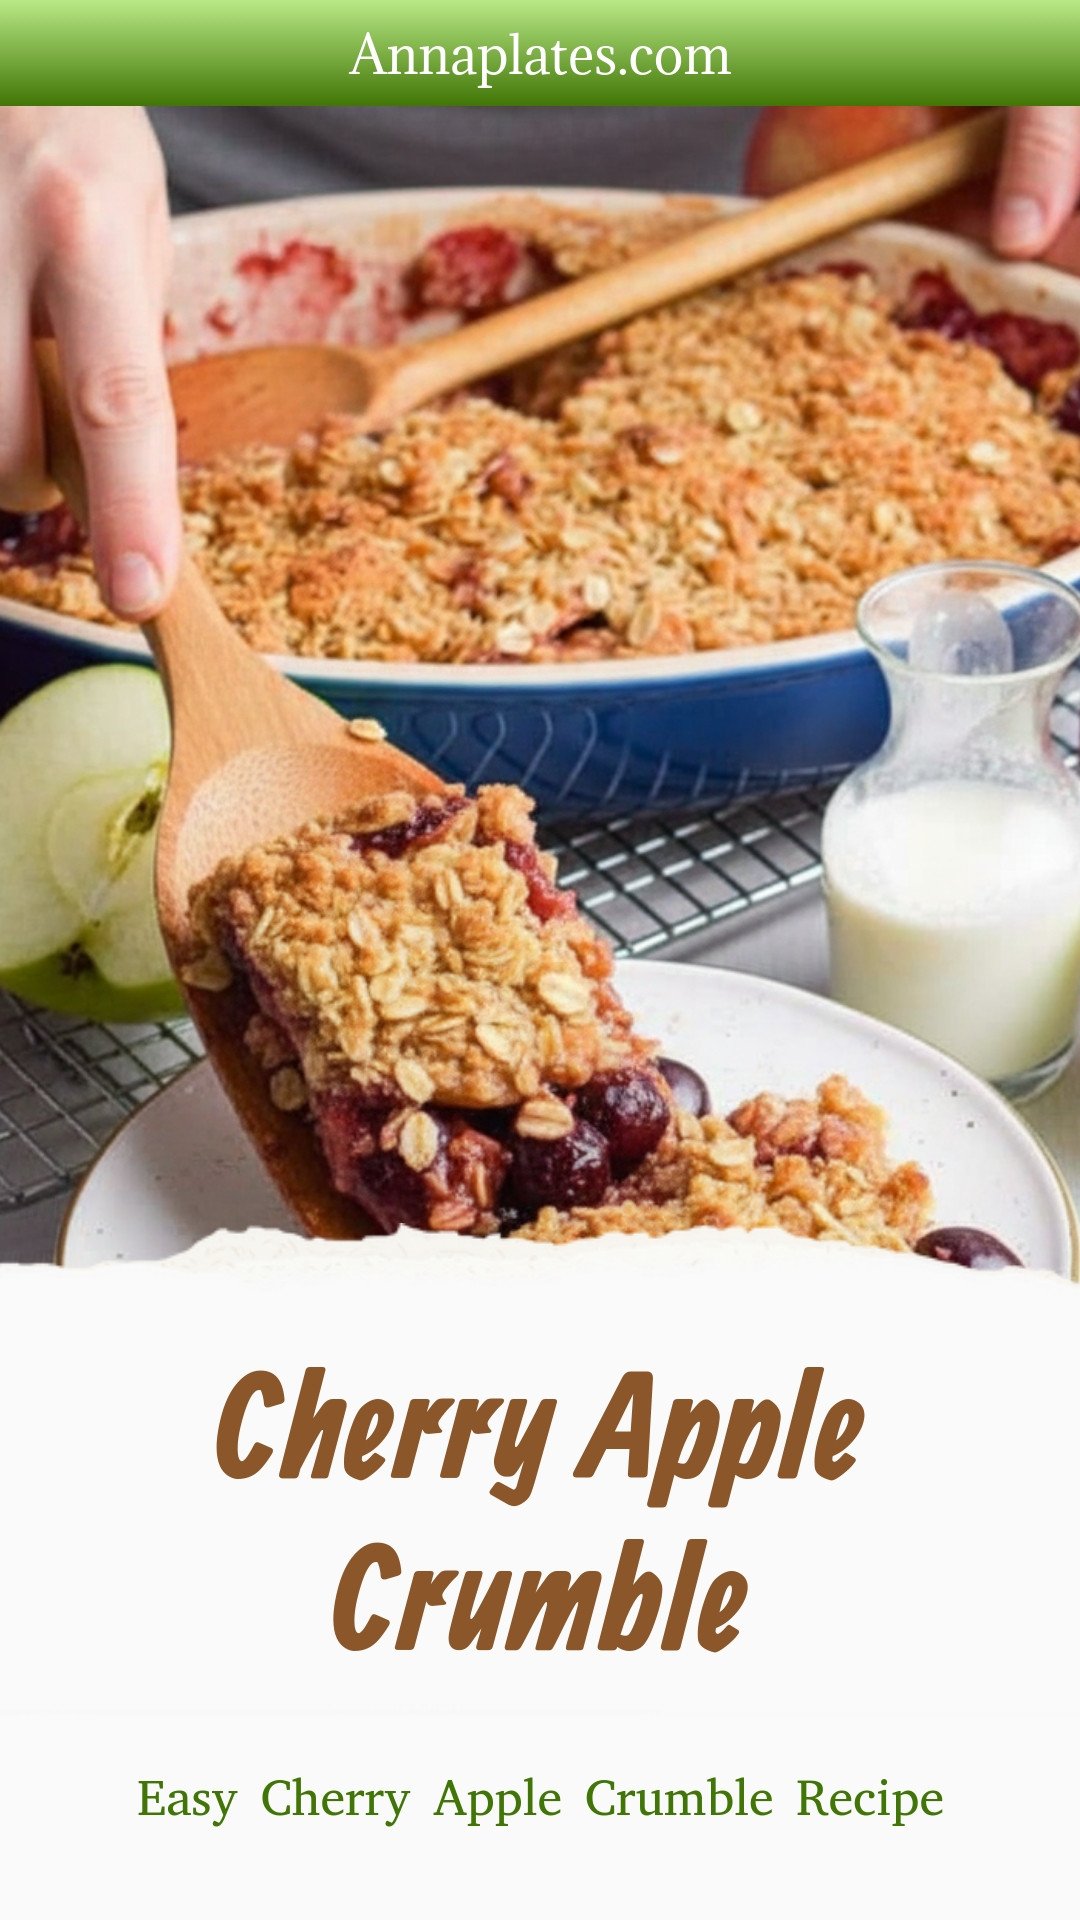
My Easy Cherry Apple Crumble
Hello, my dear. Come sit at the table. Let’s bake something cozy. This crumble is like a warm hug in a dish. I love the smell of apples and cherries together. It reminds me of my own grandma’s kitchen. She always said fruit desserts were the best. I think she was right.
This recipe is so simple. You don’t need any fancy tools. Just your hands and two bowls. We’ll make a sweet, juicy filling first. Then we’ll make the crunchy topping. The secret is using your fingers to mix the butter in. Doesn’t that sound fun?
Step 1: First, turn your oven on to 375 degrees. Let it get warm and ready. Now, peel and slice your apples. You can cut them into little cubes if you like. I still laugh at that. My grandson calls them “apple blocks.” Put them in a big bowl.
Step 2: Add your pitted cherries to the apples. Use fresh or frozen ones. Squeeze that half lemon over everything. The juice keeps the fruit bright. Now add the sugar, cinnamon, nutmeg, flour, and salt. Mix it all gently. Let it sit for five minutes. You’ll see lovely juices start to form.
Step 3: Time for the crumble topping! Get another bowl. Put in the oats, both sugars, flour, cinnamon, and salt. Stir it with a fork. Now add the softened butter. (A hard-learned tip: Your butter must be soft! If it’s cold, the topping won’t clump right.) Use your clean hands to pinch it all together. Keep going until it looks like wet sand.
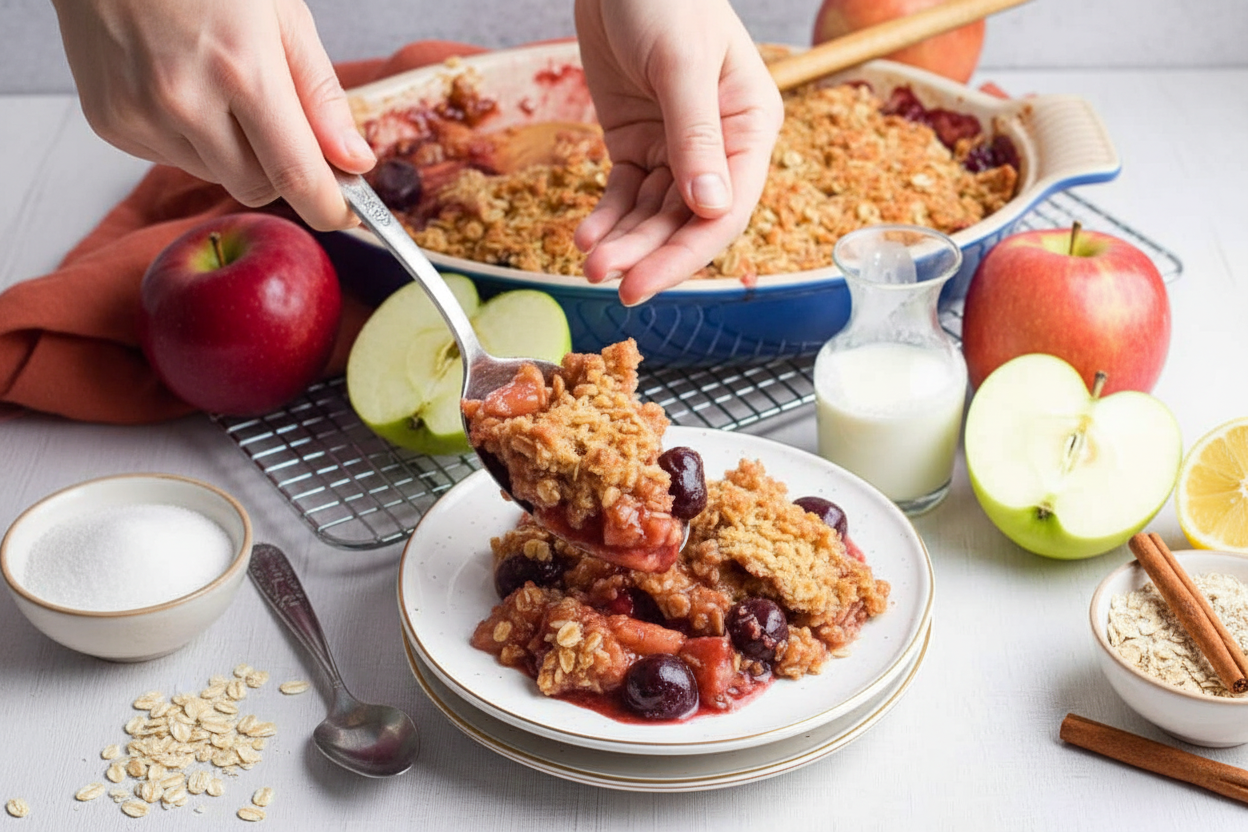
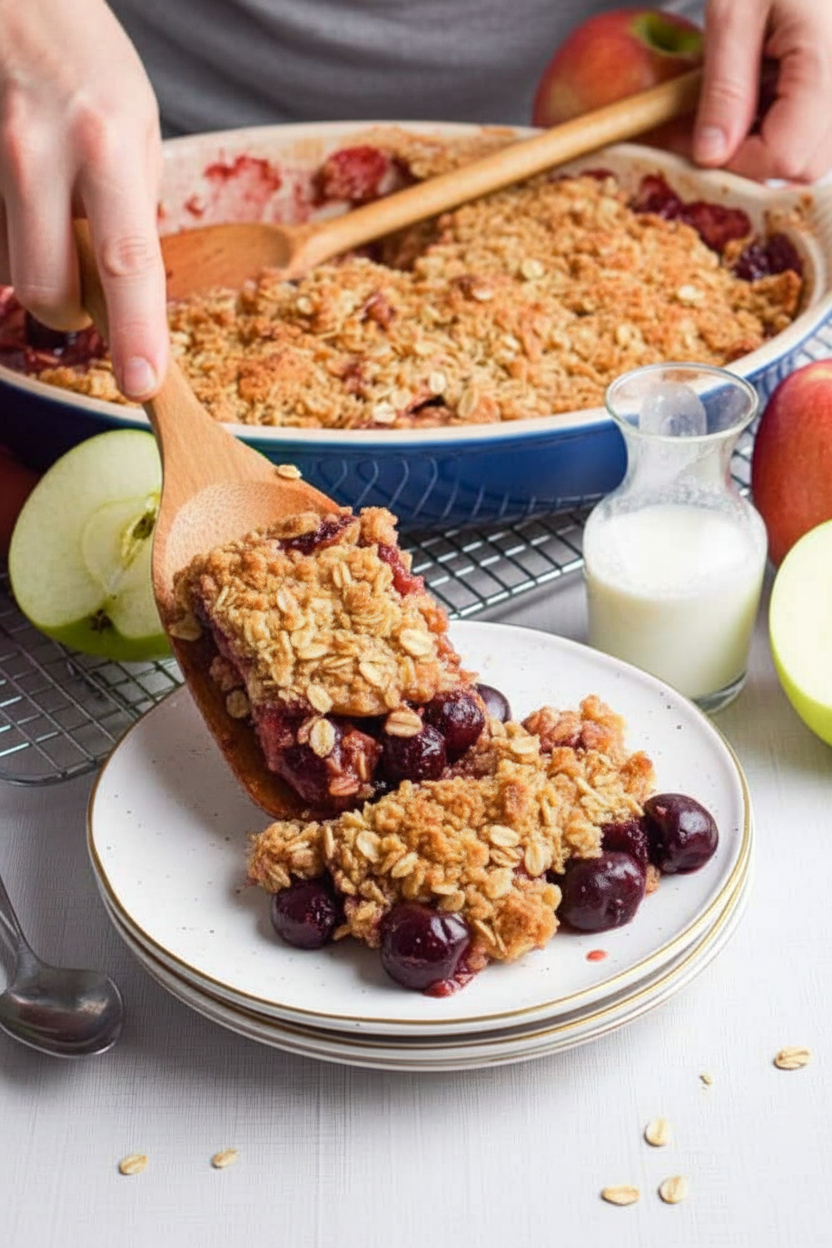
Step 4: Pour your fruity mix into a baking dish. Spread it out evenly. Now, take handfuls of the crumble topping. Sprinkle it all over the fruit like a cozy blanket. Try to cover every spot. This is my favorite part. It feels like you’re tucking the fruit in for a nap.
Step 5: Bake it for about 40 minutes. Your kitchen will smell amazing. It’s done when the fruit is bubbly and the top is golden. Let it rest for ten minutes. This keeps it from being too runny. Do you like your crumble with ice cream or custard? Share below! Now, here are the details.
Cook Time: 40 minutes
Total Time: 1 hour
Yield: 6 servings
Category: Dessert
Three Fun Twists to Try
Once you master the basic recipe, you can play. I love adding little changes. It makes the crumble feel new again. Here are three of my favorite twists. They are all so simple.
Berry Blast: Swap the cherries for mixed berries. Blueberries and raspberries are wonderful. Their tartness is so good with the sweet apples.
Nutty Crunch: Add a handful of chopped almonds to the crumble topping. They get so toasty in the oven. It adds a lovely little crunch.
Ginger Snap: Add a teaspoon of ground ginger to the fruit. It gives a warm, spicy kick. My friend Margaret taught me that one.
Which one would you try first? Comment below!
Serving It Up Just Right
This crumble is perfect straight from the dish. But a little extra love makes it special. I always serve it warm. That’s when it tastes the very best. Here are a few ideas for you.
Top it with a big scoop of vanilla ice cream. Watch it melt into the crumble. You could also use whipped cream or thick yogurt. A drizzle of cold custard is my personal favorite. It’s pure comfort.
For a drink, a cold glass of milk is classic. It cuts the sweetness just right. For the grown-ups, a small glass of sweet dessert wine pairs beautifully. It tastes like autumn in a glass. Which would you choose tonight?
Keeping Your Crumble Cozy
Let’s talk about keeping your crumble for later. It stores beautifully. Once cooled, cover it tightly. It will be happy in the fridge for three days.
You can freeze it too. Wrap the whole dish well. Or freeze individual portions. I once froze a whole crumble for my grandson’s visit. Heating it up made the kitchen smell like love all over again.
To reheat, use your oven. Warm it at 350 degrees until bubbly. This keeps the topping crisp. A microwave will make it soft. Batch cooking matters for busy families. A ready-made dessert brings everyone together easily. Have you ever tried storing it this way? Share below!
Simple Fixes for Common Crumble Troubles
Sometimes our bakes need a little help. First, a soggy topping. This often means your butter was too melted. Use softened butter, not liquid. I remember when my first crumble topping sank. It taught me to be patient with the butter.
Second, fruit that’s too watery. Let your filling rest. Those five minutes are key. The flour mixes with the juices. This creates a lovely thick sauce. Getting the texture right matters. It means every bite is perfect.
Third, a bland flavor. Do not skip the lemon juice or salt. They make the fruit flavors sing. Balancing sweet and tart matters. It turns simple fruit into something special. Which of these problems have you run into before?
Your Crumble Questions, Answered
Q: Can I make this gluten-free? A: Yes! Use your favorite gluten-free flour blend. It works just fine.
Q: Can I make it ahead? A: Absolutely. Assemble it and refrigerate. Bake it just before dinner.
Q: What fruit can I swap? A: Try peaches or berries. Use what you have. *Fun fact: Early crumbles were called ‘crisps’ in World War II Britain.*
Q: Can I double the recipe? A: You can. Use a bigger baking dish. Just watch the baking time.
Q: Any optional tips? A: Add chopped nuts to the topping. It gives a nice crunch. Which tip will you try first?
From My Kitchen to Yours
I hope you love this recipe. It is a hug in a baking dish. Share it with someone you care about. I would love to see your creation.
Your version might inspire another reader. Please share your photos with our community. Have you tried this recipe? Tag us on Pinterest! I always look for your posts. Thank you for baking with me today.
Happy cooking!
—Anna Whitmore.
Easy Cherry Apple Crumble Recipe
Description
This easy Cherry Apple Crumble is the perfect cozy dessert. Warm, sweet, and topped with a buttery oat crumble. Simple recipe!
Ingredients
For the Cherry Apple Filling
For the Crumble Topping
Instructions
- Preheat the oven to 375 degrees F.
- In a mixing bowl add all fruit filling ingredients and mix to combine.
- Set aside and rest for at least 5 minutes to allow the juices to release.
- In another mixing bowl combine all crumble ingredients except the butter. Mix well.
- Add in softened butter and use your hands to press or pinch the butter into the flour mixture until it is well incorporated and forms a crumbly texture.
- Pour the fruit mixture into a prepared dish. Then sprinkle the crumble mixture evenly over the top.
- Bake at 375 degrees F for about 40 minutes until the fruit is bubbly and the topping is a crisp golden brown.
- Remove from the oven and allow to rest for 10 minutes before serving.
- Serve with a drizzle of custard, whipped cream, ice cream, yogurt or simply on its own. Enjoy!
Notes
- For added flavor, top with spicy Sriracha mayo, mango salsa, or use marinated tofu for a vegetarian option.


Leave a Reply