

The Magic of Milk and Honey
Let’s start with the milk and honey. It feels like a hug in a bowl. The warmth wakes up the yeast. That’s the tiny creature that makes our rolls rise.
Watch it get foamy after five minutes. It’s alive! I still laugh at that. This step matters. It proves your yeast is happy and ready to work for you.
Getting Your Hands in the Dough
Now we add flour, egg, and butter. The dough will be sticky at first. That’s okay. Just keep mixing. It will come together into a soft ball.
Kneading for five minutes is important. It builds strength. This gives the rolls their lovely, soft texture. Do you like to knead by hand or with a mixer? I love the quiet feel of doing it myself.
The Patient Rise
Cover the dough and walk away. Let it rest in a warm spot. This is when the magic happens. The dough will grow to twice its size.
My kitchen window in the sun is my favorite spot. This waiting matters. It develops flavor and makes the rolls light. Fun fact: the yeast eats the sugars and makes little bubbles of air! That’s what makes it puff up.
Shaping with Love
Punch the dough down. It’s fun! Then divide it into sixteen pieces. Roll each piece between your palms. Make a nice, smooth circle.
Place them close in your baking dish. They will rise and become neighbors. They’ll bake up soft on all sides. What’s your favorite shape for a dinner roll? I tried making little knots once. It was a funny mess!
The Best Part: Butter
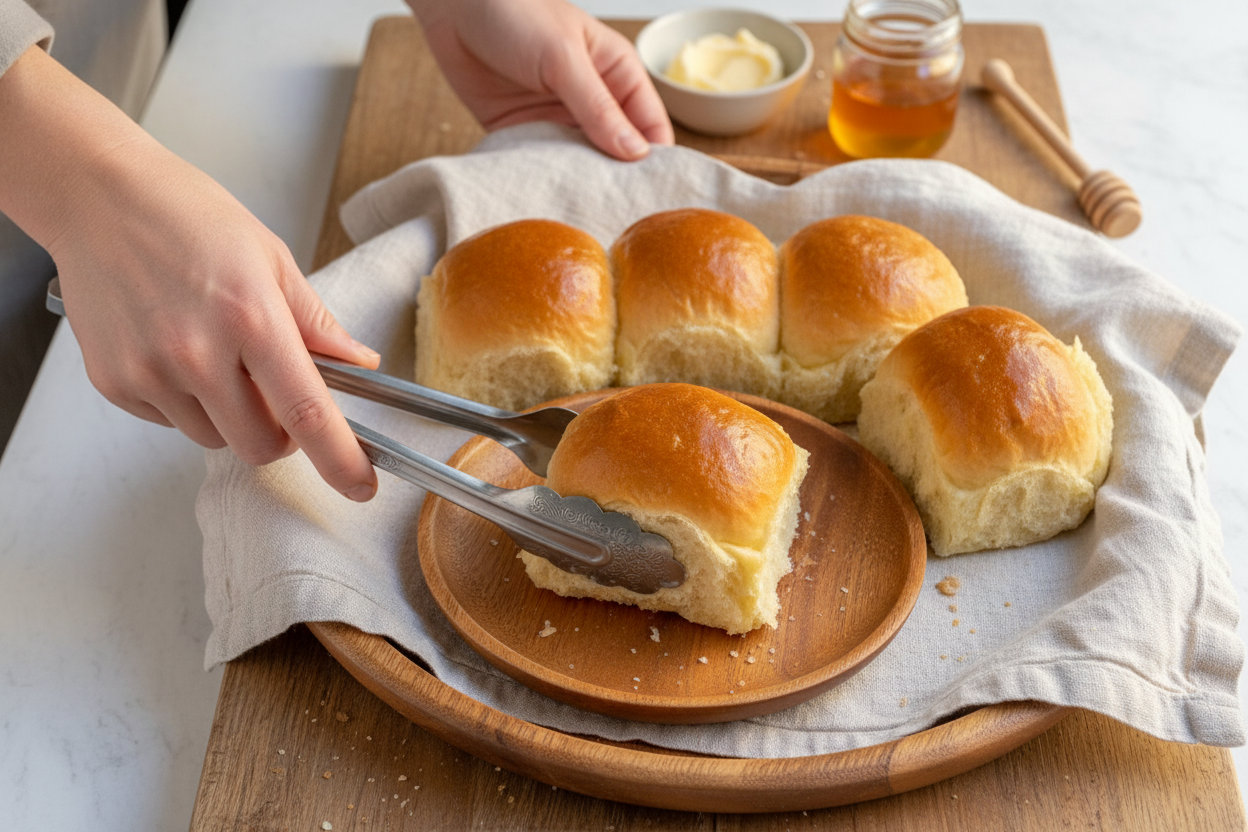
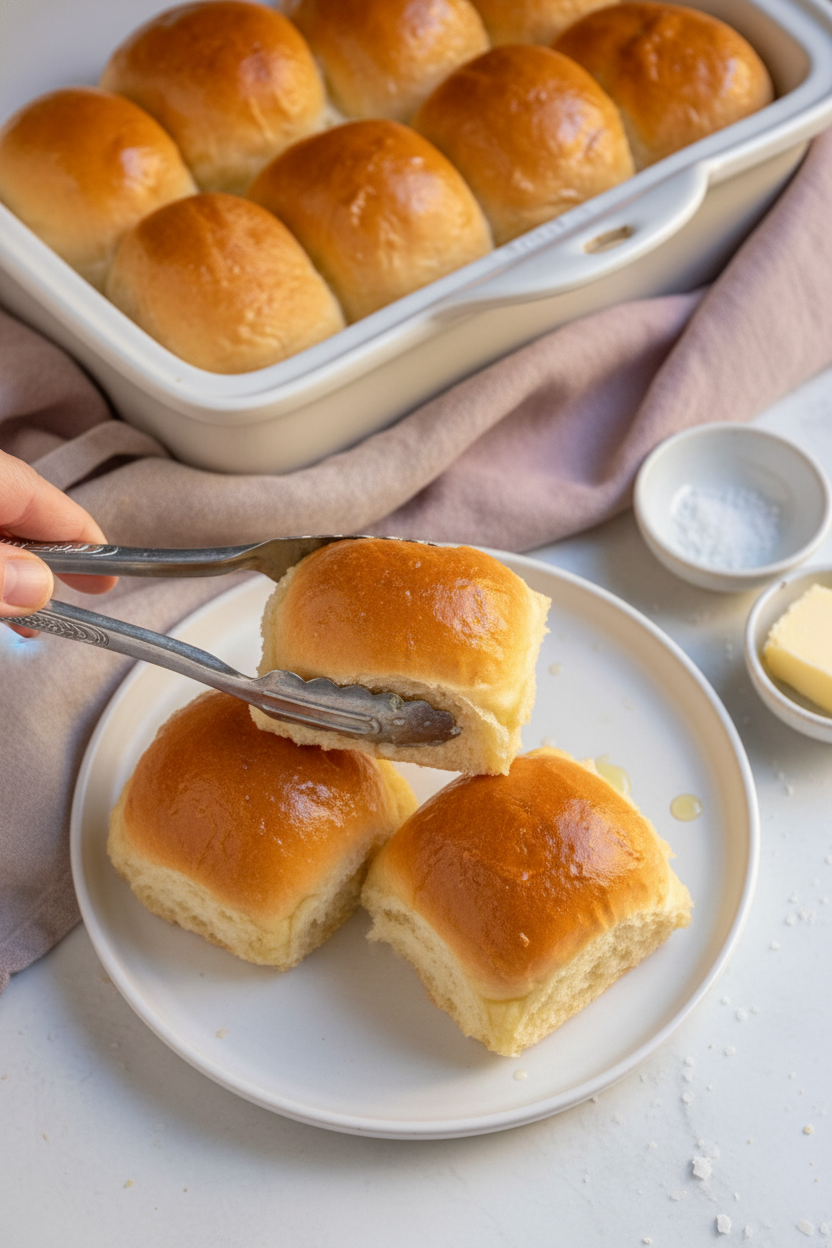
Bake until they are golden brown. Doesn’t that smell amazing? Now for the secret. Take cold butter right from the wrapper.
Rub it all over the hot rolls. It melts into a shiny, delicious glaze. This final touch matters. It gives the tops a wonderful flavor and a soft finish. Will you try this butter trick? Tell me if you love it as much as I do.
Ingredients:
| Ingredient | Amount | Notes |
|---|---|---|
| warm whole milk | 1 ¼ cup | about 100º F or warm to the touch |
| honey | 2 teaspoons | |
| active dry yeast | 2 ¼ teaspoons | 1 Fleischmann’s packet |
| all-purpose flour | 3 cups | plus more for dusting |
| large egg | 1 | |
| unsalted butter, melted | 3 tablespoons | + 1-2 tablespoons cold butter to finish the rolls |
| kosher salt | 1 teaspoon |
My Softest Homemade Dinner Rolls
Hello, dear. Come sit. Let’s make my favorite dinner rolls. They are soft as a cloud. I learned this recipe from my own grandma. The kitchen always smelled so good. I still laugh at that. She would shoo us away from the hot pan. We just couldn’t wait.
Making bread is like a little magic show. You mix simple things. Then you wait. The dough gets big and puffy! Doesn’t that smell amazing? It’s the yeast waking up. It always feels special. Here is how we do it, step by step.
- Step 1: Warm your milk. It should feel like a bath, not hot. Stir in the honey. Sprinkle the yeast on top. Let it sit for five minutes. It will get foamy. This means your yeast is happy and alive.
- Step 2: Add two cups of flour to the bowl. Mix it on low. It will look shaggy and sticky. That is perfect. My grandson calls it “glue dough.” It always makes me smile. Just scrape the sides down.
- Step 3: Crack in the egg. Start mixing slow. Then go a bit faster. Now add the melted butter. Do the same thing. The dough will become smooth again. It feels silky.
- Step 4: Add the last cup of flour slowly. Use a quarter cup each time. Now let the mixer knead for five minutes. The dough should be soft and stretchy. (A hard-learned tip: if it sticks to your finger, add one more tablespoon of flour.)
- Step 5: Finally, add the salt. Mix for just thirty more seconds. Put the dough in a greased bowl. Cover it with a towel. Let it rest until it doubles. This takes about an hour in my kitchen. What’s your favorite smell in a kitchen? Share below!
- Step 6: Punch the dough down. It’s fun! Flour your board lightly. Divide the dough into sixteen pieces. Roll each into a ball with your palms. Place them in a greased dish. Let them rise again until puffy.
- Step 7: Bake at 350°F for about twenty minutes. They will turn golden brown. Now, the best part. Take cold butter. Rub it all over the hot rolls. It melts right in. This makes the tops so soft. I could eat one right now.
Cook Time: 21–22 minutes
Total Time: About 2 hours 30 minutes
Yield: 16 rolls
Category: Bread, Side Dish
Three Fun Twists to Try
Once you know the basic roll, you can play. Here are my favorite little changes. They are all so good.
- Garlic & Herb Butter: Mix minced garlic and parsley into your finishing butter. It’s so savory.
- Cinnamon Sugar Swirl: Roll the dough flat. Brush with butter, sprinkle cinnamon sugar. Roll up and slice before the second rise.
- Everything Bagel Topping: Brush rolls with egg wash before baking. Sprinkle with everything bagel seasoning. So crunchy!
Which one would you try first? Comment below!
Serving Them Up Right
These rolls love company. Tear them open at the table. Let the steam out. Serve them with a big pot of soup. Or next to a Sunday roast. You can also use them for mini sandwiches the next day. They are perfect.
For drinks, I have two ideas. A cold glass of milk is classic. It just feels right. For the grown-ups, a pale ale beer pairs nicely. It cuts through the butter. Which would you choose tonight?
Keeping Your Rolls Soft and Fresh
Fresh rolls are best the day you bake them. But they freeze beautifully for later. Let them cool completely first. Then wrap each roll tightly in plastic wrap. Pop them all into a big freezer bag. They will keep for three months.
To reheat, just wrap a frozen roll in foil. Warm it in a 300°F oven for 15 minutes. I once tried microwaving a roll. It turned tough and chewy. The oven method keeps them soft and warm.
Batch cooking these rolls saves so much time. You can have fresh bread any night. This matters because good food should be easy. A warm roll can turn a simple soup into a feast. Have you ever tried storing rolls this way? Share below!
Simple Fixes for Common Roll Troubles
Is your dough not rising? Your milk might be too hot. It should feel warm on your wrist, not hot. I remember killing yeast with water that was too hot. The rolls were like little rocks. Be patient and check the temperature.
Are your rolls dense and heavy? You might have added too much flour. The dough should be a little sticky. This matters because soft dough makes soft rolls. Adding flour slowly gives you more control.
Do they look pale? Brush them with butter before baking. That gives them a lovely golden color. A beautiful bake makes you feel proud. That confidence makes cooking more fun. Which of these problems have you run into before?
Your Quick Bread Questions Answered
Q: Can I make these gluten-free? A: Yes. Use a good 1-to-1 gluten-free flour blend. The texture will be a little different but still good.
Q: Can I make the dough ahead? A: Absolutely. After the first rise, shape the rolls. Cover the pan and put it in the fridge overnight.
Q: What if I don’t have honey? A: A teaspoon of white sugar works just fine. It just feeds the yeast.
Q: Can I double the recipe? A: You can. Just make sure your mixer bowl is big enough. Or mix it by hand in a large bowl.
Q: Any optional tips? A: Try adding a pinch of garlic powder to the melted butter. Fun fact: The cold butter finish is my favorite trick. It makes the tops wonderfully soft. Which tip will you try first?
From My Kitchen to Yours
I hope you love making these rolls. There is nothing like homemade bread. The smell fills your whole house with love. It is a simple joy we can all share.
I would love to see your beautiful bakes. Share a picture of your golden rolls with me. Have you tried this recipe? Tag us on Pinterest @AnnaWhitmoreKitchen! Your stories and photos make my day. Thank you for cooking with me.
Happy cooking!
—Anna Whitmore.
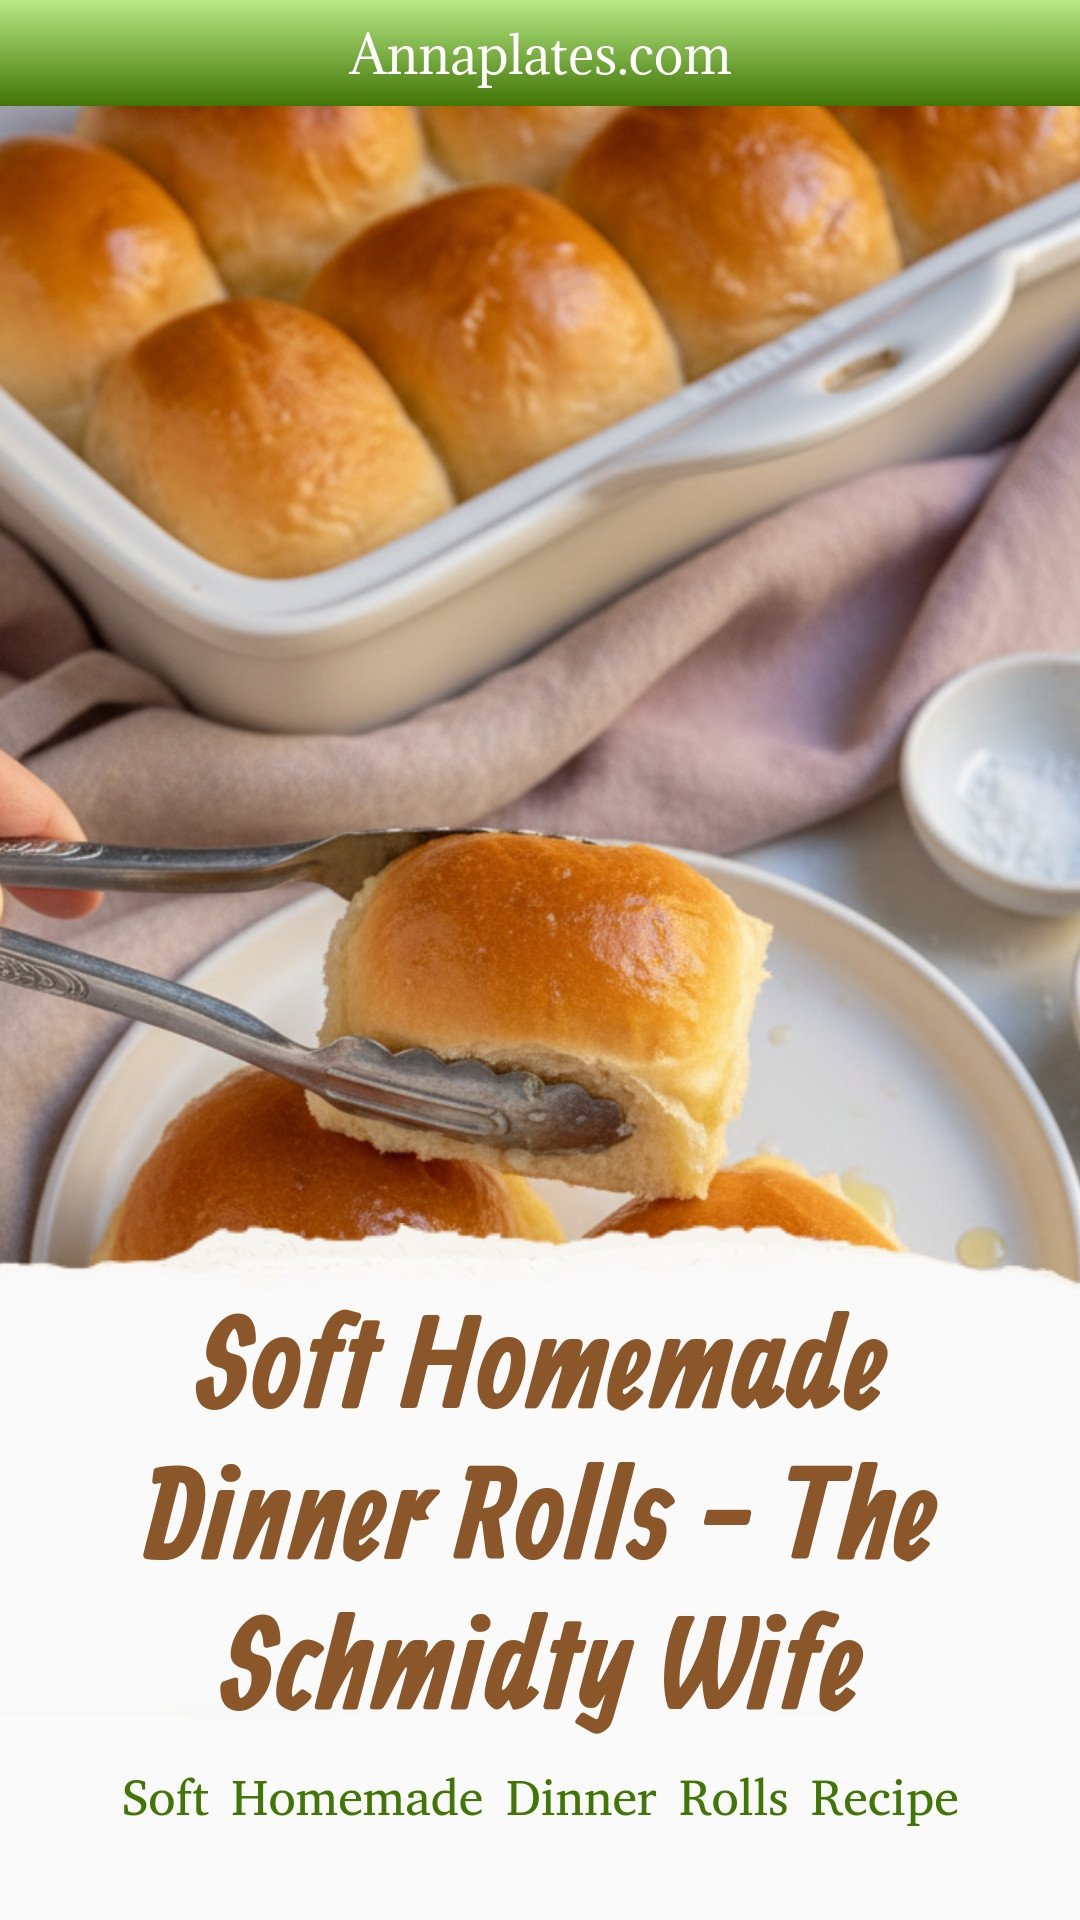
Soft Homemade Dinner Rolls – The Schmidty Wife: Soft Homemade Dinner Rolls Recipe
Description
Fluffy, soft homemade dinner rolls recipe. Easy step-by-step instructions for perfect, buttery pull-apart rolls every time. A family favorite side dish!
Ingredients
Instructions
- In the bowl of a stand mixer add the milk and honey, stir together to combine. Dust the top of the mixture with the yeast. Let rest for about 5 minutes.
- Add 2 cups of the flour to the bowl. Mix on low to medium until a dough forms, scraping down the sides of the bowl if needed. The dough should be sticky at this point but still holding its shape.
- Add the egg to the bowl and mix in starting on low and moving to medium as it blends in.
- Add the butter and mix in on low and moving to medium as it blends in.
- Once the dough is smooth again. Add the remaining 1 cup of flour about 1/4 cup at a time. Knead for 5 minutes on medium until smooth.
- Add in the salt. Knead on medium for about 30 more seconds.
- Transfer the dough to a greased bowl and cover. Let rest 30 to 60 minutes until it has doubled. (Mine in a warm kitchen usually is ready in about 35 minutes, this time will depend on the environment of your kitchen.)
- Transfer the dough to a lightly floured cutting board. Divide into 16 equal sizes.
- Grease a 9×16 baking dish. Roll each piece of dough between your palms to get a circle. Transfer to the baking dish.
- Let rise 45-60 minutes until they have doubled in size.
- Preheat the oven to 350° F. Bake about 21-22 minutes until golden brown. Finish rolls with cold butter once they are out of the oven by simple peeling off the end of a butter wrapper and spreading the cold butter all over the top of the hot rolls, melting the butter over the top.
Notes
- Nutrition Information per roll: Calories: 142, Total Fat: 5g, Saturated Fat: 3g, Trans Fat: 0g, Unsaturated Fat: 2g, Cholesterol: 23mg, Sodium: 113mg, Carbohydrates: 21g, Fiber: 1g, Sugar: 2g, Protein: 4g.


Leave a Reply