
My First Air Fryer Bacon
I was so nervous the first time. I thought the bacon would fly around! But it didn’t. I just laid the strips side by side. A little overlap is fine. It cooked up so quietly. I still laugh at that.
Why this matters: Starting simple builds kitchen confidence. You learn by doing, not by worrying. Now, tell me, what was your first air fryer experiment? Was it a surprise success?
The Simple Method
Place six strips in the basket. One layer is key. No piling. Set the temperature to 400 degrees. Set the timer for 8 minutes. Then walk away. Isn’t that easy?
Halfway through, peek inside. Doesn’t that smell amazing? The bacon might have shifted. Just nudge it with tongs. This keeps it cooking evenly. Close the basket and let it finish.
Getting It Just Right
When the timer beeps, look at your bacon. Do you like it chewy or crisp? Think about where it’s going. A salad loves softer bacon. A sandwich needs a good crunch.
Add 1-2 more minutes if needed. Check after each minute. Why this matters: You are in charge. Your perfect bacon is not my perfect bacon. And that’s how it should be.
A Little Extra Flavor
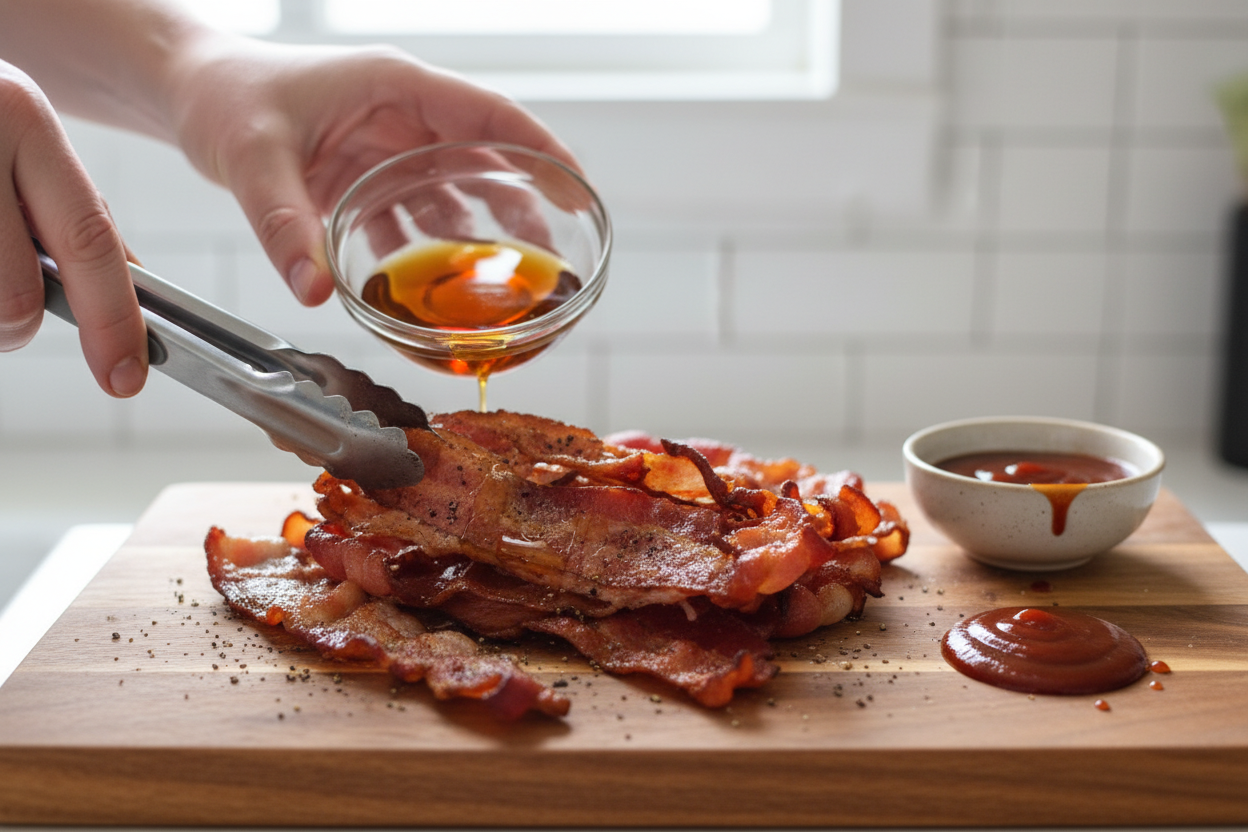
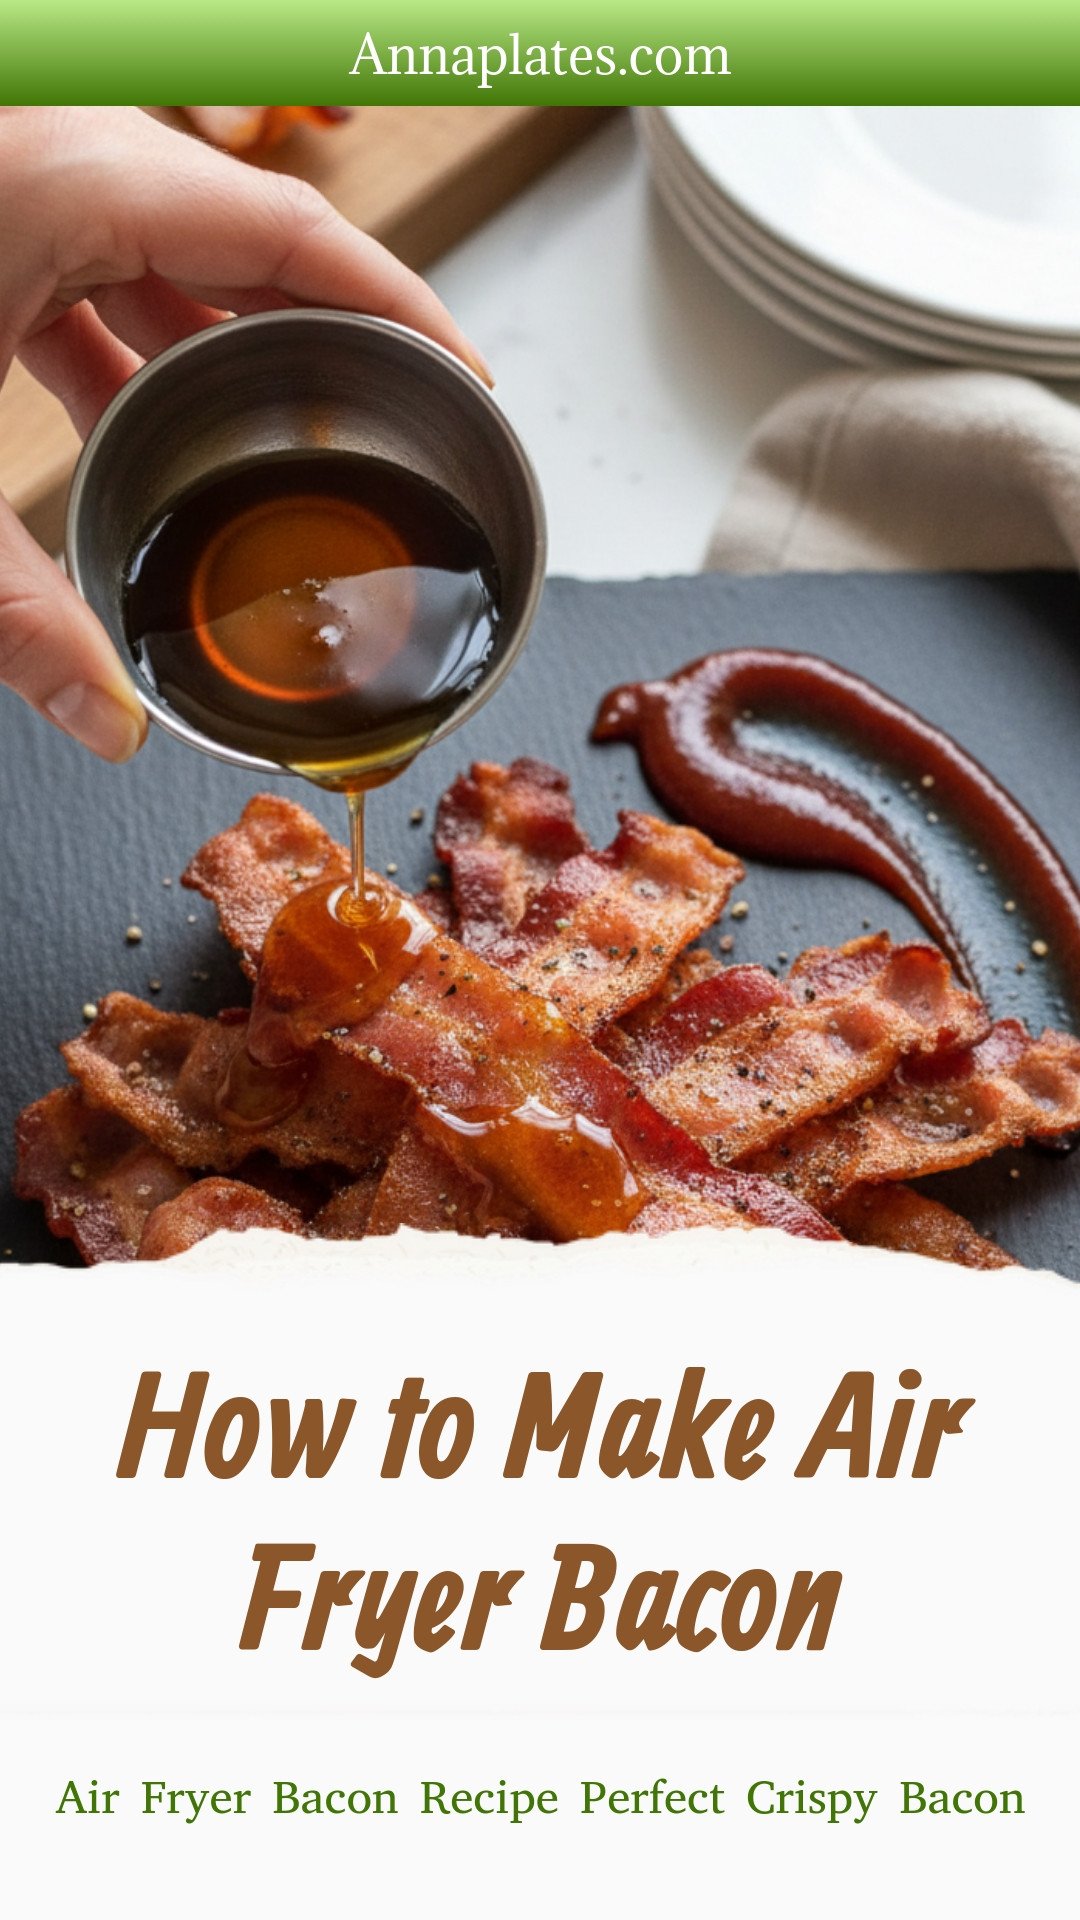
Plain bacon is wonderful. But a tiny sprinkle of black pepper is nice. My grandson loves a tiny brush of maple syrup before cooking. It gets sticky and sweet.
Fun fact: The air fryer’s hot air cooks the bacon and makes the fat drip away. That’s why it can feel a bit lighter. Do you have a favorite seasoning for bacon? I’d love new ideas.
Why I Love This Way
My stove stays clean. No greasy splatters on my apron. The air fryer basket is easy to wash. The bacon cooks evenly, every single time. It feels like a little magic trick.
I make it for quick sandwiches. I crumble it on soups. It’s a small joy. So, will you try it this way? Let me know how your family likes it.

Ingredients:
| Ingredient | Amount | Notes |
|---|---|---|
| Bacon | 6 strips | |
| Black pepper | 1 pinch | Optional; other seasonings like syrup or BBQ sauce can be used. |
The Easiest, Crispiest Air Fryer Bacon You’ll Ever Make
Hello, my dear! It’s Anna. Let’s talk about bacon. That wonderful, sizzling smell on a Saturday morning. I used to dread the splatter on my stovetop. What a mess to clean! Then my grandson showed me his air fryer. I was skeptical, I admit. But this method is a true game-changer. The bacon gets perfectly crispy every single time. And my kitchen stays spotless. Isn’t that a wonderful thing?
Now, some folks say you must not let the bacon slices touch. I found that isn’t quite true. You just need a single layer. A little overlap is just fine. My first batch, I was so nervous I spaced them an inch apart. I still laugh at that. We’re making bacon, not building a museum display! Just lay them in side-by-side. You’ll see.
- Step 1: Take your bacon from the fridge. Place six slices in your air fryer basket. Lay them side-by-side in one layer. A tiny bit of overlap is perfectly okay. (My hard-learned tip: Don’t pile it on top of itself. That leads to steaming, not crisping!).
- Step 2: Set your air fryer to 400 degrees. Set the timer for 8 minutes. Close it and let it work its magic. That gives you time to set the table. Doesn’t that smell amazing already?
- Step 3: At about 4 minutes, open the basket. Check on your bacon. The air might have moved a slice. Just nudge it back with tongs. This peek helps you see how it’s crisping up. Do you like your bacon chewy or super crisp? Share below!
- Step 4: When the timer beeps, look at your bacon. Need it crispier? Add 1-2 more minutes. Remember what you’re using it for. Salad bacon can be softer. Sandwich bacon should snap a little. Keep cooking in short bursts until it’s just right for you.
- Step 5: Carefully remove the bacon. I use my tongs again. Place it on a plate with a paper towel. Let it cool for just a minute. Then it’s ready to serve and enjoy. So simple, right?
Cook Time: 8–12 minutes
Total Time: 10–15 minutes
Yield: 3 servings
Category: Breakfast, Basics
Three Fun Twists on Your Bacon
Once you master the basic, try playing with flavors. It’s such an easy way to feel fancy. Here are three of my favorite simple twists. They make an ordinary breakfast feel special.
- Maple Pepper Glaze: Brush bacon with a tiny bit of maple syrup. Then sprinkle with fresh black pepper. Sweet, smoky, and spicy all at once.
- Brown Sugar Crisp: Press a little brown sugar onto each slice before cooking. It creates a delicious, caramelized crust. The kids love this one.
- Smoky BBQ Rub: A light dusting of your favorite BBQ seasoning works wonders. It tastes like a summer cookout, any day of the week.
Which one would you try first? Comment below!
Serving Your Perfect Bacon
Of course, bacon is wonderful all on its own. But I love building a plate around it. For a classic breakfast, serve it with fluffy scrambled eggs and buttered toast. Crumble it over a big green salad for a tasty lunch. Or, layer it in a BLT sandwich with the ripest tomato you can find.
What to drink? For a cozy morning, a glass of cold orange juice is my go-to. It cuts through the richness. In the evening, a crisp cider pairs beautifully with the salty, smoky flavors. Which would you choose tonight?

Storing Your Crispy Bacon Treasure
Let’s talk about keeping your bacon perfect. First, let it cool on a paper towel. This soaks up extra grease. Then, pop it in a sealed container in the fridge. It will stay good for about four days.
You can freeze it too. I layer the strips between parchment paper. This stops them from sticking together. I remember my first time freezing bacon. I just tossed it in a bag. What a sticky, messy block I had to deal with later!
To reheat, use your air fryer again. Two minutes at 370 degrees brings back the crisp. This matters because good food shouldn’t go to waste. Batch cooking saves you time on busy mornings. Have you ever tried storing it this way? Share below!
Fixing Little Bacon Troubles
Sometimes cooking has small hiccups. Do not worry. Here are easy fixes. First, if your bacon is too chewy, it needs more time. Just cook it in one-minute bursts. Check it after each minute.
Second, if it smokes a lot, there is too much fat. I once had a smoky kitchen. Now I always add a little water to the drawer below the basket. This stops the grease from smoking. It makes cleanup easier too.
Third, if pieces curl up, just press them down. Use your tongs when you check halfway. Fixing these small issues builds your cooking confidence. It also ensures every bite is just right. Which of these problems have you run into before?
Your Bacon Questions, Answered
Q: Is this recipe gluten-free? A: Yes, plain bacon is naturally gluten-free. Always check your seasoning labels.
Q: Can I make it ahead? A: Absolutely. Cook, store, and reheat as I described above. It works great.
Q: What can I use instead of black pepper? A: A tiny brush of maple syrup is lovely. A sprinkle of brown sugar works too.
Q: Can I cook more than six slices? A: You can, but cook in single layers. Do not overcrowd the basket. Cook in batches.
Q: Any optional tips? A: Save that leftover bacon fat. Let it cool. Then strain it into a jar. You can cook eggs in it later for amazing flavor. *Fun fact: That saved fat is called “liquid gold” by many cooks.* Which tip will you try first?
From My Kitchen to Yours
I hope you love this easy method. It changed my weekend breakfasts. Now my kitchen stays much cleaner. I would love to see your crispy results.
Share a photo of your perfect bacon plate. You can tag my blog on Pinterest. Let’s build a little community of air fryer fans. Have you tried this recipe? Tag us on Pinterest!
Happy cooking!
—Anna Whitmore.
How to Make Air Fryer Bacon: Air Fryer Bacon Recipe Perfect Crispy Bacon
Description
Crispy, perfect bacon with less mess! Learn the easy air fryer method for quick results every time.
Ingredients
Instructions
- Place 6 slices bacon in your air fryer basket. I have heard for best results, don’t let the bacon touch, but that was NOT my experience at all. You just don’t want to pile it all in. I simply lay each piece side by side in a single layer with a tiny bit overlapping. (see photo above) It worked perfectly.
- Set your air fryer at 400 degrees and set the timer to 8 minutes.
- At about the halfway mark, I opened the basket to be sure everything looked stellar. It did and so I popped it back in. If bacon has moved or adjusted from the air, use tongs and readjust.
- Continue cooking. When the timer goes off, check the bacon. If you’d like it a little crispier, cook an additional 2 minutes and check again. Keep in mind what you are using it for. If if it is going in a salad, you might not want it too crisp, if you’re putting it on a sandwich, maybe a bit crispier is your desire.
- Do this in 1-2 minute increments until you have it cooked the way you like it.
- Remove the bacon and serve.


Leave a Reply