

The Joy of No-Bake Treats
Hello, my dear. Come sit at the table. Let’s talk about treats. I love baking, but some days, I just don’t want to turn on the oven. That’s the beauty of these bites. They come together with just a bowl and a spoon.
You mix, you shape, you create. It feels like playing with edible clay. I still laugh at the time my grandson made a pumpkin with ten ridges. He said it was a pumpkin from Mars. Why does this matter? Because cooking should be fun, not fussy. It’s about the memories you make with your hands.
A Little Story About Color
Getting that perfect pumpkin orange is my favorite part. You start with melted butter. It looks so plain. Then you add a drop of red and a drop of yellow. You stir and, like magic, it becomes orange. Doesn’t that smell amazing? It’s buttery and sweet.
My tip? Add the color slowly. You can always add more. But you can’t take it away. Fun fact: Long ago, people thought carrots were purple or white! Orange carrots came later. What’s your favorite color to make with food coloring? I’d love to know.
The Magic of Peanut Butter Dough
Now, you add the peanut butter and sugar. Keep mixing. Your arm might get a little tired. That’s how you know it’s working. The dough gets stiff and holds together. This is important. If it’s too soft, your pumpkins will slump.
Why does this matter? Feeling the dough change teaches you patience. Good things take a little muscle. Have you ever made a no-bake dough like this before? It’s so satisfying when it finally comes together.
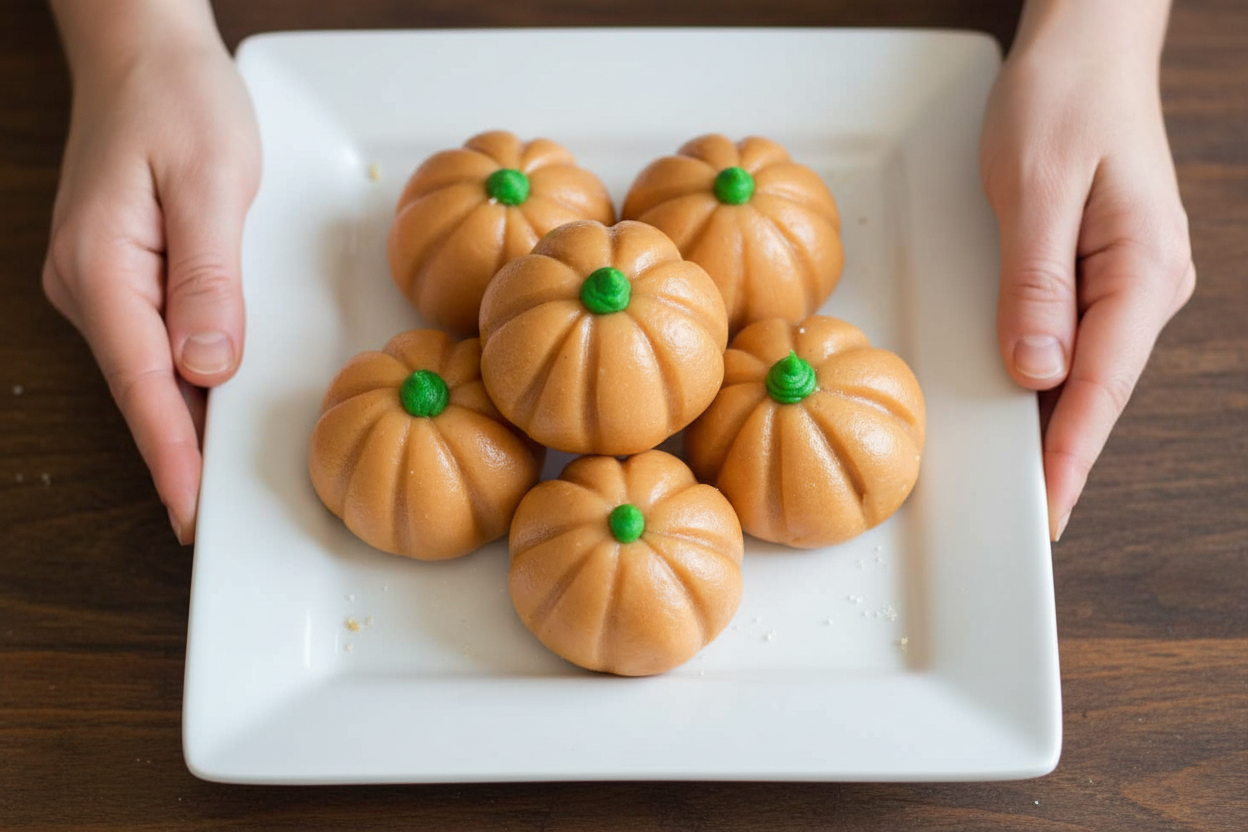
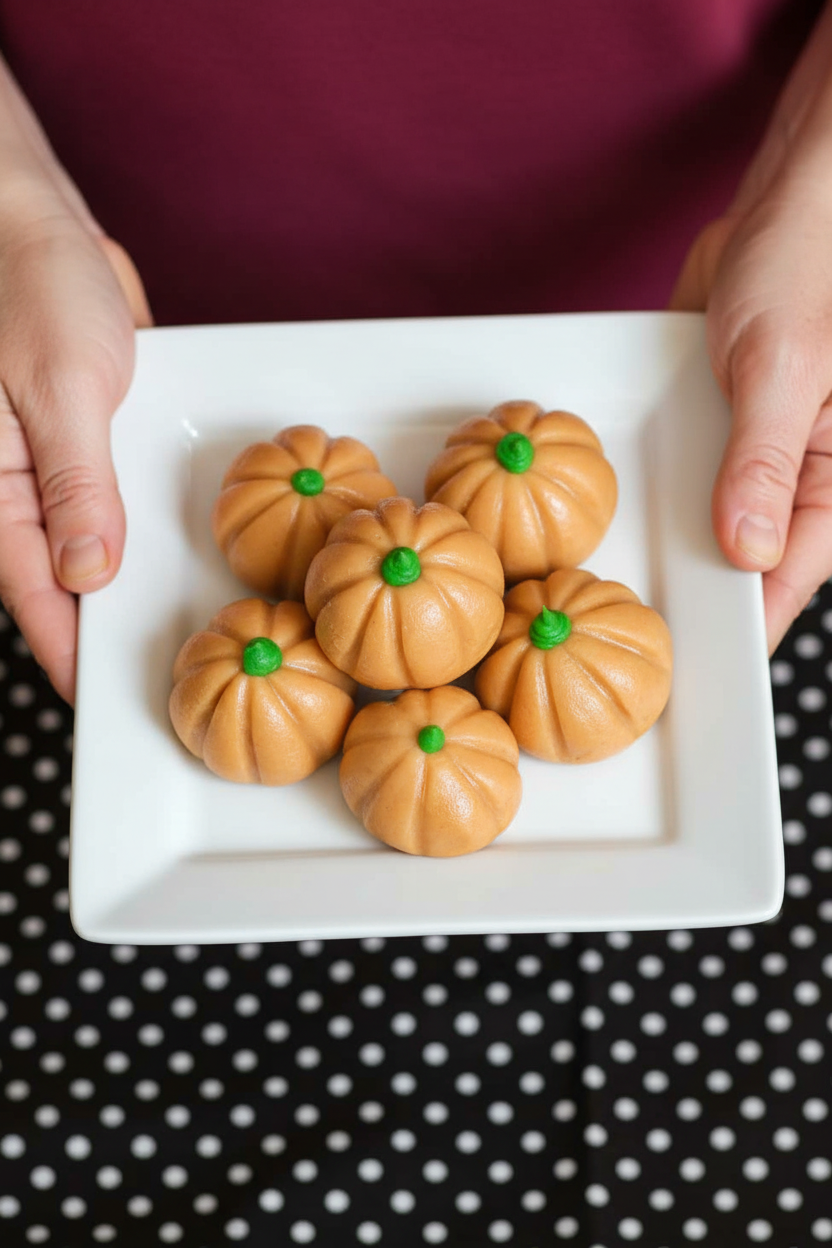
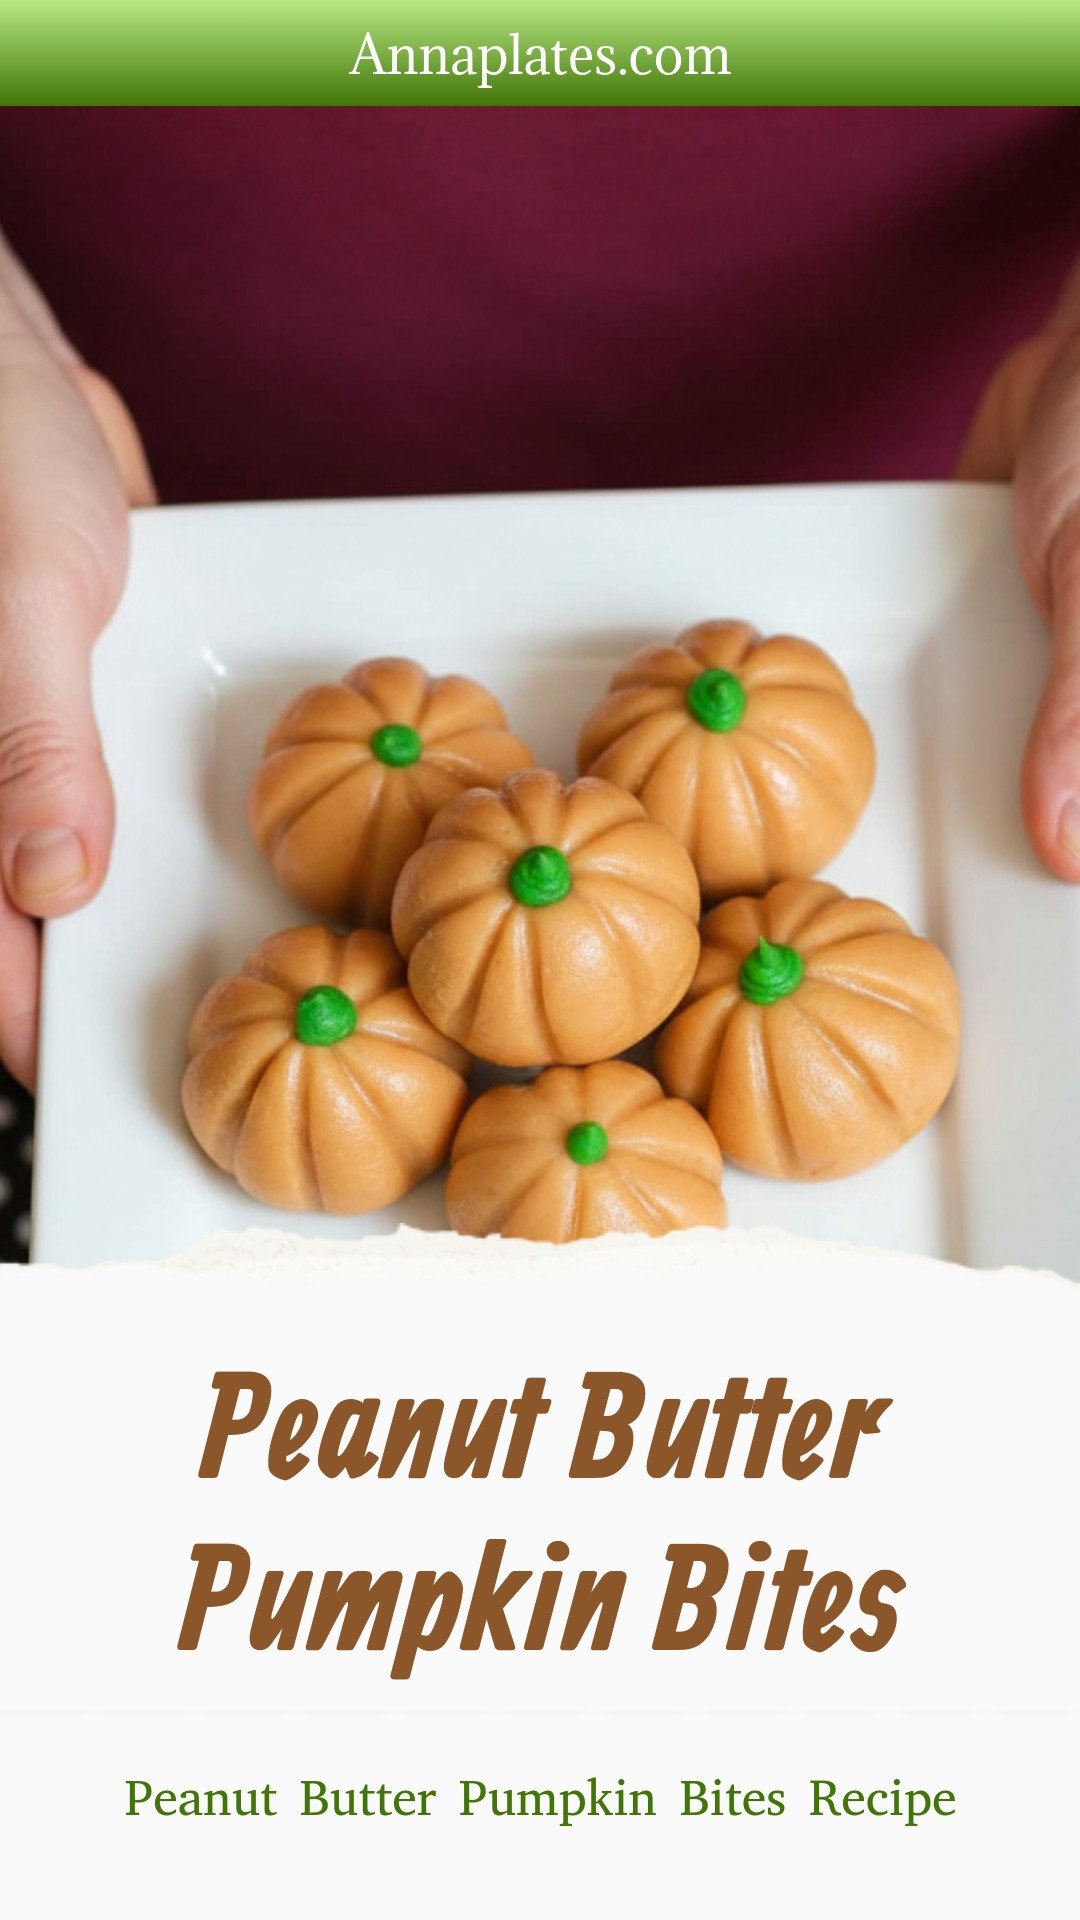
Shaping Your Mini Pumpkins
Take small pieces of dough. Roll them into balls. Now, the fun part. Use a clean toothpick. Gently press lines into the ball to make ridges. Don’t press too hard. You just want to give it shape.
Every pumpkin will be unique. Some plump, some tall. That’s their charm. Finally, a tiny dot of green icing for the stem. It brings them to life. Placing that stem always makes me smile.
Serving With Love
You can eat them right away. But I like to let them chill for a bit. They firm up nicely. I serve them on a plate with toasted coconut. It looks like autumn leaves on the ground.
They also look wonderful perched on a cupcake. It makes a simple dessert feel special. What would you serve them with? A glass of cold milk is always my pick. Tell me your favorite way to serve treats.
Ingredients:
| Ingredient | Amount | Notes |
|---|---|---|
| Butter | ½ cup | |
| Peanut Butter | 1½ cups | |
| Powdered Sugar | 16 ounces | Sifted |
| Red Food Coloring | As needed | |
| Yellow Food Coloring | As needed | |
| Green Decorators Icing | For decoration |
My Little Peanut Butter Pumpkins
Hello, my dear! Come sit at the counter. I want to show you something fun. We are making peanut butter pumpkin bites. They are no-bake treats. My grandkids helped me name them. I still laugh at that.
These little pumpkins are sweet and simple. You just mix a few things together. Then you shape them with your hands. It feels like playing with clay. Doesn’t that smell amazing? It’s all peanut butter and sugar.
Let me tell you how we make them. Follow these steps with me. We will have a plate of pumpkins in no time. I’ll share a little story as we go. Ready?
Step 1: Melt your butter in a big bowl. Now, add your food coloring. Use red and yellow to make orange. Stir until it looks like a sunset. (A hard-learned tip: use a bowl you don’t love. Food coloring can stain!)
Step 2: Stir in the peanut butter. It will get all smooth. Now, slowly add the powdered sugar. Keep mixing until it forms a stiff dough. Your arm might get tired. My grandson always asks to take over here.
Step 3: Pinch off some dough. Roll it into a small ball. Not a perfect sphere, though. Gently press it to be a little pumpkin shape. Use a toothpick to draw lines from top to bottom. Make about five ridges. What other shapes could you make with this dough? Share below!
Step 4: Your pumpkins need stems. Take your green icing tube. Squeeze a tiny bit on top of each one. It looks like a fresh vine. Let them sit for a bit. They will firm up nicely.
Cook Time: 30 minutes
Total Time: 45 minutes
Yield: 25 pumpkin bites
Category: Dessert, Snack
Three Fun Twists to Try
You can change these up so easily. Here are my favorite ideas. They make the kitchen feel like a lab.
Chocolate Dip: Melt some chocolate chips. Dip the bottom of each pumpkin. Let it harden on wax paper. A chocolate patch for your pumpkin!
Crunchy Surprise: Mix crushed pretzels into the dough. It adds a salty crunch. The sweet and salty mix is wonderful.
Sunflower Pumpkins: Use sunflower seed butter instead. Perfect for friends with allergies. They will taste just as lovely.
Which one would you try first? Comment below!
Serving Them Up With Style
Presentation is part of the fun. I like to put these on a bed of toasted coconut. It looks like hay. You could also place them on cupcakes as toppers. Or line them up on a pretty orange plate.
What to drink? A cold glass of milk is always my pick. It’s classic. For the grown-ups, a sip of creamy bourbon goes well. It tastes like autumn in a glass.
So, you have your plate of pumpkins. You have your drink beside you. Which would you choose tonight? I think I’ll have the milk. It reminds me of after-school snacks long ago.
Keeping Your Pumpkin Bites Fresh
These little bites are best kept cool. Store them in a sealed container in the fridge. They will stay good for about a week. You can also freeze them for a month. Just lay them on a tray first until firm. Then pack them together in a container.
No reheating is needed. Just let them sit out for five minutes before eating. I love making a double batch for the freezer. It means I always have a sweet treat ready for visitors. My first time, I skipped the tray-freeze step. I ended up with one big peanut butter pumpkin lump!
Batch cooking like this saves you time later. It turns a treat into a handy gift or snack. Have you ever tried storing it this way? Share below!
Fixing Common Pumpkin Bite Problems
Is your dough too sticky? Just add a bit more powdered sugar. Mix it in slowly until the dough is stiff. I remember when my dough was like glue. A little extra sugar fixed it right up.
Are the colors not mixing well? Melt your butter first. Then add the food coloring to it. Mix it until the butter is fully orange. This makes the color even throughout every bite. Getting the color right first makes your food look more joyful.
Are your pumpkins losing their shape? Your dough might be too warm. Just pop the bowl in the fridge for fifteen minutes. Chilled dough is much easier to shape. This small step builds your confidence. You will feel like a real kitchen artist. Which of these problems have you run into before?
Your Quick Questions, Answered
Q: Are these gluten-free? A: Yes, they are. Just check your powdered sugar label to be sure.
Q: Can I make them ahead? A: Absolutely. Make them up to three days before you need them.
Q: What if I don’t have decorator icing? A: A tiny piece of green candy or a sliver of pistachio works fine.
Q: Can I double the recipe? A: You can. Use a very large bowl. Your arm might get a little tired mixing!
Q: Is the toasted coconut necessary? A: No, it’s just for looks. A simple plate works perfectly. *Fun fact: Toasting coconut brings out its natural sweetness.* Which tip will you try first?
From My Kitchen to Yours
I hope you have fun making these sweet pumpkins. Cooking is about sharing joy and making memories. I would love to see your creations. Show me your plate of orange pumpkin bites.
Have you tried this recipe? Tag us on Pinterest! Use our handle @AnnasCozyKitchen. Your photos always make my day. Thank you for spending time in the kitchen with me.
Happy cooking!
—Anna Whitmore.
Peanut Butter Pumpkin Bites: Peanut Butter Pumpkin Bites Recipe
Description
Easy no-bake dog treats! These healthy peanut butter pumpkin bites are perfect for training or a tasty snack. Quick, simple & made with 4 ingredients.
Ingredients
Instructions
- Melt butter in a large bowl and add a few drops of yellow and red food coloring, until mixture has a nice orange color.
- Add the peanut butter and confectioners sugar and mix together until a dough like consistency is reached. (This means that when the dough is nice and stiff and it gets hard to add any more sugar, to let it go at that).
- Shape dough into small balls shaped like pumpkins; make ridges on the pumpkins with a toothpick.
- Add a small amount of green decorators icing to the top of each pumpkin for a stem.
- Refrigerate, if desired, to allow pumpkins to firm.
- Serve on a plate lined with toasted coconut and Halloween decorated cookies, if desired; these also look good on top of cupcakes.
Notes
- Nutrition Facts (per serving, recipe makes 25 pumpkins): Calories: 125kcal, Carbohydrates: 22g, Protein: 4g, Fat: 12g, Saturated Fat: 4g, Polyunsaturated Fat: 2g, Monounsaturated Fat: 5g, Trans Fat: 0.1g, Cholesterol: 10mg, Sodium: 96mg, Potassium: 88mg, Fiber: 1g, Sugar: 2g, Vitamin A: 113IU, Calcium: 9mg, Iron: 0.3mg


Leave a Reply