

The Magic in Your Mixing Bowl
Hello, my dear. Come sit. Let’s make some clouds you can eat. I’m talking about homemade marshmallows. They are softer than a whisper. They melt on your tongue like sweet snow.
Store-bought ones are fine. But homemade? Oh, they are a different creature. They taste pure and light. Making them feels like a little kitchen miracle. I still laugh at the first time I saw them puff up. I thought my mixer was making magic!
A Sticky Story & A Sweet Lesson
My grandson once asked why we make food from scratch. It takes time. I told him a story. Long ago, marshmallows were made from a plant root. People cooked it with honey for sore throats. Isn’t that a funny start for a campfire treat?
Fun fact: The name “marshmallow” comes from the “mallow” plant that grows in marshes! Making them today teaches us patience. Good things need time to grow, just like people. That matters. It reminds us that simple ingredients can become something wonderful.
Your Sugar & Your Thermometer
The key is the hot sugar syrup. You must watch it like a baby bird. Use your candy thermometer. Wait for it to hit 240 degrees. This is the “soft ball” stage. It makes the marshmallows set just right.
Do not walk away. Stir often. It goes slow, then fast. I learned this the hard way. I burned a batch once. The smell was so sad. Trust me, stay with your pot. What’s the most patient thing you’ve ever made in the kitchen?
The Whisking Wonder
Now for the fun part. Pour the hot syrup into the gelatin. Start your mixer. Watch it turn thin and watery. Then, a miracle happens. It becomes a fluffy, white mountain. It grows and grows. Doesn’t that smell amazing? Like sweet vanilla clouds.
Beat it for a full 8 minutes. You want stiff peaks. This matters because the air you whip in is what makes them soft. No air means a dense, sad marshmallow. We are not making doorstops, my dear. We are making pillows!
Dusting, Cutting, and Tasting
Pour your fluff into the prepared pan. Smooth the top. Let it rest in the cold fridge for 6 hours. It needs a long nap. When it’s ready, dust everything with powdered sugar. This stops the stickiness.
Use a pizza cutter to slice them. It glides right through. Toss the cubes in more sugar. Shake off the extra. Then, you must try one. Close your eyes. Taste the difference. Do you prefer your marshmallows in cocoa, or all by themselves?
Sharing Your Fluffy Creations
Store them in a tin with a tight lid. They keep for weeks. But they never last that long in my house. I love to bag them up for friends. A homemade gift says “I thought of you.” It is a gift of your time and care.
That is the second reason this matters. Food connects us. It is a way to show love without big words. So, tell me, who will you share your first batch with? I would love to hear your stories.

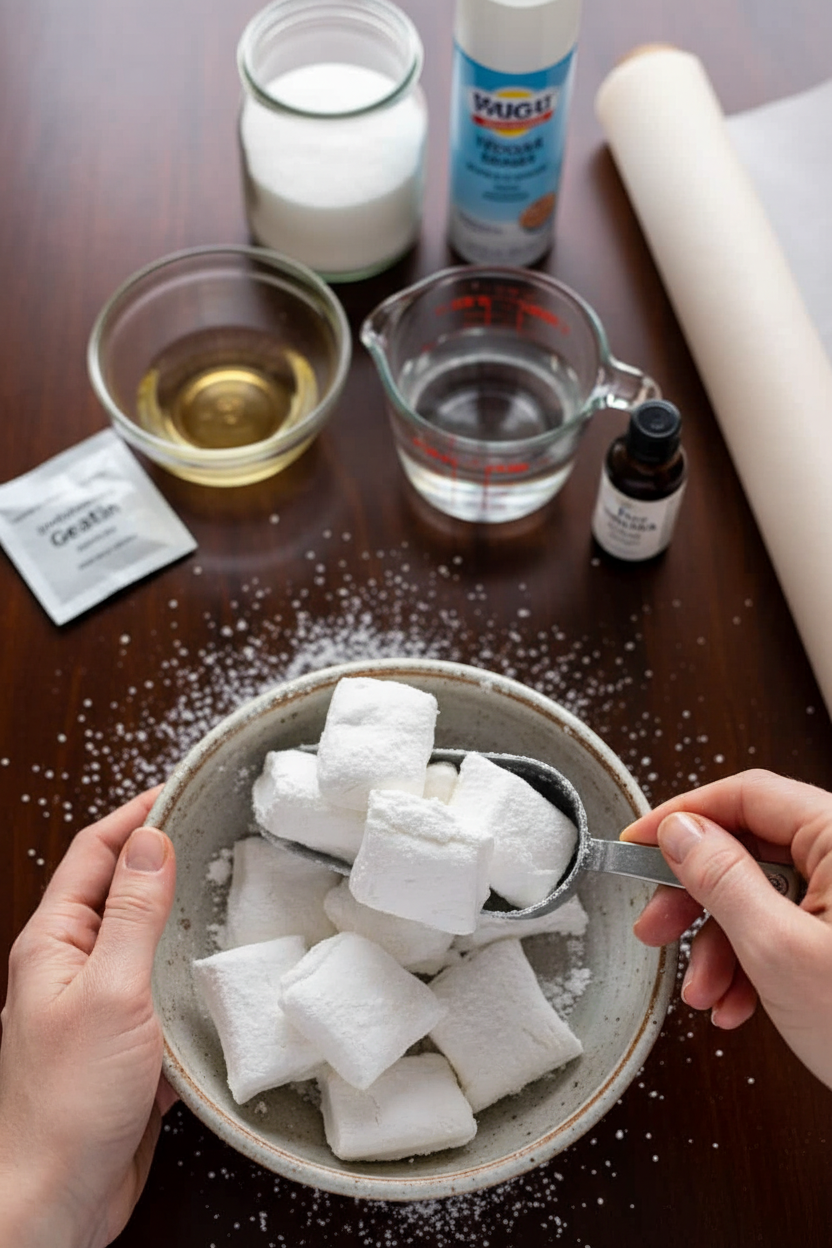
Ingredients:
| Ingredient | Amount | Notes |
|---|---|---|
| Unflavored gelatin powder (such as Knox) | 2 tablespoons | |
| Warm water | ½ cup | For blooming gelatin |
| Granulated sugar | 3 cups | |
| Water | 1 cup | For sugar syrup |
| Clear vanilla extract | 2 teaspoons | |
| Non-stick cooking spray | As needed | For pan |
| Parchment paper | As needed | For pan |
| Powdered confectioners sugar | As needed | For dusting |
Easy Homemade Marshmallows: A Fluffy Kitchen Adventure
Hello, my dear! Come sit. Let’s make something magical today. We are making marshmallows from scratch. I know, it sounds fancy. But it’s just sweet, fluffy fun. It reminds me of my grandson’s first camping trip. He said my marshmallows made the best s’mores. I still laugh at that.
You just need a few simple things. The trick is a candy thermometer. And a little patience. Doesn’t that smell amazing when it starts to cook? Here is how we do it, step-by-step.
- Step 1: First, get your pan ready. Line it with parchment paper. Give it a light spray. This keeps our fluffy cloud from sticking. Set it aside. Now, wake up the gelatin. Sprinkle it over warm water. Let it sit and get soft for ten minutes. It looks funny, but trust me.
- Step 2: Now, make the sugar syrup. Put sugar and water in a pot. Heat it on medium. Stir it now and then. You must watch it closely. (My hard-learned tip: Do not walk away to check your phone! The sugar can burn fast.) Let it reach 240 degrees on your thermometer.
- Step 3: Take the hot syrup off the heat. Let it cool for ten minutes. Whisk your gelatin bowl until it’s smooth. It will be a bit lumpy at first. That’s okay. Just keep whisking. Pour it into your mixer bowl. Add a tiny pinch of salt. This makes the sweet taste even better.
- Step 4: Turn your mixer on medium. Slowly add the warm sugar syrup. Pour in just a little bit at a time. Let it mix well between pours. Then add the vanilla. Now, let it beat for a full eight minutes. It will grow into a big, white, fluffy cloud. What does the mixture look like when it’s ready? Share below!
- Step 5: Pour your fluffy cloud into the prepared pan. Smooth the top with a spatula. Cover it with another piece of parchment. Now, the hard part. It needs to rest in the fridge for six hours. I know, waiting is tough! But it makes them perfect for cutting.
- Step 6: Time to cut! Sprinkle powdered sugar everywhere. Turn the marshmallow block out onto it. Peel off the paper. Dust the other side too. Use a pizza cutter to make squares. It glides right through. Toss all the pieces in more sugar. Shake off the extra. Then, enjoy your pillowy creation!
Cook Time: 20 minutes
Total Time: 6 hours 20 minutes
Yield: About 25 marshmallows
Category: Dessert, Candy
Three Fun Twists for Your Fluffy Clouds
Once you master the basic cloud, you can play! Here are my favorite simple twists. They make lovely gifts, too.
- Peppermint Sparkle: Use peppermint extract instead of vanilla. Mix in some crushed candy canes. It’s perfect for the holidays.
- Berry Pink: Add a drop of pink food coloring with the vanilla. You could use a tiny bit of strawberry powder too. So pretty!
- Chocolate Swirl: After pouring into the pan, drizzle melted chocolate on top. Swirl it with a knife. It looks so fancy.
Which one would you try first? Comment below!
Serving Your Sweet Creations
Of course, they are wonderful all on their own. But let’s think bigger. Plop one in a cup of rich hot chocolate. It’s the only way to drink it, I think. You can also toast them over a candle for a mini indoor s’more.
For drinks, I love them with a cup of dark roast coffee. The bitter coffee and sweet marshmallow are perfect friends. For a special treat, a creamy chocolate stout beer is wonderful. Which would you choose tonight?
Keeping Your Homemade Marshmallows Perfect
Homemade marshmallows keep beautifully. Store them in an airtight container. They will stay soft for about two weeks. You can also freeze them for a month. Just layer them between parchment paper in a freezer bag.
I once forgot a batch in the back of the pantry. They were still good three weeks later. A little less fluffy, but still sweet. This is why proper storage matters. It saves your hard work and lets you enjoy treats slowly.
You can make a big batch for gifts. Cut them into fun shapes with cookie cutters. Dust them well with powdered sugar. This stops them from sticking together. Have you ever tried storing marshmallows this way? Share below!
Common Marshmallow Troubles and Easy Fixes
First, the mixture might not get fluffy. This happens if the sugar syrup is not hot enough. Always use a candy thermometer. It must reach 240 degrees. This matters because the right temperature makes the magic happen.
Second, the marshmallows can be too sticky. I remember my first batch stuck to everything. The fix is simple. Always dust your pan, hands, and cutter with powdered sugar. It acts like a little cloud of non-stick magic.
Third, they might not set firmly. Just be patient. Let them chill in the fridge for the full six hours. Rushing leads to a gooey mess. This patience builds your cooking confidence. Which of these problems have you run into before?
Your Marshmallow Questions, Answered
Q: Are these marshmallows gluten-free? A: Yes, they are. The main ingredients are naturally gluten-free.
Q: Can I make them ahead? A: Absolutely. Make them up to two weeks before you need them.
Q: What can I use instead of vanilla? A: Try a different extract. Mint or almond are lovely swaps.
Q: Can I double the recipe? A: I don’t recommend it. The mixer bowl can get too full. Make separate batches.
Q: Any fun optional tip? A: Add a drop of food coloring when you add the vanilla. Fun fact: The first marshmallows were made from a plant root! Which tip will you try first?
Wrapping Up From My Kitchen
I hope you love making these fluffy treats. It is such a fun kitchen project. Seeing that glossy, white fluff form is pure joy. I would love to see your creations.
Share a picture of your marshmallow squares. Or show them toasted over a cozy fire. Have you tried this recipe? Tag us on Pinterest! Your stories make my day. Thank you for cooking with me.
Happy cooking!
—Anna Whitmore.
Easy Homemade Marshmallows: Easy Homemade Marshmallows Recipe
Description
Fluffy, sweet, and surprisingly simple to make! Learn how to create perfect homemade marshmallows with this easy step-by-step recipe.
Ingredients
Instructions
- Completely line a 9×13 pan with parchment paper. Lightly spray with non-stick cooking spray.
- In a small bowl with 1/2 cup of warm water inside, sprinkle the gelatin on top evenly and set aside for 10 minutes.
- Meanwhile, heat the sugar and 1 cup of water in a saucepan over medium heat. Whisk the mixture occasionally until combined.
- Allow the sugar mixture to reach 240 degrees F (check with a candy thermometer). Do not walk away and stir very often to prevent burning.
- Remove from heat and allow to cool for about 10 minutes.
- Whisk your gelatin bowl until combined and smooth.
- In the bowl of a mixer, pour the gelatin mixture and whisk on medium. Add a pinch of salt.
- Begin adding the sugar mixture a tiny bit at a time, allowing the mixture to whisk and combine in the stand mixer in between each addition.
- As soon as all the sugar mixture has been added, add the vanilla extract.
- Beat the entire mixture for about 8 minutes, until stiff peaks form. It will be smooth but not too runny and not too thick.
- Pour the mixture into your parchment lined pan, using a spatula to smooth it into an even layer. Cover the top of the pan with another piece of parchment paper.
- Place in the refrigerator for 6 hours.
- When ready to cut, prepare a cutting area by sprinkling it with powdered confectioners sugar. Turn the pan out onto the sprinkled powder. Peel the parchment paper off. Dust the other side.
- Oil up your cutting tool (a pizza cutter or knife). Using it, cut the marshmallows into strips and dust the freshly cut sides with powdered sugar.
- Then cut the strips into your desired size of marshmallows. Toss in powdered sugar and then shake them in a mesh strainer to remove excess.
- Store in an airtight container. Enjoy!
Notes
- Nutrition Facts (per marshmallow, recipe makes approximately 25): Calories: 95 kcal, Carbohydrates: 24 g, Protein: 0.5 g, Fat: 0.1 g, Sodium: 2 mg, Potassium: 1 mg, Sugar: 24 g, Calcium: 1 mg, Iron: 0.02 mg.


Leave a Reply