

My First No-Bake Pie
I remember my first no-bake pie. It was for my grandson’s birthday. I was so nervous it wouldn’t set. But it turned out perfectly. He still asks for it every year. I still laugh at that.
This pie is a wonderful first recipe for a young cook. You don’t even need an oven. It teaches you about layers and patience. That matters because cooking is about trying new things. What was the first dessert you ever helped make?
Let’s Talk About Layers
Making this pie is like building a tasty tower. First, you pour some plain pudding. This is your strong base. Then you mix pudding with whipped cream. This layer is fluffy and light.
Doesn’t that smell amazing? The chocolate is so rich. Fun fact: The graham cracker crust was invented because a baker ran out of flour. Building layers matters. It makes every bite more interesting. You get different textures and tastes.
The Best Part: The Topping
The final touch is my favorite. You get to be an artist. Spread the last bit of whipped cream like fluffy clouds. Then, take your chocolate bar.
Use a potato peeler to make little chocolate curls. They look so fancy. It feels like magic. Do you like big chocolate shavings or tiny ones on your desserts?
The Waiting Game
Now comes the hard part. You have to wait. Put the pie in the fridge for an hour. This chill time lets everything become friends. The crust gets softer. The layers firm up.
Waiting matters in baking and in life. Good things take a little time. It makes the first bite even sweeter. I always set a timer so I don’t peek too early.
A Pie for Sharing
This pie is best shared with people you love. It is sweet, simple, and made with joy. Cutting the first slice is always exciting. You see all your beautiful layers.
Food is about more than just eating. It is about the memories you make. It is about the smiles around the table. What is your favorite food to share with your family? I would love to know.
Ingredients:
| Ingredient | Amount | Notes |
|---|---|---|
| Instant chocolate pudding | 1 box (5.85 oz) | |
| Graham cracker pie crust | 1 (9-inch) | Pre-made |
| Whipped cream | 1 tub (8 oz) | |
| Hershey’s Chocolate Bar | 1 bar | Regular sized |
| 2% milk | As called for on box |
My No-Bake Chocolate Pudding Pie
This pie is my go-to treat for a hot summer day. You don’t even have to turn on the oven. The kitchen stays cool, and you get a delicious dessert. My grandkids think I’m a magician when I make this. I just smile and wink. It’s our little secret.
Here is how we make our magic pie. Just follow these simple steps. I promise it’s easy as, well, pie!
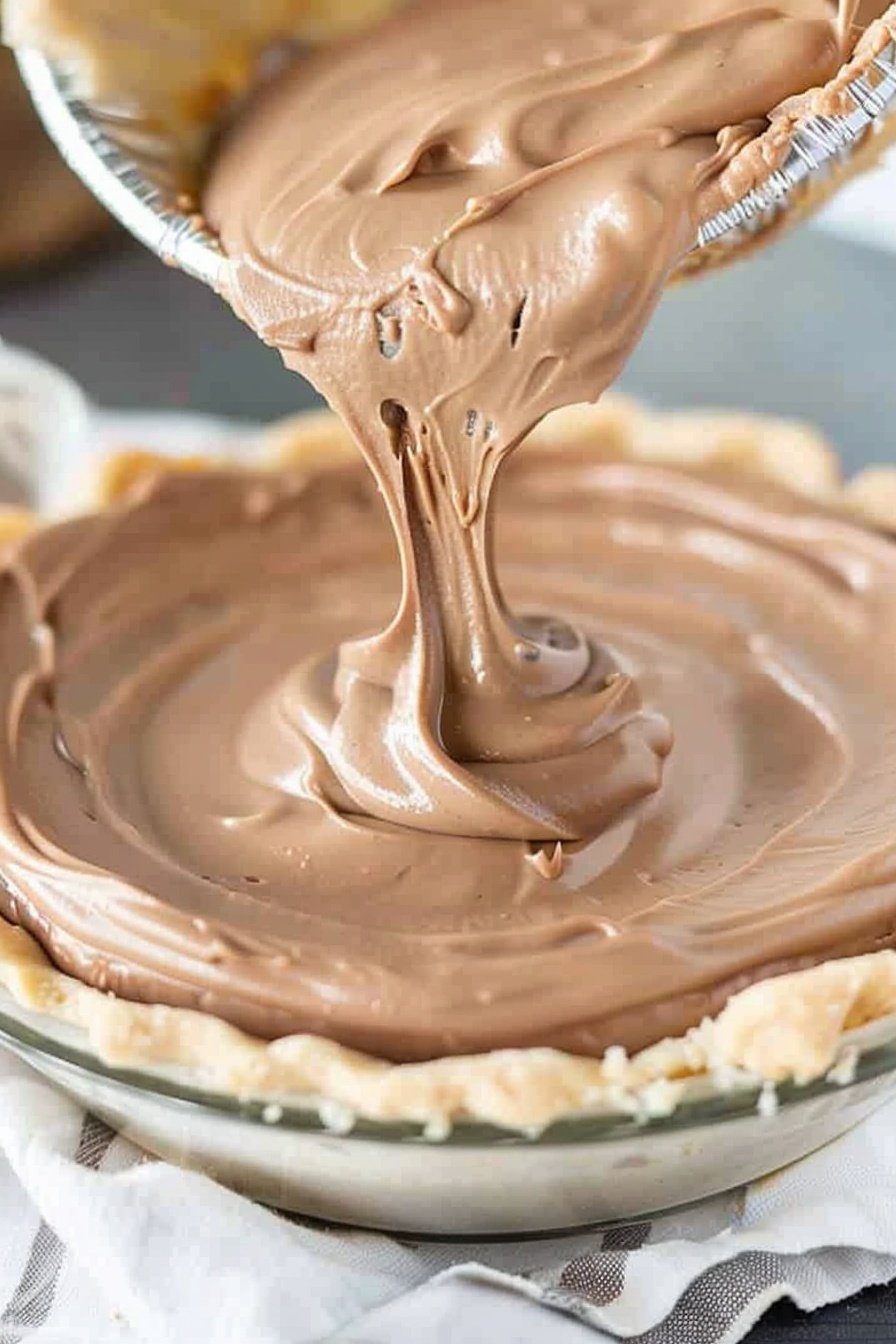
- Step 1: First, make the chocolate pudding. Just follow the directions on the box. It usually asks for some cold milk. Whisk it until it’s nice and thick. Doesn’t that smell amazing? I love that chocolaty scent.
- Step 2: Now, pour a little less than half of the pudding into the pie crust. Spread it around with a spoon. This is our first yummy layer. It reminds me of spreading mud pies as a kid. Only this one tastes much better!
- Step 3: Let’s make the creamy layer. Take the rest of the pudding and put it in a bowl. Mix in half of the tub of whipped cream. Stir it all together until it’s one color. (A hard-learned tip: mix gently so the whipped cream stays fluffy!).
- Step 4: Pour this creamy mixture on top of the first layer. Smooth it out nicely. Now, take half of the leftover whipped cream and spread it on top. This is our cloud layer. It makes the pie look so fancy.
- Step 5: For the final touch, take your chocolate bar. Use a potato peeler to shave off pretty chocolate curls. Just scrape it along the edge. Let the curls fall onto the whipped cream. It looks like little chocolate leaves. What’s your favorite part of decorating a dessert? Share below!
- Step 6: The hardest part is waiting. Pop the pie into the fridge for at least an hour. This lets everything set and get wonderfully cold. Then, slice it up and enjoy your creation. I still laugh at how fast it disappears in my house.
Cook Time: No cook time!
Total Time: 1 hour 15 minutes
Yield: 6 servings
Category: Dessert, No-Bake
Three Fun Twists to Try
This pie is like a blank canvas. You can dress it up in so many ways. Here are a few of my favorite ideas. They are all so simple and fun.
- Cookie Crunch: Mix some crushed Oreo cookies into the creamy middle layer. It adds a wonderful little crunch.
- Peanut Butter Swirl: Drop little spoonfuls of peanut butter on the first pudding layer. Then swirl it with a knife before adding the next layer.
- Summer Berry: Top your finished pie with fresh raspberries or sliced strawberries. The sweet fruit and chocolate are a perfect pair.
Which one would you try first? Comment below!
Serving Your Masterpiece
I love making a simple dessert feel special. For this pie, a little extra touch goes a long way. It makes everyone feel loved.
Serve each slice on a pretty plate. Add a few extra chocolate shavings on the side. A single mint leaf looks lovely, too. For a real treat, a scoop of vanilla bean ice cream is perfect right alongside it. The cold creaminess is just dreamy.
For drinks, a tall, frosty glass of milk is the classic choice. It just feels right. For the grown-ups, a little glass of coffee liqueur over ice is a nice match. It sips like a creamy, grown-up chocolate drink. Which would you choose tonight?

Keeping Your Chocolate Pie Perfect
This pie loves a cool fridge. Cover it with plastic wrap right on the pudding. This stops a weird skin from forming.
You can freeze slices for a sweet treat later. Wrap each piece tightly. Thaw it in the fridge for a few hours.
I once forgot a pie on the counter. The whipped cream went all weepy. Now my fridge is its best friend.
Making two pies is a great idea. It saves so much time for a busy week. A ready-made dessert makes any day better.
Have you ever tried storing it this way? Share below!
Easy Fixes for Pie Problems
Is your pudding too runny? Let it set in the fridge longer. A firm pudding makes for neat slices.
I remember when my layers mixed together. I was in a big hurry. Let each layer set for just five minutes.
Getting big chocolate shavings is tricky. Use a vegetable peeler on a cold bar. This makes pretty, delicate curls for the top.
Fixing small issues builds your kitchen confidence. You learn that mistakes are okay. A beautiful pie also tastes more special.
Which of these problems have you run into before?
Your Pie Questions Answered
Q: Can I make this gluten-free?
A: Yes! Just use a gluten-free graham cracker crust from the store.
Q: How far ahead can I make it?
A: You can make it a full day before. Keep it covered in the fridge.
Q: What can I use instead of whipped cream?
A: Cool Whip works just fine. It will still be delicious and creamy.
Q: Can I double the recipe?
A: Of course! Make two pies for a party. Everyone will be so happy.
Q: Any extra tips?
A: A little vanilla extract in the pudding is my secret. Fun fact: vanilla can make chocolate taste even richer!
Which tip will you try first?
From My Kitchen to Yours
I hope you love making this simple pie. It is a joy to share these recipes with you. Food is best when made with happy hands.
I would love to see your creation. Your family’s smiles are the best reward for a cook.
Have you tried this recipe? Tag us on Pinterest!
Happy cooking!
—Anna Whitmore.
No-Bake Chocolate Pudding Pie: Creamy, Cheesy Goodness
Description
This easy No-Bake Chocolate Pudding Pie is the ultimate dessert! A creamy, dreamy filling in a crunchy crust. Perfect for hot days and busy schedules.
Ingredients
Instructions
- Prepare your instant chocolate pudding per package directions (different brands require different amounts of milk).
- Pour a little less than half of your chocolate pudding into the bottom of your graham cracker pie crust.
- Mix the remaining pudding with ½ of the whipped cream and stir well.
- Add as the next layer of pie.
- Add ½ of the remaining whipped cream to the top of the pie.
- Using a potato peeler shave off chocolate pieces to add to the top of your pie.
- Refrigerate for 1 hour (or more) Serve and enjoy!


Leave a Reply