
The Cake That’s Not a Pie
Let’s talk about Boston Cream Pie. It’s a cake, not a pie. I still laugh at that. It was made in a pie pan long ago. That’s how it got its name. The story makes me smile every time.
Why does this matter? Names can be silly. The important part is the taste. It’s a lesson in not judging a book by its cover. Or a cake by its name! What’s your favorite food with a funny name?
The Heart of the Matter
The pastry cream is the soul of this dessert. It’s a rich, vanilla custard. You cook it slowly on the stove. You must whisk and whisk. It feels like a little kitchen dance.
My grandson once called it “yellow pudding.” He was right! Tempering the eggs is the secret step. You add warm milk to the yolks slowly. This keeps them smooth. No one wants scrambled eggs in their cake. Doesn’t that smell amazing when the vanilla hits the warm cream?
A Simple, Happy Cake
The cake itself is simple. You mix warm milk with melted butter. This makes it very tender. The batter will look thin, like for pancakes. That’s perfect. It bakes up soft and golden.
Fun fact: The original Boston Cream Pie used a sponge cake. Our version is a little richer and softer. Let the layers cool completely. A warm cake will melt our precious “yellow pudding.” Do you prefer your cakes light and fluffy, or dense and rich?
The Shiny Chocolate Hat
The glaze is pure magic. You just heat cream and pour it over chocolate. It turns into a shiny, smooth blanket. The corn syrup gives it a beautiful gloss. It’s so simple, but it looks so fancy.
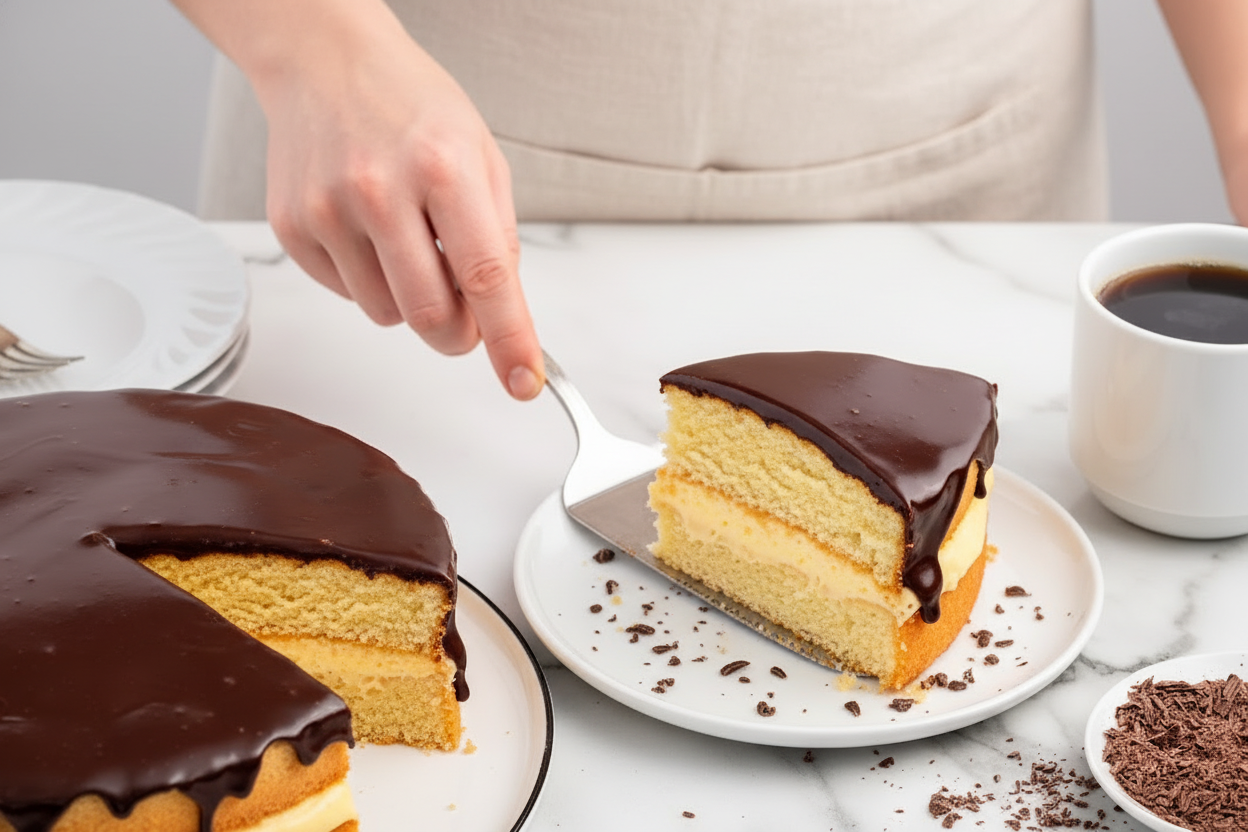
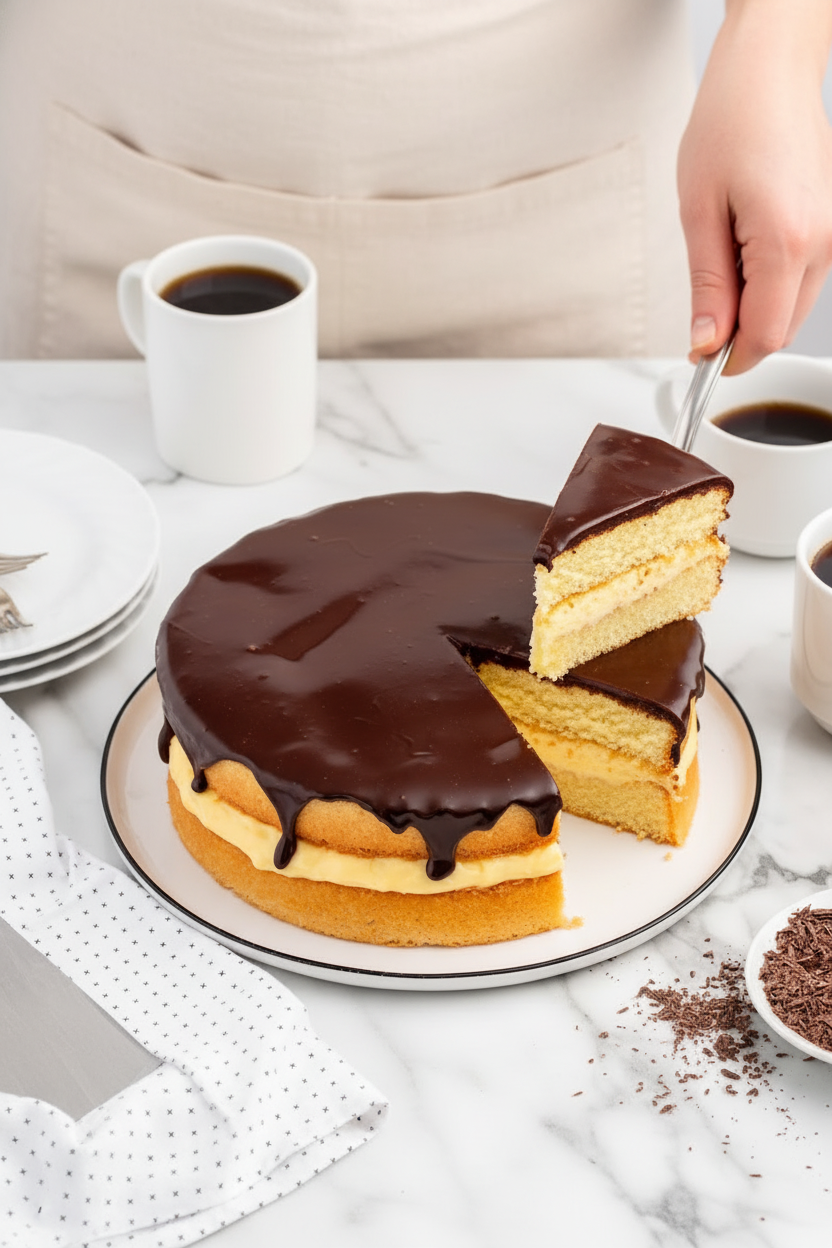
Let it cool a bit before pouring. You want it to be thick like syrup. Then pour it right in the center of the top cake layer. Watch it drip over the sides. It’s the best part. This matters because finishing touches bring joy. They make something homemade look special.
Putting It All Together
Assembly is fun. First cake layer, then all the pastry cream. Be gentle with the second layer. You don’t want the cream to squish out. Then, the glorious chocolate pour.
The final touch is the chill. Let the whole cake set in the fridge. This makes slicing neat. You get to see all the beautiful layers. A slice of history and flavor. What’s the first dessert you ever helped make in the kitchen? I’d love to hear your story.

Ingredients:
| Ingredient | Amount | Notes |
|---|---|---|
| Whole milk | 2 cups | For the Pastry Cream |
| Granulated sugar | ¾ cup | For the Pastry Cream |
| Cornstarch | ¼ cup | For the Pastry Cream |
| Large egg yolks | 5 | For the Pastry Cream, room temperature |
| Unsalted butter | 3 tablespoons | For the Pastry Cream, cold and cubed |
| Vanilla extract | 1 ½ teaspoons | For the Pastry Cream |
| All-purpose flour | 1 ¾ cups | For the Cake |
| Baking powder | 1 ¾ teaspoons | For the Cake |
| Salt | ½ teaspoon | For the Cake |
| Granulated sugar | 1 ¾ cups | For the Cake |
| Large eggs | 3 | For the Cake, room temperature |
| Vanilla extract | 2 teaspoons | For the Cake |
| Whole milk | 1 cup | For the Cake, heated to 165° – 170° F |
| Unsalted butter | ½ cup | For the Cake, melted |
| Finely chopped bittersweet chocolate baking bar | ¾ cup | For the Chocolate Glaze, 60% cacao |
| Heavy cream | ½ cup | For the Chocolate Glaze |
| Clear corn syrup | 1 tablespoon | For the Chocolate Glaze |
| Vanilla extract | ½ teaspoon | For the Chocolate Glaze |
My Favorite Boston Cream Pie Story
My grandson calls this a “cake-pie-custard-donut.” I still laugh at that. It is a funny name for a dessert. But it is pure joy on a plate. I learned this recipe from my own grandmother. Her kitchen always smelled of vanilla and warm milk. Doesn’t that smell amazing? Making it is a little project. But every step is worth it. Let’s make some memories together.
Step 1: The Pastry Cream
First, we make the pastry cream. Warm your milk until tiny bubbles form at the edge. Do not let it boil. In another bowl, whisk sugar, cornstarch, and egg yolks. They will become pale and smooth. This part is like making sunshine in a bowl.
Step 2: Tempering the Eggs
Now, we must be gentle. Slowly drizzle some warm milk into the egg mixture. Whisk it fast! This is called tempering. It keeps the eggs from turning into scrambled eggs in your cream. (My hard-learned tip: go slow with that first half-cup of milk!).
Step 3: Cooking the Cream
Pour everything back into the pot. Cook it on medium heat. You must whisk the whole time. It will get very thick. This takes patience. I think of my grandmother’s stories while I whisk. Cook it for one full minute after it boils.
Step 4: Finishing & Chilling
Remove the pot from the heat. Stir in your butter and vanilla. The butter makes it so silky. Pour it into a bowl. Press plastic wrap right on the surface. This stops a yucky skin from forming. Chill it for a few hours. What’s your favorite thing to do while you wait for something to chill? Share below!
Step 5: The Cake Batter
Time for the cake! Heat your oven. Mix your dry things in one bowl. In a big bowl, beat sugar, eggs, and vanilla. It will get fluffy and light. This is the magic step. Slowly mix in warm milk with melted butter. Then gently fold in the flour mixture.
Step 6: Baking & Cooling
Divide the batter between two pans. Bake until golden. A toothpick should come out clean. Let the cakes cool in the pan a bit. Then move them to a rack. Peel off the parchment paper. Let them get completely cool. This is very important.
Step 7: The Chocolate Glaze
For the glaze, heat cream and pour it over chopped chocolate. Let it sit for a minute. Then whisk in corn syrup and vanilla. It becomes so shiny! Let it cool and thicken slightly. This makes it perfect for pouring.
Step 8: Assembly
Finally, assembly! Place one cake layer on a plate. Spread the chilled cream on top. Be generous. Top with the second layer. Pour the glossy chocolate right in the center. Let it drip down the sides a little. Slice and enjoy the layers of happiness.
Cook Time: About 1 hour active
Total Time: 4–5 hours (with chilling)
Yield: 10-12 slices
Category: Dessert, Cake
Three Fun Twists to Try
This classic is wonderful as-is. But sometimes, a little change is fun. Here are three ideas I love. They make the dessert feel new again.
Orange Dream
Add a teaspoon of orange zest to the pastry cream. Use an orange-chocolate bar for the glaze. It tastes like a fancy candy.
Berry Surprise
Add a thin layer of strawberry jam on the bottom cake layer. Then add the pastry cream. The berry and cream combo is heavenly.
Coconut Escape
Toast some sweetened coconut flakes. Sprinkle them on the pastry cream before adding the top layer. Use a dark chocolate glaze. It’s a tropical vacation on a plate.
Which one would you try first? Comment below!
Serving It Up Just Right
This cake is a star on its own. But a little presentation makes it special. For a pretty plate, add a few fresh raspberries on the side. A tiny dollop of whipped cream never hurts. I love using my grandmother’s china cake stand. It makes any dessert feel like a party.
What to drink? A glass of cold milk is the classic choice. It is perfect for a young helper. For the grown-ups, a small cup of strong coffee or a glass of tawny port is lovely. The coffee cuts the sweetness just right. Which would you choose tonight?
Keeping Your Boston Cream Pie Happy
Let’s talk about storing this lovely cake. The fridge is its best friend. Cover it well and eat it within three days. The pastry cream must stay cold.
You can freeze the cake layers alone. Wrap them tightly in plastic. They will keep for a month. Thaw them on the counter when needed.
I do not recommend freezing the assembled pie. The cream can get watery. The texture changes. It’s best fresh from the fridge.
You can make parts ahead. Bake the cakes a day early. Make the pastry cream the day before, too. This splits up the work nicely.
I once tried to keep a slice out all afternoon. The cream got too soft. It was a delicious but messy lesson! Storing it right matters. It keeps every bite perfect and safe to eat. Have you ever tried storing it this way? Share below!
Simple Fixes for Common Troubles
Is your pastry cream lumpy? Do not worry. Just press it through a fine sieve. A quick whisk will make it smooth again.
Is your cake layer stuck in the pan? Let it cool for ten minutes first. Then run a thin knife around the edge. It should pop right out.
Is your chocolate glaze too thick? Add a tiny splash of warm cream. Whisk it gently. It will become pourable again.
I remember when my first glaze seized up. I was in a hurry. I learned to let the bowl sit after heating. Patience makes it silky.
Fixing small problems builds your confidence. You learn that mistakes are okay. Getting the textures right also makes the flavor shine. Every layer should be a joy. Which of these problems have you run into before?
Your Boston Cream Pie Questions, Answered
Q: Can I make this gluten-free? A: Yes! Use a good gluten-free flour blend. Make sure it has xanthan gum in it.
Q: What can I make ahead? A: The pastry cream and cake layers can be made a day early. Keep them chilled and wrapped.
Q: I don’t have bittersweet chocolate. A: Semi-sweet chocolate chips work just fine. The glaze will be a little sweeter.
Q: Can I make a smaller cake? A: You can halve the recipe. Use two six-inch cake pans. Bake time may be less.
Q: Any optional tips? A: A tiny pinch of salt in the glaze makes the chocolate taste richer. It’s a wonderful trick. Which tip will you try first?
From My Kitchen to Yours
I hope you love making this classic dessert. It is a special treat for sharing. The layers tell a story of care.
Fun fact: This “pie” is called a pie because it was baked in pie tins long ago!
I would love to see your creation. Your kitchen stories make my day. Have you tried this recipe? Tag us on Pinterest! Let’s fill the world with sweet, homemade things.
Happy cooking!
—Anna Whitmore.
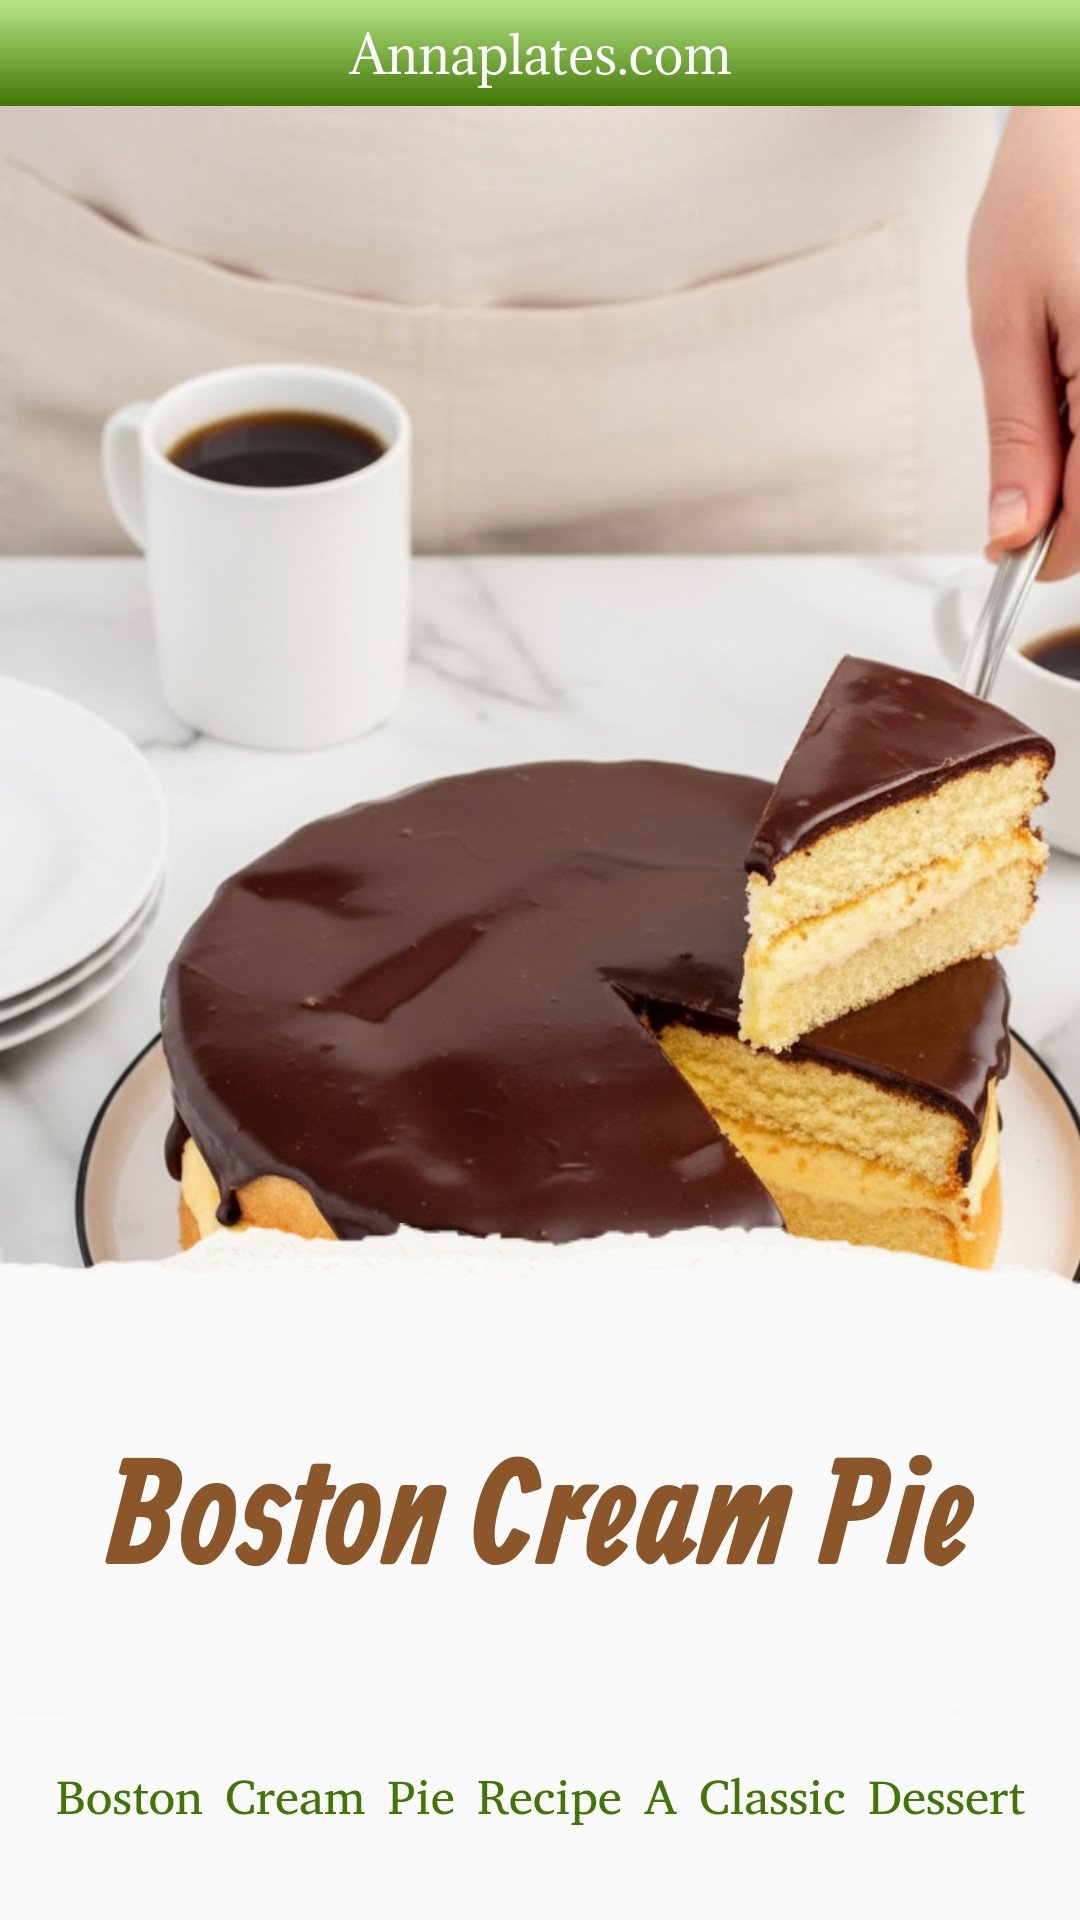
Boston Cream Pie: Boston Cream Pie Recipe A Classic Dessert
Description
Indulge in the classic Boston Cream Pie! Layers of sponge cake, rich custard, and shiny chocolate glaze make this dessert irresistible. Perfect for any celebration.
Ingredients
=== For the Pastry Cream ===
=== For the Cake ===
=== For the Chocolate Glaze ===
Instructions
- In a 3-4 quart saucepan, over medium-high heat, add the milk and bring to a temperature of 170*-180* F and you have tiny bubbles forming along the edges of the saucepan. You are scalding the milk, not bringing it to a boil. Remove from the heat.
- In a large mixing bowl whisk together the granulated sugar and cornstarch until fully combined and no lumps from the cornstarch remain. Whisk in the egg yolks by hand for 1-2 minutes or until smooth.
- Slowly drizzle in ½ cup of the warm milk while whisking vigorously. Add another ½ cup warm milk while whisking vigorously again. This is to temper the egg yolks so they do not scramble when added to the sauce pot and cooked.
- Place the saucepan with the remaining warm milk back to the stovetop, over medium-high heat, and slowly pour the egg mixture into the pot while whisking constantly.
- Cook the pastry cream mixture for 8-10 minutes, while whisking constantly to avoid burning, or until the mixture comes to a rolling boil and thickens quite a bit. The pastry cream will get very thick very quickly once it comes to a boil so do not walk away from the saucepan on the stove.
- Cook for an additional 30 seconds – 1 minute once it thickens then remove from the heat.
- Add the cubed unsalted butter and vanilla extract and whisk vigorously until the butter is fully incorporated and the pastry cream is thick and smooth.
- Transfer the pastry cream to a bowl and cover with plastic wrap, being sure to place the plastic wrap directly onto the entire surface of the pastry cream. This will prevent a skin from forming on the surface of the pastry cream while it cools.
- Refrigerate the pastry cream for 2-4 hours, or until fully chilled before adding to the cooled cake layers for assembly.
- Preheat oven to 325* F. Spray 2 – 9 inch round cake pans with baker’s spray and line each pan with a piece of parchment round. Set aside.
- In a small bowl combine together the all-purpose flour, baking powder and salt. Set aside.
- In a large mixing bowl, using a handheld mixer on medium-high speed, beat the granulated sugar, eggs and vanilla extract for 3-4 minutes or until thick and fluffy.
- In a small bowl, with a pour spout (a 2 cup glass measure cup works great for this) whisk together the warm milk and melted butter. With the mixer on low speed, slowly drizzle the warm milk mixture into the large bowl of beaten eggs until fully incorporated.
- With the mixer on low speed, add the flour mixture slowly to the bowl and mix just until all the flour has been fully incorporated. Your cake batter should resemble pancake batter without any lumps.
- Divide the batter evenly between the two prepared cake pans. Bake for 30-33 minutes or until lightly golden around the edges and the center is set. A toothpick inserted into the center of the cake should come out clean.
- Allow the cakes to cool in the pan for 10 – 15 minutes before turning them out onto a wire cooling rack to cool completely. Be sure to remove the parchment paper from the bottom of each cake layer while cooling.
- In a medium, microwave safe, bowl add the chopped bittersweet chocolate and heavy cream. Be sure that the chocolate is covered by the heavy cream, and microwave on high for 1 minute. Remove from the microwave and let sit for 1 minute.
- Add the clear corn syrup and vanilla extract to the melted chocolate and whisk until smooth.
- Allow the chocolate glaze mixture to cool for 15-20 minutes in the bowl before pouring over the top of the assembled cake.
- Place one of the cake layers onto a large cake plate.
- Spread the chilled pastry cream into an even layer over the first cake layer. If your pastry cream is very thick from a long chill, be sure to whisk it for 1-2 minutes to loosen it up to a spreadable consistency before adding to the cake.
- Top the pastry cream with the second cake layer. Be careful to not press too hard as you do not want the pastry cream to come out the sides of the cake.
- Slowly pour the chocolate glaze into the center of the top cake layer. It is ok if some of the chocolate glazes drips down the sides, but you do not want to cover the sides completely as you want to be able to see the layers.
- Slice and serve the cake while the pastry cream is still chilled.


Leave a Reply