
A Sweet Story to Share
My grandson calls these my “magic bars.” I still laugh at that. They are magic because you don’t even turn on the oven. We make them on hot summer days. The kitchen stays cool.
It matters because cooking should be fun, not hard. Anyone can make these. What is your favorite no-bake treat? Tell me about it in the comments.
Why These Bars Are Special
These bars are for everyone. They are gluten-free and vegan. That means friends with food worries can eat them too. Sharing food is about sharing joy.
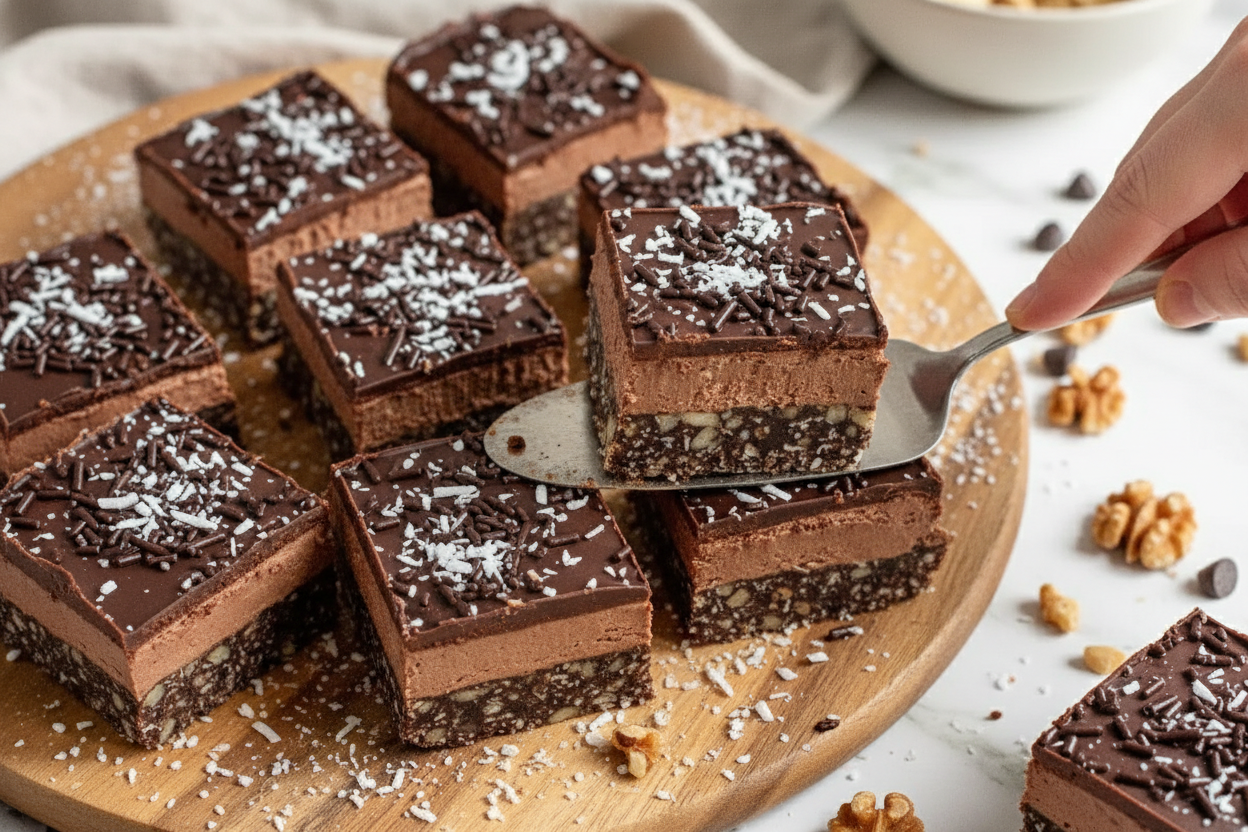
I love the crunch from the walnuts. The coconut makes it taste like a beach vacation. Doesn’t that smell amazing? The three layers feel fancy but are simple.
Let’s Talk About the Crust
The bottom layer is the most important step. You must press it down very firmly. I use the bottom of a glass. Press, press, press!
If you don’t press hard enough, the base will crumble. We don’t want a sandy plate. We want a solid foundation. This matters for a perfect bite.
The Fluffy Middle Secret
Here is a fun fact: *The middle layer gets fluffy from beating it for five full minutes.* Set a timer. I use it to wash a few dishes.
The mixer makes it light and smooth. It tastes like a chocolate cloud. Do you prefer a fluffy or a fudgy middle in your desserts?
Finishing Touches and Patience
The chocolate top is easy. Melt it slowly. Stir well. Then pour it over the fluffy middle. This is where you can get creative.
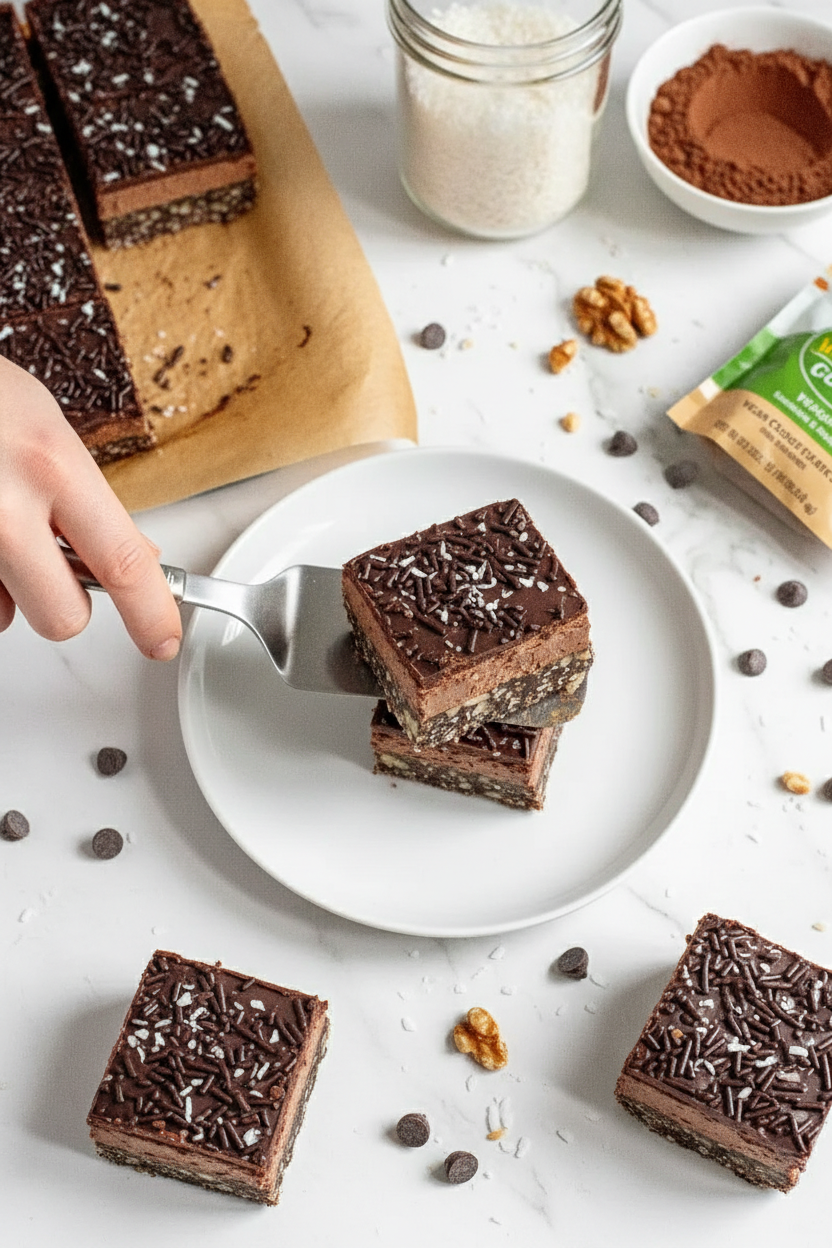
Add sprinkles or extra coconut. Then comes the hard part. You must wait one whole hour for it to chill. I know, it’s tough! But it makes slicing clean. Will you try sprinkles or coconut on top?
Ingredients:
| Ingredient | Amount | Notes |
|---|---|---|
| vegan salted butter, melted | 1/2 cup (114g) | Base Layer |
| gluten-free graham cracker crumbs | 1 3/4 cups (210g) | Base Layer |
| unsweetened shredded coconut | 1 cup (120g) | Base Layer |
| chopped walnuts | 1/2 cup (60g) | Base Layer |
| granulated sugar | 2 tablespoons (25g) | Base Layer |
| unsweetened cocoa powder | 2 tablespoons (11g) | Base Layer |
| vegan salted butter, softened | 1/2 cup | Middle Layer |
| powdered sugar | 2 cups (240g) | Middle Layer |
| unsweetened cocoa powder | 2 tablespoons (11g) | Middle Layer |
| vegan milk | 1 tablespoon (15ml) | Middle Layer |
| fine sea salt | 1/4 teaspoon | Middle Layer |
| vegan chocolate chips | 3/4 cup (126g) | Top Layer |
| vegan milk | 6 tablespoons (90ml) | Top Layer |
| vegan chocolate sprinkles | for decor | Top Layer, optional |
| shredded coconut | for decor | Top Layer, optional |
My No-Bake Chocolate Bars: A Sweet Little Secret
Hello, my dear. Come sit at the counter. Let’s make something sweet together. I want to share my favorite no-bake chocolate bars. They are gluten-free and vegan, but don’t let that fool you. They are pure magic. I first made these for my grandson’s birthday. He has food allergies, you see. His smile was worth every stir. Doesn’t that smell amazing already? Let’s begin.
Step 1: First, let’s get our pan ready. Take an 8-inch square pan. Line it with two pieces of parchment paper, crisscrossed. This makes a little sling. It will lift our bars right out later. It’s my favorite trick. (Hard-learned tip: Spray the pan first so the paper sticks!). Now, grab a big bowl. Mix the melted vegan butter, graham crumbs, coconut, walnuts, sugar, and cocoa. It will look like dark, chunky sand.
Step 2: Pour that sandy mix into your pan. Now, press it down. Press it really, really firm with your fingers. I still laugh at that. My first batch crumbled because I was too gentle. You want a solid base. Set the pan aside. Now, for the fluffy middle. Put the softened butter, powdered sugar, cocoa, salt, and a splash of milk in a bowl. Beat it with a mixer. Let it go for a full five minutes. It gets so light and dreamy.
Step 3: Spread that chocolate frosting over our base. Be nice and even with it. Doesn’t it look pretty? Now, the shiny top. Put chocolate chips and milk in a small bowl. Heat it in the microwave for 30 seconds. Stir. Heat again if needed. You can do this on the stove, too. Stir until it’s silky smooth. Pour it over the frosting layer. Tilt the pan to cover every bit. What’s your favorite part of making bars: the pressing, the mixing, or the topping? Share below!
Step 4: This is the fun part. Sprinkle on some coconut or chocolate sprinkles if you like. I always add a little something. Then, the hardest step. Put the whole pan in the fridge. Let it chill for at least one hour. I know, waiting is tough. But it makes them slice so neatly. Then, use the parchment paper to lift it all out. Cut into squares. Oh, my. They are rich, crunchy, and perfect. Store any leftovers in the fridge. They never last long at my house.
Cook Time: 1 hour (chilling)
Total Time: 1 hour 20 minutes
Yield: 9-12 bars
Category: Dessert, Snack
Three Fun Twists to Try
These bars are like a blank canvas. You can change them up so easily. Here are a few ideas I love. They make the recipe feel new again. Try one next time.
Berry Blast: Mix dried cranberries or cherries into the base. They add a lovely, tart little pop.
Peanut Butter Swirl: Add a big spoonful of peanut butter to the middle layer. Swirl it with a knife.
Orange Zest Sparkle: Stir the zest of one orange into the melted chocolate top. It smells like sunshine.
Which one would you try first? Comment below!
Serving Them Up With Style
These bars are wonderful all on their own. But sometimes, you want to make them extra special. For a party, place each bar on a little paper doily. It looks so quaint. You could also serve them with a scoop of vegan vanilla ice cream. The mix of cold and chocolate is heavenly. For a pretty plate, add a few fresh raspberries on the side. Their color just sings.
What to drink? A cold glass of almond milk is my go-to. It’s so comforting. For the grown-ups, a small glass of coffee liqueur over ice pairs beautifully. It’s a deep, rich flavor. Which would you choose tonight?
Keeping Your Chocolate Bars Happy
These bars love the cold. Store them in the fridge for up to five days. Use an airtight container so they stay fresh.
You can also freeze them for six months. Wrap each bar in parchment paper first. Then place them all in a freezer bag.
Let frozen bars thaw in the fridge for an hour. I once left a batch out on the counter. They got too soft and messy!
Making a double batch saves time later. You always have a sweet treat ready. This matters because life gets busy.
A ready-made dessert brings a little joy. It is a small gift to your future self. Have you ever tried storing it this way? Share below!
No-Bake Troubles and Easy Fixes
First, a crumbly base layer. You must press it down very firmly. Use the bottom of a cup to help you.
I remember when my first batch fell apart. I did not press hard enough. A firm press makes all the difference.
Second, a grainy frosting. Your butter must be properly softened. Also, beat the mixture for the full five minutes.
This creates a smooth, fluffy texture. It matters because the mouthfeel is so much better. You will feel like a real baker.
Third, chocolate that seizes or burns. Always melt it in short bursts. Stir well between each heating interval.
Patience gives you a glossy, perfect top. Which of these problems have you run into before?
Your Quick Questions, Answered
Q: Are these really gluten-free? A: Yes, if you use gluten-free graham crumbs. Always check the package label to be sure.
Q: Can I make them ahead? A: Absolutely! They need at least one hour to chill. They taste even better the next day.
Q: What nut can I swap for walnuts? A: Try pecans or almonds. You can even leave nuts out completely. *Fun fact: The coconut adds plenty of crunch!*
Q: Can I double the recipe? A: Yes. Use a 9×13 inch pan. All the steps stay exactly the same.
Q: Are the toppings needed? A: No, but they are fun. Sprinkles or extra coconut make them special. Which tip will you try first?
From My Kitchen to Yours
I hope you love making these bars. I have shared this recipe with my grandkids. It always makes the kitchen smell wonderful.
I would love to see your creation. It makes my day to see your photos. Have you tried this recipe? Tag us on Pinterest!
Use the handle @AnnaWhitmoreEats. Thank you for spending time with me today. Happy cooking!
—Anna Whitmore.
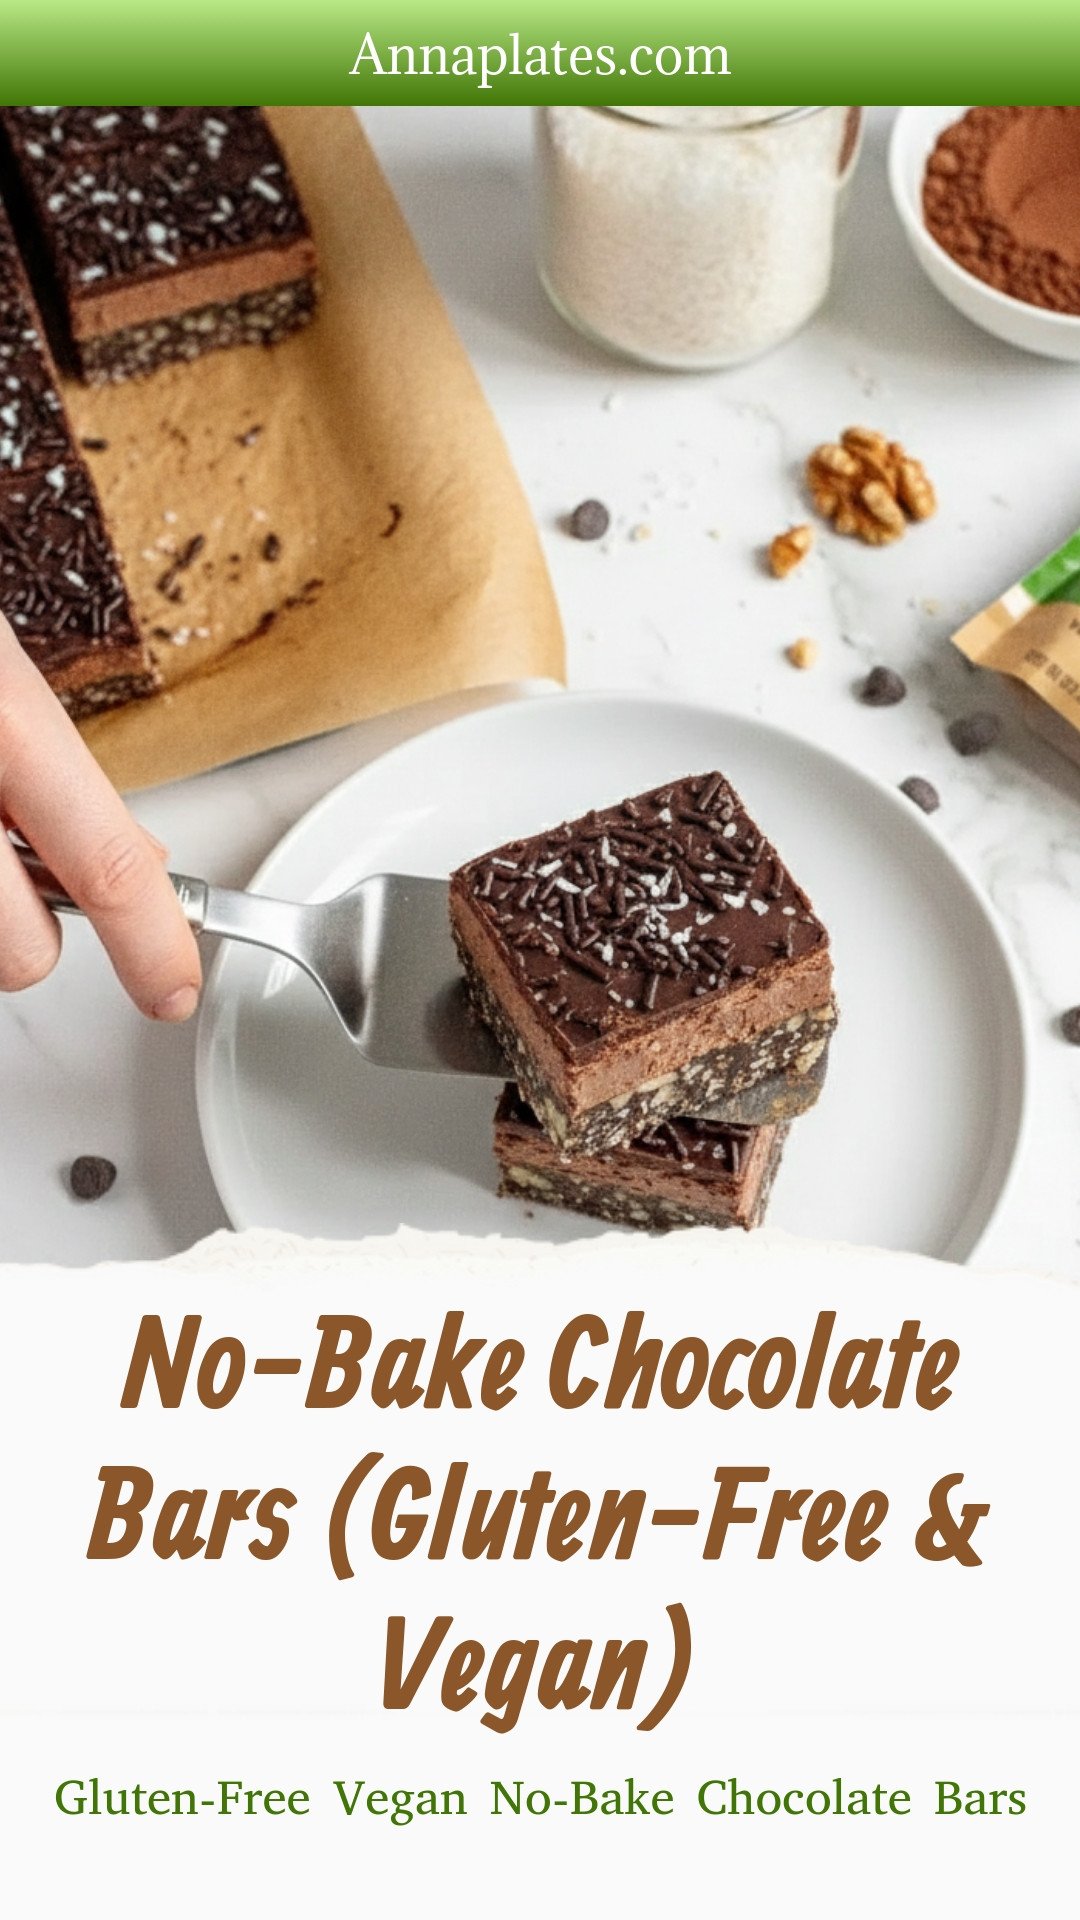
Gluten-Free Vegan No-Bake Chocolate Bars
Description
Easy no-bake chocolate bars! Gluten-free, vegan, and made with simple ingredients. A rich, decadent treat ready in minutes. Perfect for healthy desserts.
Ingredients
Base Layer
Middle Layer
Top Layer
Instructions
- Prepare an 8×8-inch baking pan with non-stick baking spray and two pieces of parchment paper, crisscrossed for easy removal. Set aside.
- In a large mixing bowl, combine all of the base ingredients (butter, graham cracker crumbs, coconut, nuts, sugar, and cocoa powder) and mix until a coarse sand-like texture is achieved.
- Pour the mixture into the prepared pan and press down firmly. If you don’t press down firmly enough, the base will be crumbly. Set aside.
- In a standmixer or large mixing bowl with handheld electric mixer, combine all of the middle layer ingredients (softened butter, powdered sugar, cocoa powder, and salt) and mix on low until combined. Scrape down the side of the bowl then turn the mixer up to high and allow to beat for 5 minutes.
- Spread the chocolate frosting evenly on top of the base layer. Set aside.
- Combine the chocolate chips and milk in a small microwave-safe bowl and heat in 30-second intervals, stirring after each interval, until melted and smooth. This can also be done on the stovetop.
- Pour the melted chocolate on top of the middle frosting layer and spread evenly. Top with chocolate sprinkles and shredded coconut if desired. Place in the fridge to chill for at least 1 hour. Enjoy!
Notes
- Leftover chocolate bars should be stored in an airtight container in the fridge for up to 5 days or frozen for up to 6 months.


Leave a Reply