

My First Pakora
I learned to make pakoras from my neighbor, Mrs. Patel. She brought over a plate one rainy afternoon. I was just a girl. The smell was so warm and spicy. I had to know how to make them.
She showed me right in my own kitchen. We laughed when my first one fell apart in the oil. Practice makes perfect, she said. I still laugh at that. Now, my kitchen smells like hers on a cozy day.
Why The Batter Works
Let’s talk about the chickpea flour. It is the magic glue. It holds all our veggies together. The rice flour is our secret. It makes each bite extra crispy and light.
Mix your dry spices well first. This matters. It makes sure every single bite is full of flavor. Doesn’t that smell amazing already? Now, add water slowly. You want a thick, happy batter that hugs the vegetables.
The Vegetable Party
This is the fun part. You can use almost any vegetable you like. I love the onion for sweetness. The potato makes it hearty. Carrots add a nice little crunch.
My grandkids fight over the spinach or cabbage. I say use what you have. That is the real lesson here. Cooking is about using good things, not being perfect. What vegetable would you add to your pakora party?
Frying With Love (And Care)
The oil needs to be just hot enough. Drop a tiny bit of batter in. If it sizzles and floats up, you are ready. This step matters for safety and taste. Too cool, and they get oily. Too hot, and they burn.
Do not crowd the pan. Give each pakora some space to dance and get crispy. Fry them until they are a golden brown. That color tells you they are done. *Fun fact: In India, pakoras are a favorite snack when it rains!*
Gather and Dip
Pakoras are best shared right away. They are hot, crispy, and full of love. Put them on a paper towel for just a second. Then, get them to the table!
We always have mint chutney and ketchup for dipping. Everyone has a favorite. The sharing is the best part. It turns food into a memory. What is your favorite dipping sauce? Tell me, I would love to know.
Ingredients:
| Ingredient | Amount | Notes |
|---|---|---|
| Chickpea flour (besan) | 1 cup | |
| Rice flour | ¼ cup | for extra crispiness |
| Baking soda | ½ teaspoon | |
| Ground cumin | 1 teaspoon | |
| Ground coriander | 1 teaspoon | |
| Turmeric | ½ teaspoon | |
| Red chili powder | ½ teaspoon | |
| Salt | ½ teaspoon | |
| Water | ¾ cup | adjust as needed |
| Onion | 1 small | thinly sliced |
| Potato | 1 small | peeled and grated |
| Carrots | ½ cup | shredded |
| Spinach or cabbage | ½ cup | chopped |
| Green chilies | 2 | finely chopped, optional |
| Cilantro | 2 tablespoons | chopped |
| Oil | as needed | for deep frying |
My Crispy Veggie Pakoras: A Rainy-Day Treat
Hello, my dear! Come sit. Let me tell you about pakoras. They are my favorite rainy-day snack. The sizzle in the pan makes everything cozy. I learned this from my friend Meena years ago. We would chat for hours over a big plate. Doesn’t that smell amazing? It’s easier than you think. Just a simple batter and whatever veggies you have. Let’s make some magic together.
Step 1: Grab a big bowl. Put in the chickpea flour and rice flour. Add all those lovely spices. Cumin, coriander, turmeric, and a bit of chili powder. Whisk it all together. I love the color the turmeric makes. It’s like sunshine in a bowl. (My hard-learned tip: Sift the flours if you can. It stops pesky little lumps!)
Step 2: Now, slowly pour in the water. Stir as you go. You want a thick, smooth batter. It should coat a spoon nicely. Too runny? Add a sprinkle more flour. Too thick? A splash more water. This is the glue for our veggies. What’s your favorite vegetable to snack on raw? Share below!
Step 3: Time for the fun part! Toss all your chopped veggies into the batter. Onion, potato, carrot, spinach. Mix it with your hands. Get everything coated well. I still laugh at how my grandson just wants to eat the batter. But we must wait! The crispy part is coming.
Step 4: Heat your oil in a deep pan. You want it nice and hot. Test it with a tiny drop of batter. If it sizzles and floats up, you’re ready. Carefully drop spoonfuls of the veggie mix in. Don’t crowd the pan. Let them swim and get golden.
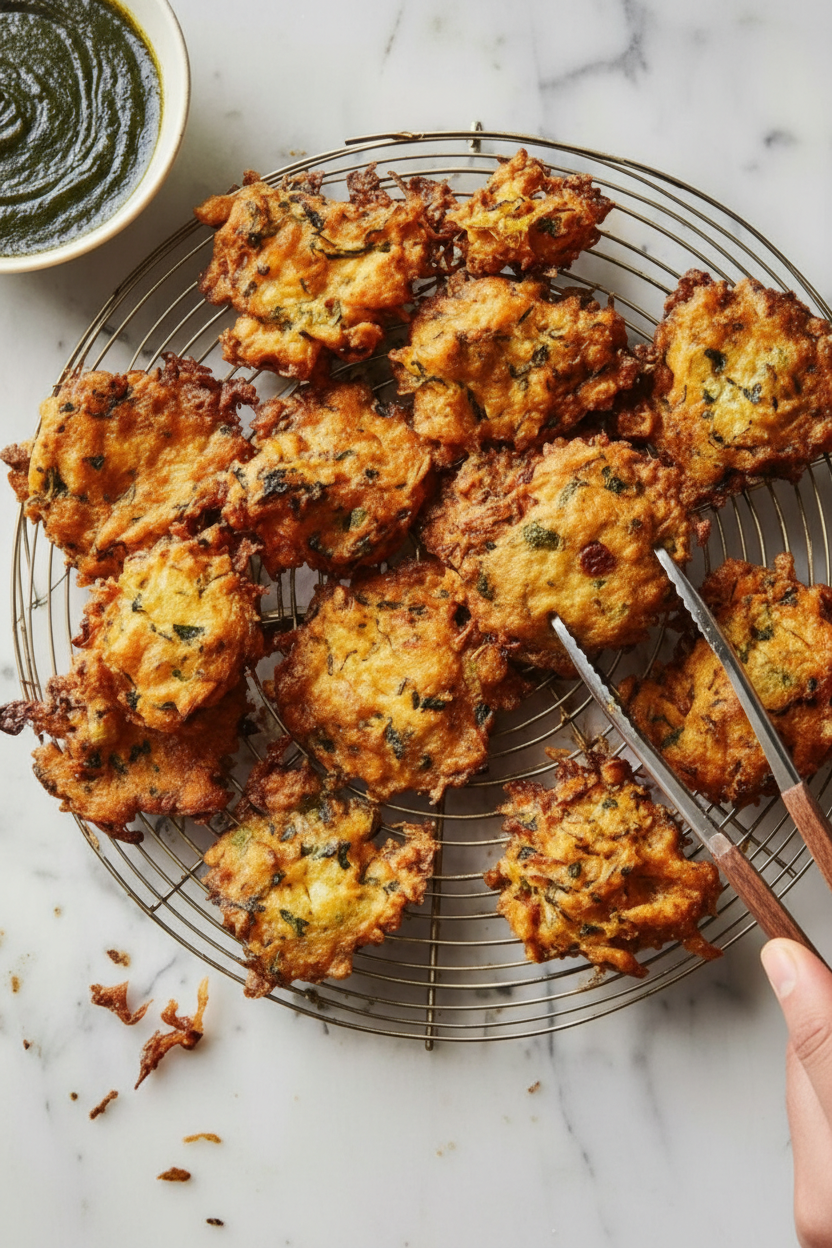
Step 5: Fry them for a few minutes on each side. You’ll see them turn a beautiful golden brown. That’s the crispiness talking! Use a slotted spoon to take them out. Let them rest on a paper towel. This soaks up extra oil. Then, dig in while they’re hot and perfect.
Cook Time: 15–20 minutes
Total Time: 30 minutes
Yield: About 20 pakoras
Category: Snack, Appetizer
Three Fun Twists to Try
Once you know the basics, you can play! Here are my favorite little twists. They make each batch a new adventure. Use what’s in your fridge or garden.
The “Clean Out the Fridge” Pakora: Add bits of sweet corn or leftover peas. Even tiny cauliflower florets work!
The “A Little Fancy” Pakora: Mix in some crumbled paneer cheese. It gets so soft and creamy inside the crispy shell.
The “Herb Garden” Pakora: Use lots of fresh mint and dill with the cilantro. It smells like a summer garden.
Which one would you try first? Comment below!
Serving Your Golden Pakoras
Presentation is part of the joy. I love a simple wooden board. Pile the pakoras high! Sprinkle a little chaat masala on top for a tangy kick. Serve with bowls of cool mint chutney and sweet tamarind sauce. Let everyone dip and choose.
For drinks, a hot cup of masala chai is my classic choice. It’s so comforting. For a cooler option, try a ginger lemonade. The zing goes perfectly with the spices. Which would you choose tonight?
Keeping Your Pakoras Perfect
Let’s talk about keeping these crispy treats. Fresh is always best. But you can store them for later. Let them cool completely first.
Put them in a sealed container. Keep them in the fridge for two days. You can freeze them for a month too. I once froze a whole batch for my grandson’s visit. He loved them just as much reheated!
To reheat, use your oven or air fryer. This brings back the crunch. Avoid the microwave, it makes them soft. Batch cooking saves so much time on busy days. It means a homemade snack is always ready. Have you ever tried storing it this way? Share below!
Pakora Problems? Easy Fixes!
Sometimes pakoras can be soggy. The oil was not hot enough. Test it with a tiny drop of batter. It should sizzle and rise right up.
The batter might be too thin. This makes the coating fall off. Just add a little more chickpea flour. I remember when my first pakoras fell apart in the oil. It was a funny mess!
They might burn outside but stay raw inside. Your heat is too high. Keep it at a steady medium. Getting the heat right builds your cooking confidence. A perfect fry means more flavor in every bite. Which of these problems have you run into before?
Your Quick Pakora Questions
Q: Are these pakoras gluten-free? A: Yes! Chickpea and rice flour have no gluten.
Q: Can I make the batter ahead? A: Mix it just before frying. It gets too thick if it sits.
Q: What other veggies can I use? A: Try cauliflower, bell pepper, or sweet potato. Use what you have!
Q: Can I double the recipe? A: Absolutely. Just fry in more batches. Do not crowd the pan.
Q: What if I don’t have rice flour? A: Use all chickpea flour. They will still be tasty, but less crispy. *Fun fact: Chickpea flour is also called besan.* Which tip will you try first?
From My Kitchen to Yours
I hope you love making these pakoras. They always remind me of rainy afternoons. The kitchen fills with wonderful smells.
I would love to see your creations. Sharing food stories connects us all. Have you tried this recipe? Tag us on Pinterest! You can find me at @AnnasCozyKitchen. Thank you for cooking with me today.
Happy cooking! —Anna Whitmore.

Crispy Vegetable Pakoras Recipe Easy Homemade
Description
Crispy, golden vegetable pakoras made easy! This simple recipe is the perfect snack or appetizer.
Ingredients
Instructions
- In a large bowl, whisk together chickpea flour, rice flour, baking soda, ground cumin, ground coriander, turmeric, red chili powder, and salt until well combined.
- Gradually pour in ¾ cup water while stirring to form a thick, lump-free batter. The consistency should be such that it coats the vegetables thoroughly but is not too runny.
- Add the thinly sliced onion, grated potato, shredded carrots, chopped spinach or cabbage, finely chopped green chilies (if using), and chopped cilantro to the batter. Mix well to coat all the vegetables evenly.
- Heat oil in a deep frying pan or kadai over medium heat until hot enough for frying (about 350°F or a drop of batter sizzles and rises to the surface immediately).
- Using a spoon, drop small portions of the batter-coated vegetables into the hot oil. Slightly flatten each spoonful with the back of the spoon. Fry in batches to avoid overcrowding.
- Fry pakoras for approximately 3–4 minutes on each side or until they turn golden brown and crispy. Maintain medium heat to ensure they cook through without burning.
- Remove the fried pakoras using a slotted spoon and place them on paper towels to drain excess oil.
- Serve hot pakoras immediately with mint chutney, tamarind chutney, or ketchup for dipping.
Notes
- For a gluten-free version, ensure all ingredients, especially the baking soda, are certified gluten-free. Adjust chili quantity to taste.


Leave a Reply