
My First Roasted Garlic Mistake
I once roasted a whole head, foil and all, for an hour. I forgot it! The kitchen smelled wonderful, but sad. I opened the foil to find little black lumps. I still laugh at that. It taught me to watch the clock.
Why this matters: Cooking isn’t about being perfect. It’s about paying gentle attention. A little watchfulness makes something simple into something magic. Have you ever burned something by accident? What did you learn from it?
The Magic of Heat and Time
Raw garlic is sharp and spicy. It makes your eyes water. But heat changes everything. The oven’s warmth turns that sharpness into sweetness. It makes the cloves soft and spreadable.
Doesn’t that smell amazing? After about 20 minutes, a cozy, buttery smell fills your house. *Fun fact: This sweet, mellow flavor happens because the heat breaks down the sharp compounds in the garlic. It’s science you can taste!
How to Tuck Your Garlic In
Start with a whole head of garlic. Peel off the loose, papery skin. Leave the tight skin on to hold it together. Now, slice about a quarter off the top. You want to see the tops of all the little cloves inside.
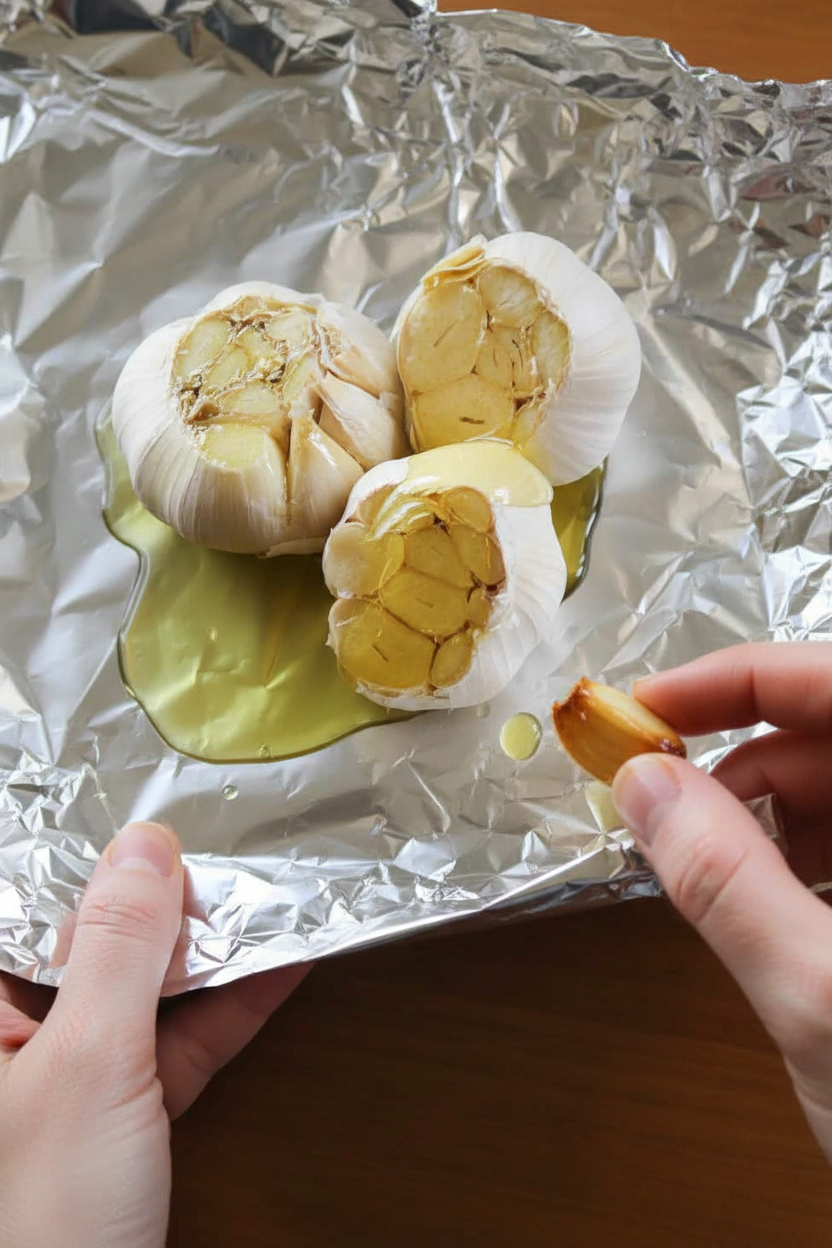
Place it on a foil sheet. Drizzle olive oil over the cut top. Let the oil seep down into the cloves. Use your finger to rub it all over. Every bit should glisten. This oil keeps it moist and helps it roast evenly.
A Warm Oven Nap
Wrap the garlic up in its foil blanket. Make a little pouch. Put it in a dish and into a 400-degree oven. Now, let it take a warm nap. Set your timer for 25 minutes.
Why this matters: Good things take the time they take. You can’t rush this. At 25 minutes, peek inside. The cloves should be golden and very soft. If not, give it 5 more minutes. What’s your favorite “slow and steady” recipe?
The Best Part: Using It!
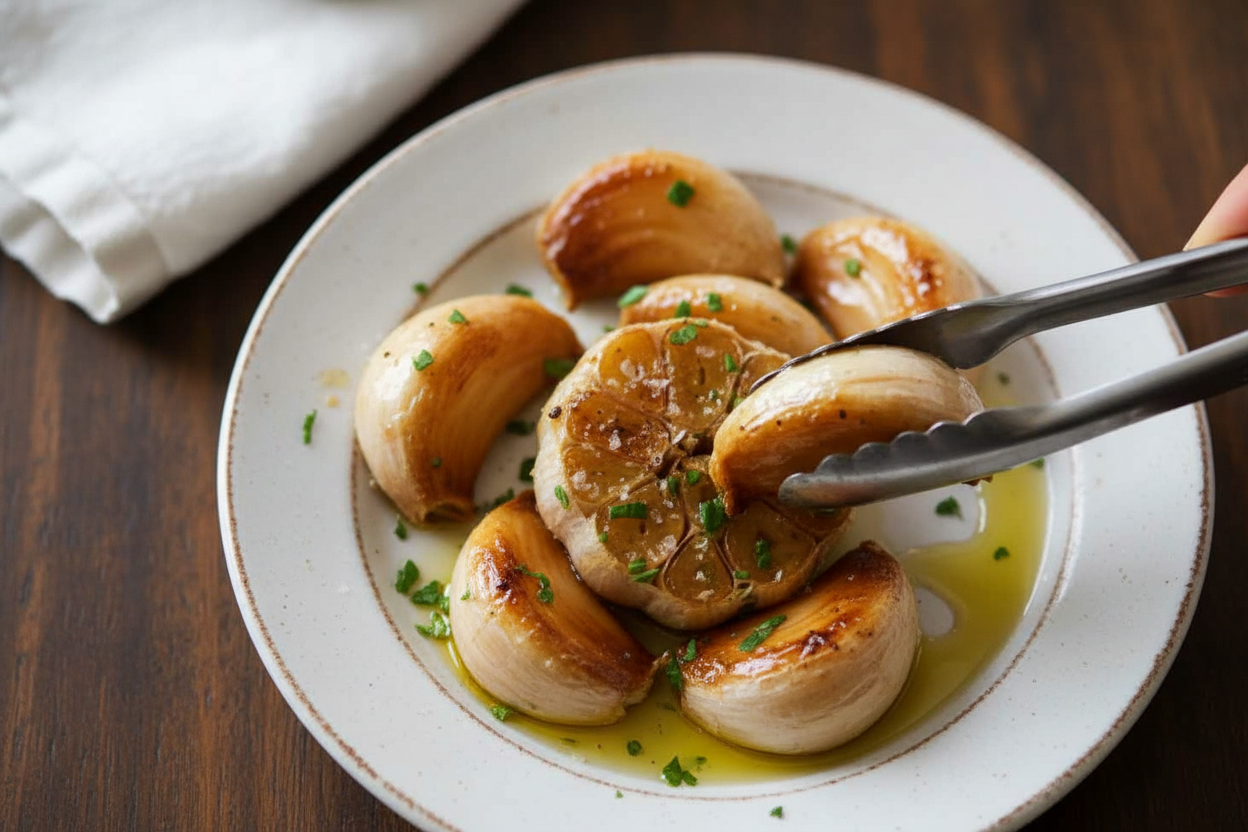
Let the garlic cool until you can touch it. Then, just squeeze! The soft, buttery cloves will pop right out. You can spread them on warm bread. It’s so simple and so good.
I love mixing a few cloves into softened butter. Add a little salt. It’s fantastic on corn on the cob. Or stir it into mashed potatoes. What would you try first? Roasted garlic in pasta, or maybe on a pizza?

Ingredients:
| Ingredient | Amount | Notes |
|---|---|---|
| Whole garlic | 1 head | |
| Olive oil | 2 tablespoons |
How to Roast Garlic: My Favorite Kitchen Trick
Hello, dear. Come sit a moment. Let’s talk about roasted garlic. It is a magical thing. Raw garlic is sharp and loud. But roasted garlic is sweet and gentle. It becomes soft like butter. You can spread it on warm bread. Doesn’t that smell amazing? I learned this from my friend Marie years ago. I still laugh at that. I thought it was so fancy! But it is the easiest trick. It makes everything taste special. Let me show you how.
Step 1: First, heat your oven to 400 degrees. Get one whole head of garlic. Peel off the loose, papery skin. Leave the tighter skin on. It holds the cloves together. Think of it like taking off a bulky coat. But leaving its shirt on!
Step 2: Now, slice the top off the head. You want to see the tops of all the little cloves inside. Use a sharp knife. Be careful with your fingers. (My hard-learned tip: save that little top piece! You can roast it too. It gets crispy and tasty for sprinkling.)
Step 3: Place the garlic on a piece of foil. Drizzle olive oil over the cut top. Let it soak down into the cloves. Use your finger to rub the oil all over. Make sure every bit gets shiny. This is the secret to getting it soft.
Step 4: Wrap the garlic up in the foil. Make a little cozy packet. Put it in a dish and into the oven. Roast it for 25 to 30 minutes. I always start watching at 25 minutes. You want it golden and soft, not burnt!
Step 5: Let it cool a little. Then just squeeze! The soft cloves will pop right out. Or use a knife to help them. They will be warm and spreadable. What’s your favorite thing to spread on fresh bread? Share below!
Cook Time: 25-30 minutes
Total Time: 35 minutes
Yield: 1 head of garlic
Category: Basic, Condiment
Three Fun Twists on Roasted Garlic
Once you master the basic way, you can play! Here are my favorite little twists. They make it new again. I love trying a new one each season.
- Herb Garden: Before wrapping, tuck fresh rosemary or thyme into the foil packet.
- Sweet & Smoky: Add a tiny drizzle of maple syrup and a pinch of smoked paprika with the oil.
- Lemon Zest: Mix a little lemon zest into the olive oil before you drizzle it on.
Each one changes the flavor in a wonderful way. Which one would you try first? Comment below!
Serving Your Golden Garlic
So you have this beautiful, soft garlic. Now what? My favorite way is simple. Spread it on a thick slice of toasted bread. A little sprinkle of salt is perfect. Or, mash it into mashed potatoes. It makes them taste rich and fancy.
For a drink, I think of comfort. A cold glass of apple cider is lovely. It’s sweet against the garlic’s richness. For a cozy evening, a small glass of red wine pairs beautifully. It feels like a hug from the inside. Which would you choose tonight?
Storing Your Golden Treasure
Let’s keep that lovely roasted garlic safe. Once cool, squeeze the cloves into a jar. Cover them with a little olive oil. This keeps for about a week in the fridge.
You can freeze it too. I spoon the soft cloves into an ice cube tray. Once frozen, pop the cubes into a bag. My first time, I forgot to label the bag. My grandson thought they were weird yellow candy!
Batch cooking matters. It saves you time on busy nights. A ready-made flavor boost is a cook’s best friend. Just grab a cube and toss it in soups or pasta.
Have you ever tried storing it this way? Share below!
Simple Fixes for Common Hiccups
Sometimes our garlic needs a little help. Here are easy fixes. First, if the cloves are too hard, they needed more time. Just wrap them back up and roast a bit longer.
Second, if they taste bitter, they might be burnt. I once got distracted by a phone call. My garlic turned dark and sad. Watch it closely after 25 minutes.
Third, if the oil didn’t seep in, you might not have cut enough off the top. Cut a bit more next time. Getting it right builds your kitchen confidence. Perfect roasting gives you that sweet, buttery flavor we love.
Which of these problems have you run into before?
Your Roasted Garlic Questions, Answered
Q: Is this gluten-free? A: Yes, it is naturally gluten-free.
Q: Can I make it ahead? A: Absolutely! It stores beautifully for a week.
Q: Can I use a different oil? A: Use any mild oil you like. Avocado oil works well.
Q: Can I roast many heads at once? A: Yes, just give them space on the pan.
Q: Any optional tips? A: Add herbs like thyme to the foil packet. Fun fact: Roasting garlic makes it sweeter and easier to digest!
Which tip will you try first?
From My Kitchen to Yours
I hope you love this simple trick. Roasted garlic makes everything taste special. It is a little jar of kitchen magic.
I would love to see what you create. Share your photos with our community. Your ideas inspire all of us.
Have you tried this recipe? Tag us on Pinterest! Thank you for spending time in my kitchen today. Happy cooking!
—Anna Whitmore.

How to Series: How to Roast Garlic: A Simple Guide to Roasting Garlic
Description
Learn how to roast garlic to sweet, caramelized perfection! Easy tutorial for creamy, flavorful garlic paste.
Ingredients
Instructions
- Preheat your oven to 400 degrees F (200 degrees C).
- Remove the outer layers of paper skin from the garlic head, leaving enough to hold it together. Chop the top off the head to expose the cloves.
- Place the garlic head on a large piece of foil. Drizzle olive oil over the top, allowing it to seep into the cloves. Use your finger to smear the oil over all exposed garlic.
- Wrap the garlic head tightly in the foil. Place it in a baking dish and roast for 25-30 minutes. Start checking at 25 minutes to prevent burning.
- Carefully remove the softened cloves from the skin using a knife. They should be smooth, buttery, and spreadable.
Notes
- You can use the roasted garlic for compound butter, dips, or any recipe. The cut-off top piece can be roasted as well, but it may cook faster.


Leave a Reply