
My First Onion Bite
I first made these for my grandson, Leo. He was seven. He saw a big onion blossom at a restaurant. His eyes got so wide. I thought, “I can make those at home.” So I did.
My kitchen was a mess. But Leo’s smile was worth it. He ate three bites and said, “Grandma, you’re magic.” I still laugh at that. Cooking for someone you love matters. It turns food into a happy memory.
Why This Recipe Works
Let’s talk about the coating. The mix of flour and cornstarch is the secret. Flour gives it a base. Cornstarch makes it extra crispy. It’s a perfect team.
The buttermilk is important too. It makes the onions tender. It also helps the flour stick. This matters because you want crunch in every bite. What’s your favorite crunchy snack? Tell me in the comments.
Let’s Get Cooking
First, cut your onions into wedges. Gently separate the layers. This makes perfect little boats for the batter. Now, mix all your dry stuff in a bowl. Doesn’t that smell amazing? Paprika and garlic powder are my friends.
Pour buttermilk over the onions. Give them a gentle toss. Then, dip each piece into the flour mix. Press lightly so it sticks. This part is fun. It’s a little messy, and that’s okay.
The Sizzle and Fry
Heat your oil in a deep pot. You need it nice and hot. A little piece of batter should sizzle right away. *Fun fact: The right heat seals the coating. This keeps the onion inside sweet and soft.*
Fry in small batches. Do not crowd the pot. They need room to dance. Fry until they are golden brown. It only takes a few minutes. Then let them drain on paper towels.
Time to Share
Serve these bites right away. They are best hot and crispy. We love ranch dip at my house. But spicy mayo is good too. What dipping sauce would you choose? Ranch, spicy mayo, or something else?
This recipe is more than a snack. It’s about sharing something fun. Food brings people together. That’s the real magic. Do you have a food that makes you think of a happy time? I’d love to hear your story.
Ingredients:
| Ingredient | Amount | Notes |
|---|---|---|
| Sweet onions | 2 large | peeled and cut into bite-sized wedges |
| All-purpose flour | 1 cup | |
| Cornstarch | 1/2 cup | |
| Paprika | 1 teaspoon | |
| Garlic powder | 1 teaspoon | |
| Onion powder | 1/2 teaspoon | |
| Salt | 1/2 teaspoon | |
| Black pepper | 1/4 teaspoon | |
| Cayenne pepper | 1/4 teaspoon | optional |
| Buttermilk | 1 cup | |
| Vegetable oil | for frying | about 2 inches deep in the pot/pan |
My Crispy Onion Bites Story
Hello, my dear. Pull up a chair. Let’s talk about crispy onions. My grandson calls these “awesome blossoms.” I just call them delicious. We make them for game nights. The whole house smells like a happy fair.
It’s a simple recipe. You just need a few bowls and some oil. The trick is in the coating. That mix of flour and cornstarch is magic. It makes each bite so light and crunchy. Doesn’t that sound wonderful?
I’ll walk you through it step-by-step. It’s like we’re cooking together in my kitchen. I still laugh at the first time I made these. I wore my nice apron. I got flour everywhere! But the result was worth it. Let’s begin.
Step 1: First, get your onions ready. Peel two big sweet ones. Cut them into wedges. Then gently pull the layers apart. You want little bite-sized pieces. This helps the coating stick to every surface. It makes them extra crispy.
Step 2: Now, mix your dry stuff. Grab a big bowl. Put in the flour and cornstarch. Add all those lovely spices. The paprika gives it a nice color. Whisk it all together. (My hard-learned tip: mix the dry stuff well before adding the onions. No one wants a bite with only pepper!)
Step 3: Time for the buttermilk bath. Pour it over your onion pieces. Toss them gently with your hands. Make sure each piece gets wet. This is the glue for our crispy coating. It’s a messy job, but fun.
Step 4: Now, coat those onions. Take a few wet pieces from the bowl. Drop them into your flour mix. Press the coating on lightly. You want every nook and cranny covered. Shake off the extra flour. Do you know what the cornstarch does? It makes them super crispy! Share below!
Step 5: Heat your oil next. Use a deep pot. You need about two inches of oil. Heat it to 350 degrees. If you don’t have a thermometer, test it. Drop in a tiny bit of batter. It should sizzle right away.
Step 6: Carefully fry the onions. Do not crowd the pot. Fry them in small batches. They need room to swim. Cook for 2-3 minutes. They will turn a perfect golden brown. Doesn’t that smell amazing?
Step 7: Last step! Take them out with a slotted spoon. Let them drain on paper towels. This soaks up the extra oil. Then serve them right away. They are best when they are hot and crunchy.
Cook Time: 15 minutes
Total Time: 30 minutes
Yield: 4-6 servings
Category: Appetizer, Snack
Three Fun Twists to Try
Once you master the basic recipe, try a little twist. It keeps things exciting. Here are three of my favorites. They are all simple changes.
Spicy Kick: Add an extra teaspoon of cayenne to the flour. It gives a warm, happy heat. Perfect for those who like a little fire.
Herb Garden: Mix two tablespoons of dried parsley into the flour. It adds a fresh, green flavor. It looks pretty too.
Cheesy Bliss: Stir a half cup of grated parmesan into the dry mix. It makes the coating rich and savory. My grandkids love this one.
Which one would you try first? Comment below!
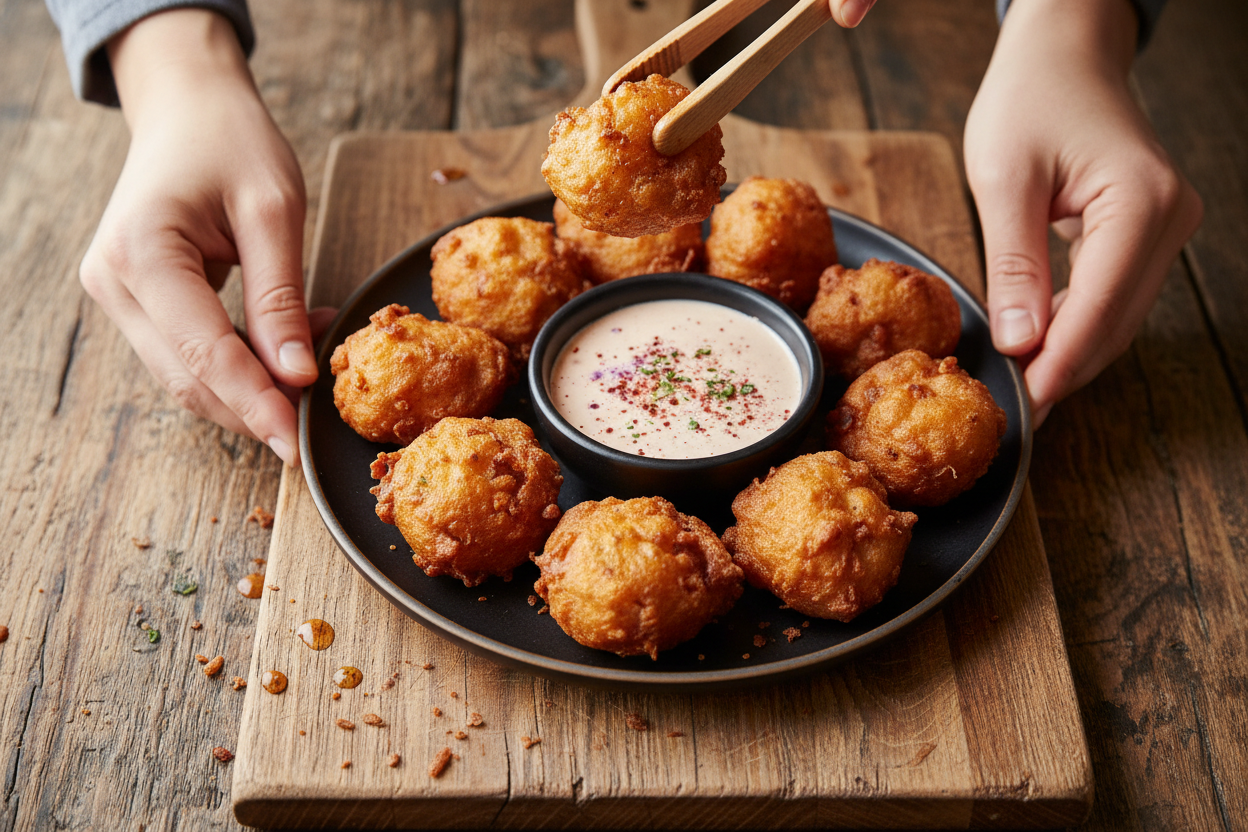
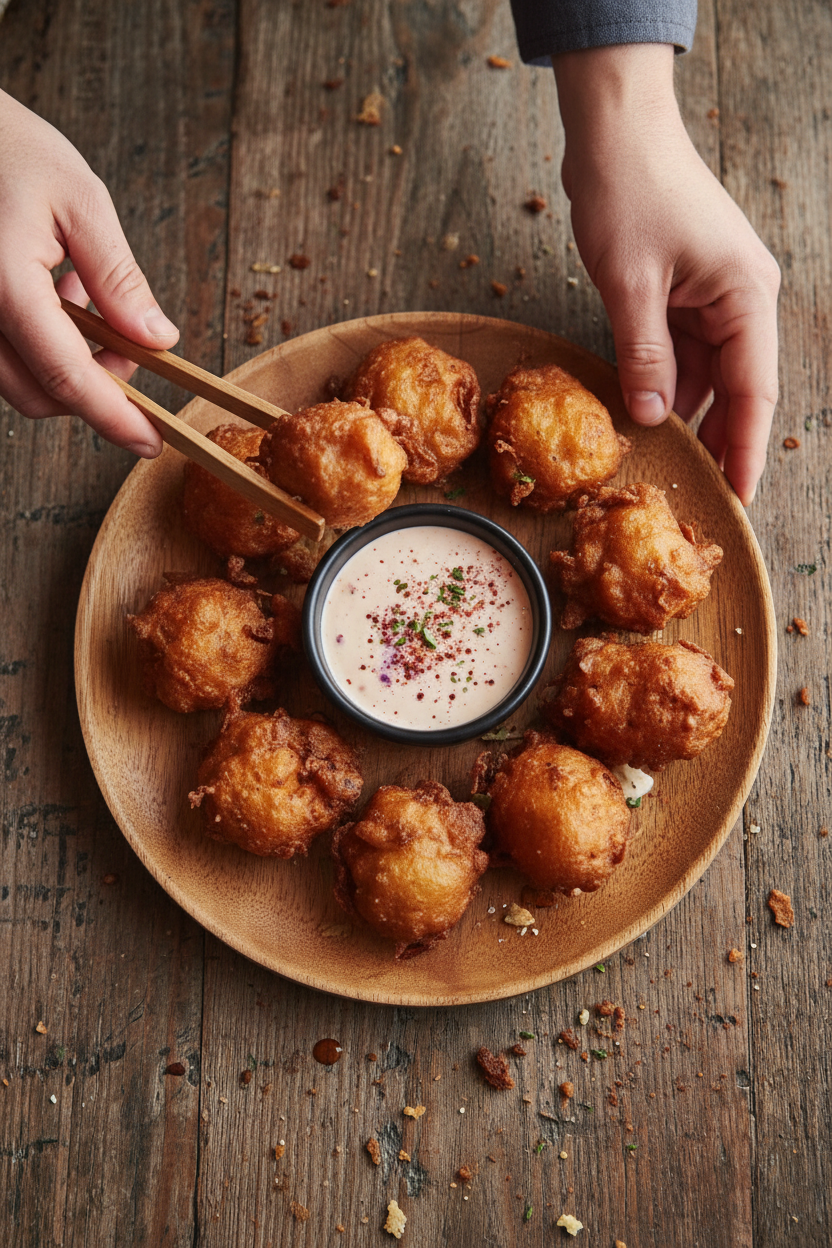
Serving Your Masterpiece
These bites are stars on their own. But I love to make a little plate. It feels special. Put them in a wide bowl or on a platter. Scatter some fresh parsley around for color.
For dipping, ranch dressing is a classic. A spicy mayo is also wonderful. Just mix mayo with a dash of hot sauce. Serve with crisp carrot sticks. They are a nice fresh break between bites.
What to drink? A cold, fizzy lemonade is perfect. It cuts through the richness. For the grown-ups, a light lager beer pairs beautifully. It’s crisp and refreshing. Which would you choose tonight?
Keeping Your Onion Bites Crispy
Let’s talk about storing these tasty bites. First, they are best eaten right away. But life happens! To store them, let them cool completely on a rack.
Then place them in a single layer in the fridge. They will keep for a day or two. I don’t recommend freezing them. The coating gets soggy when thawed.
To reheat, use your oven. Spread bites on a baking sheet. Heat at 375°F for about 10 minutes. This brings back the crunch. My first time, I used the microwave. What a soggy mess that was!
Batch cooking is a smart move for parties. Fry all your onions ahead of time. Then reheat just before guests arrive. This saves you so much fuss later. Planning ahead matters. It lets you enjoy your own party.
Have you ever tried storing it this way? Share below!
Fixing Common Onion Bite Troubles
Sometimes the coating falls off. This happens if the oil is not hot enough. Always check the temperature with a thermometer. I remember when my first batch was bare. The oil was too cool!
Another issue is soggy bites. Do not crowd the pan. Fry in small batches. This keeps the oil temperature steady. Getting a good crisp matters. It makes the texture so much more fun to eat.
The bites might burn quickly. Your heat is likely too high. Adjust it between batches. Cooking with control matters. It builds your confidence in the kitchen. You learn to trust your eyes and nose.
Which of these problems have you run into before?
Your Onion Bite Questions, Answered
Q: Can I make these gluten-free?
A: Yes! Use a gluten-free flour blend instead of all-purpose flour.
Q: Can I make the batter ahead?
A: You can mix the dry ingredients a day early. But coat the onions just before frying.
Q: What if I don’t have buttermilk?
A: Mix 1 cup milk with 1 tablespoon lemon juice. Let it sit for 5 minutes.
Q: Can I double the recipe?
A: Absolutely. Just use a very large pot for frying. Fry in more, smaller batches.
Q: Is the cayenne pepper very spicy?
A: It adds just a little warmth. You can leave it out for mild bites. *Fun fact: Paprika adds more color than heat!*
Which tip will you try first?
From My Kitchen to Yours
I hope you love making these onion bites. They always remind me of summer picnics. The sound of sizzling oil is a happy sound.
I would love to see your creations. Did your family gobble them up? Share a picture of your golden-brown batch.
Have you tried this recipe? Tag us on Pinterest! You can find me at @AnnasKitchenNook. Thank you for cooking with me today.
Happy cooking!
—Anna Whitmore.

Awesome Blossom Onion Bites Recipe for Crispy Appetizers
Description
Crispy, golden onion bites that taste just like the restaurant appetizer! Easy homemade recipe with a spicy dipping sauce. Perfect party snack.
Ingredients
Batter & Coating
For Frying
Instructions
- Prepare Onions: Place the onion wedges in a large bowl and gently separate the layers to create bite-sized pieces ideal for coating and frying.
- Mix Dry Ingredients: In a separate bowl, whisk together the all-purpose flour, cornstarch, paprika, garlic powder, onion powder, salt, black pepper, and cayenne pepper if using to create a flavorful coating mix.
- Coat Onions in Buttermilk: Pour the buttermilk over the onion wedges and toss them gently ensuring each piece is evenly coated with the buttermilk.
- Dredge Onions in Flour Mixture: Working in batches, dip the buttermilk-coated onion wedges into the flour mixture, pressing lightly so the coating adheres well to every layer.
- Heat Oil for Frying: Heat approximately 2 inches of vegetable oil in a deep skillet or pot to 350°F (175°C), making sure the oil is hot enough to achieve a crispy exterior.
- Fry Onion Bites: Carefully place the coated onion wedges in the hot oil in batches. Fry for 2 to 3 minutes, turning occasionally, until the bites are golden brown and crispy.
- Drain Excess Oil: Remove the fried onion bites with a slotted spoon and place them on paper towels to drain excess oil.
- Serve: Serve the awesome blossom onion bites hot with your favorite dipping sauces such as spicy mayo, ranch, or bloom sauce for an irresistible appetizer.
Notes
- For best results, serve immediately while hot and crispy. The cayenne pepper can be adjusted or omitted to control the spice level.


Leave a Reply