
My First Custard Disaster
I tried making custard when I was young. I did not whisk enough. I ended with sweet, lumpy milk soup. I still laugh at that.
It taught me a good lesson. Patience is your best friend in the kitchen. Rushing only makes a mess. This matters because cooking is about trying again.
Why We Whisk and Whisk
You might get tired of whisking. I know I do. But do not stop too soon. That constant motion keeps everything smooth.
It stops the eggs from turning into scrambled bits. It makes the custard silky and perfect. Doesn’t that sound better than lumpy soup? What kitchen task tries your patience the most?
The Magic of Simple Things
Look at the ingredients. Just milk, eggs, sugar, and vanilla. They are simple, plain things. But together, they create magic.
This matters because it shows how wonderful simple food can be. You do not need fancy stuff to make something special. *Fun fact*: Vanilla comes from a delicate orchid flower.
That Wonderful Smell
As the custard cooks, a smell fills the kitchen. It is warm and sweet. It smells like a big, cozy hug.
Doesn’t that smell amazing? It is one of my favorite parts of cooking. That smell tells you something good is coming. What smell makes you feel happy and safe?
Your Turn to Make It
Now you can try. Follow the steps, but do not worry. If it is not perfect, that is okay. My first one was not perfect either.
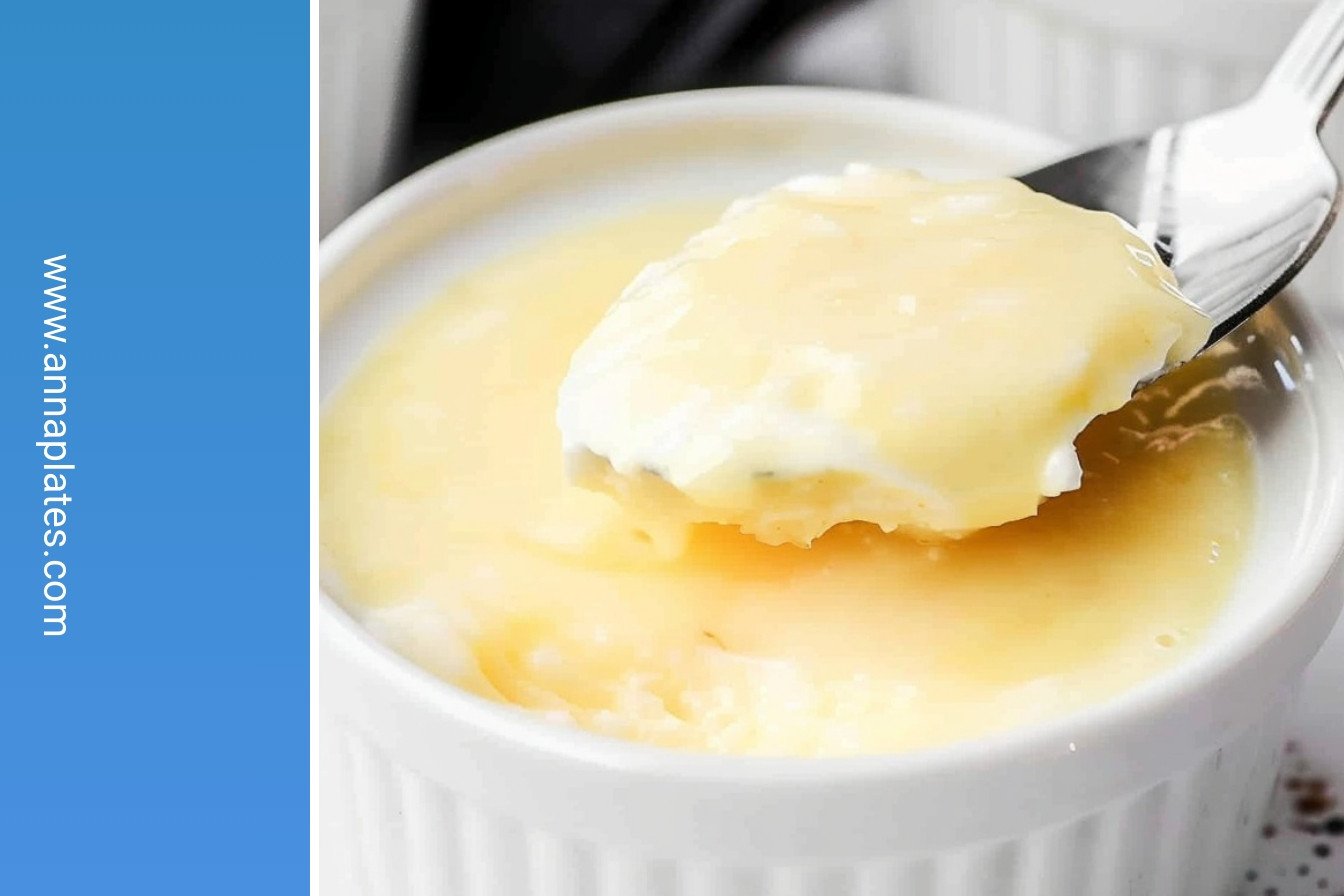
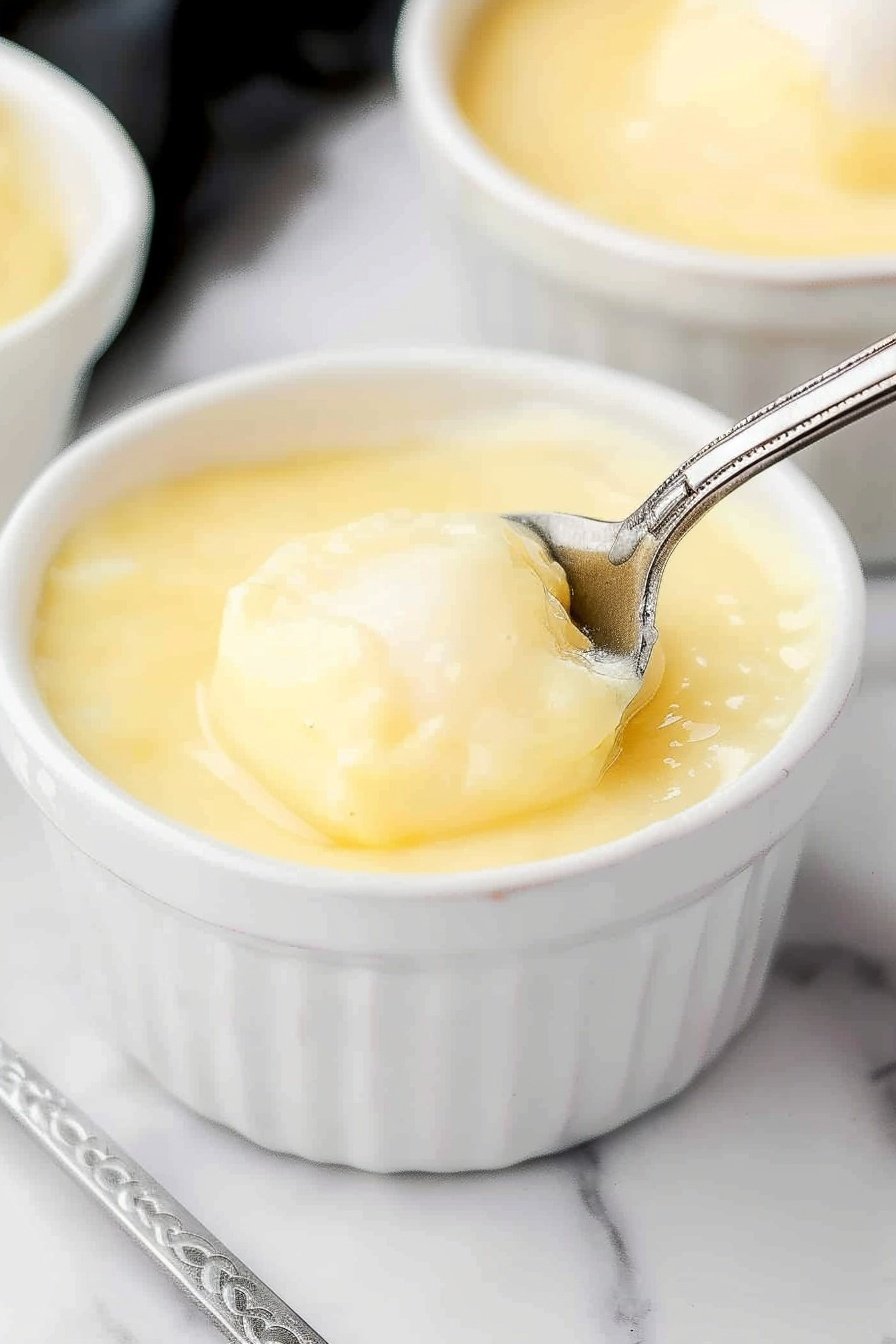
The most important step is covering it with plastic. Press it right on the surface. This stops a thick skin from forming on top. Are you a fan of the custard skin, or do you like it smooth?
Ingredients:
| Ingredient | Amount | Notes |
|---|---|---|
| granulated sugar | ½ cup | |
| granulated sugar | 2 tablespoons | |
| cornstarch | 3 tablespoons | |
| whole milk | 2½ cups | |
| pure vanilla extract | 2 teaspoons | |
| extra-large egg yolks | 4 | or 3 jumbo egg yolks, room temperature, slightly beaten |
| salted sweet cream butter | 1 tablespoon |
My Grandmother’s Silky Smooth Custard
I have loved custard since I was a little girl. My own grandmother taught me how to make it. She would say, Anna, the secret is in the whisk. I still think of her every single time I make this. Your kitchen will smell so warm and sweet. Doesn’t that smell amazing?
This recipe is like a big, warm hug in a bowl. It’s not hard, but you must pay close attention. Just follow these steps with me. You will end up with the smoothest, most delicious custard. I promise it is worth the little bit of work.
Step 1: Grab a good, heavy saucepan. Put your sugar, cornstarch, and milk right in. Now, start whisking over medium heat. Keep whisking until you see little bubbles. The mixture will get thicker. This takes about 6 to 8 minutes. It feels like a little arm workout!
Step 2: Take the pan off the heat. Now, scoop out about one cup of the hot milk. Pour it slowly into your beaten egg yolks. Whisk it together quickly. This warms the eggs up so they don’t scramble. (My hard-learned tip: Pour slowly and whisk fast! No one wants sweet scrambled eggs.)
Step 3: Pour that egg mixture back into the saucepan. Put it back on the heat. Keep whisking for another two to three minutes. You will feel it get even thicker. This is when the magic really happens. It becomes a proper custard.
Step 4: Remove the pan from the stove again. Whisk in the butter and vanilla. The butter makes it extra rich. The vanilla makes the whole house smell like heaven. I always take a deep breath right here. What’s your favorite sweet smell in the kitchen? Share below!
Step 5: Now, pour your custard through a fine-mesh sieve into a bowl. This catches any little lumps. It makes the custard perfectly smooth. My grandmother was very strict about this step. I still laugh at that.
Step 6: Pour the custard into your serving bowls. Press plastic wrap right onto the surface. This stops a thick skin from forming on top. Then, the hard part—waiting! Let it chill in the fridge for two hours.
Cook Time: 15 minutes
Total Time: 2 hours 20 minutes
Yield: 6 servings
Category: Dessert
Three Fun Twists on Classic Custard
Once you master the basic recipe, you can have some fun. I love to mix in different flavors. It makes a simple dessert feel brand new. Here are a few of my favorite ideas to get you started.
Orange Dreamsicle: Add the zest of one orange with the vanilla. It tastes just like the frozen treat from my childhood.
Chocolate Swirl: Melt some chocolate chips. Swirl it into the custard right before you chill it.
Berry Surprise: Place a few fresh raspberries at the bottom of each bowl before you pour the custard in.
Which one would you try first? Comment below!
Serving Your Beautiful Custard
This custard is wonderful all on its own. But you can make it extra special. I like to top it with a few fresh berries. A sprinkle of cinnamon is lovely too. For a real treat, add a crunchy shortbread cookie on the side.
What should you drink with it? A cup of hot tea is my go-to. It’s a perfect non-alcoholic pairing. For a special night, a little glass of sweet dessert wine is just right. The flavors dance together so nicely.
Which would you choose tonight?

Keeping Your Custard Happy
This custard loves a cool, cozy fridge. Pour it into a bowl and press plastic wrap right on top. This stops a rubbery skin from forming. It will be perfect for up to three days.
You can freeze it for a month, but the texture changes. It becomes a bit icy. I think it is best fresh from the fridge. I once left a bowl uncovered overnight. The top was like a leathery blanket. We had to scrape it off.
Making a big batch saves you time later. You can enjoy a sweet treat all week. This matters because a ready-made dessert makes any day feel special. Have you ever tried storing it this way? Share below!
Simple Fixes for Common Custard Troubles
Is your custard lumpy? Do not worry. Just push it through a fine sieve. The sieve catches all the little cooked egg bits. You will have a smooth pudding.
If it is too thin, you might not have cooked it enough. It needs to bubble gently to get thick. I remember when I rushed mine. It was like sweet milk. Getting the thickness right matters for that classic, creamy feel.
A scrambled egg texture means the heat was too high. Always temper your eggs with the hot milk first. This step matters because it gently warms the eggs. It keeps everything silky. Which of these problems have you run into before?
Your Custard Questions Answered
Q: Is this custard gluten-free? A: Yes, it is. Cornstarch is naturally gluten-free.
Q: Can I make it ahead? A: Absolutely. Make it two days before you need it.
Q: What if I only have small eggs? A: Use five small egg yolks instead of four large ones.
Q: Can I double the recipe? A: You can. Just use a bigger pot to stir it.
Q: Any extra tips? A: A sprinkle of nutmeg on top is lovely. Fun fact: Vanilla comes from a special orchid bean. Which tip will you try first?
From My Kitchen to Yours
I hope you love making this custard. It is a simple, comforting joy. Share your beautiful creations with everyone.
I would be so happy to see your finished dessert. A picture tells a wonderful story. Have you tried this recipe? Tag us on Pinterest!
Happy cooking!
—Anna Whitmore.
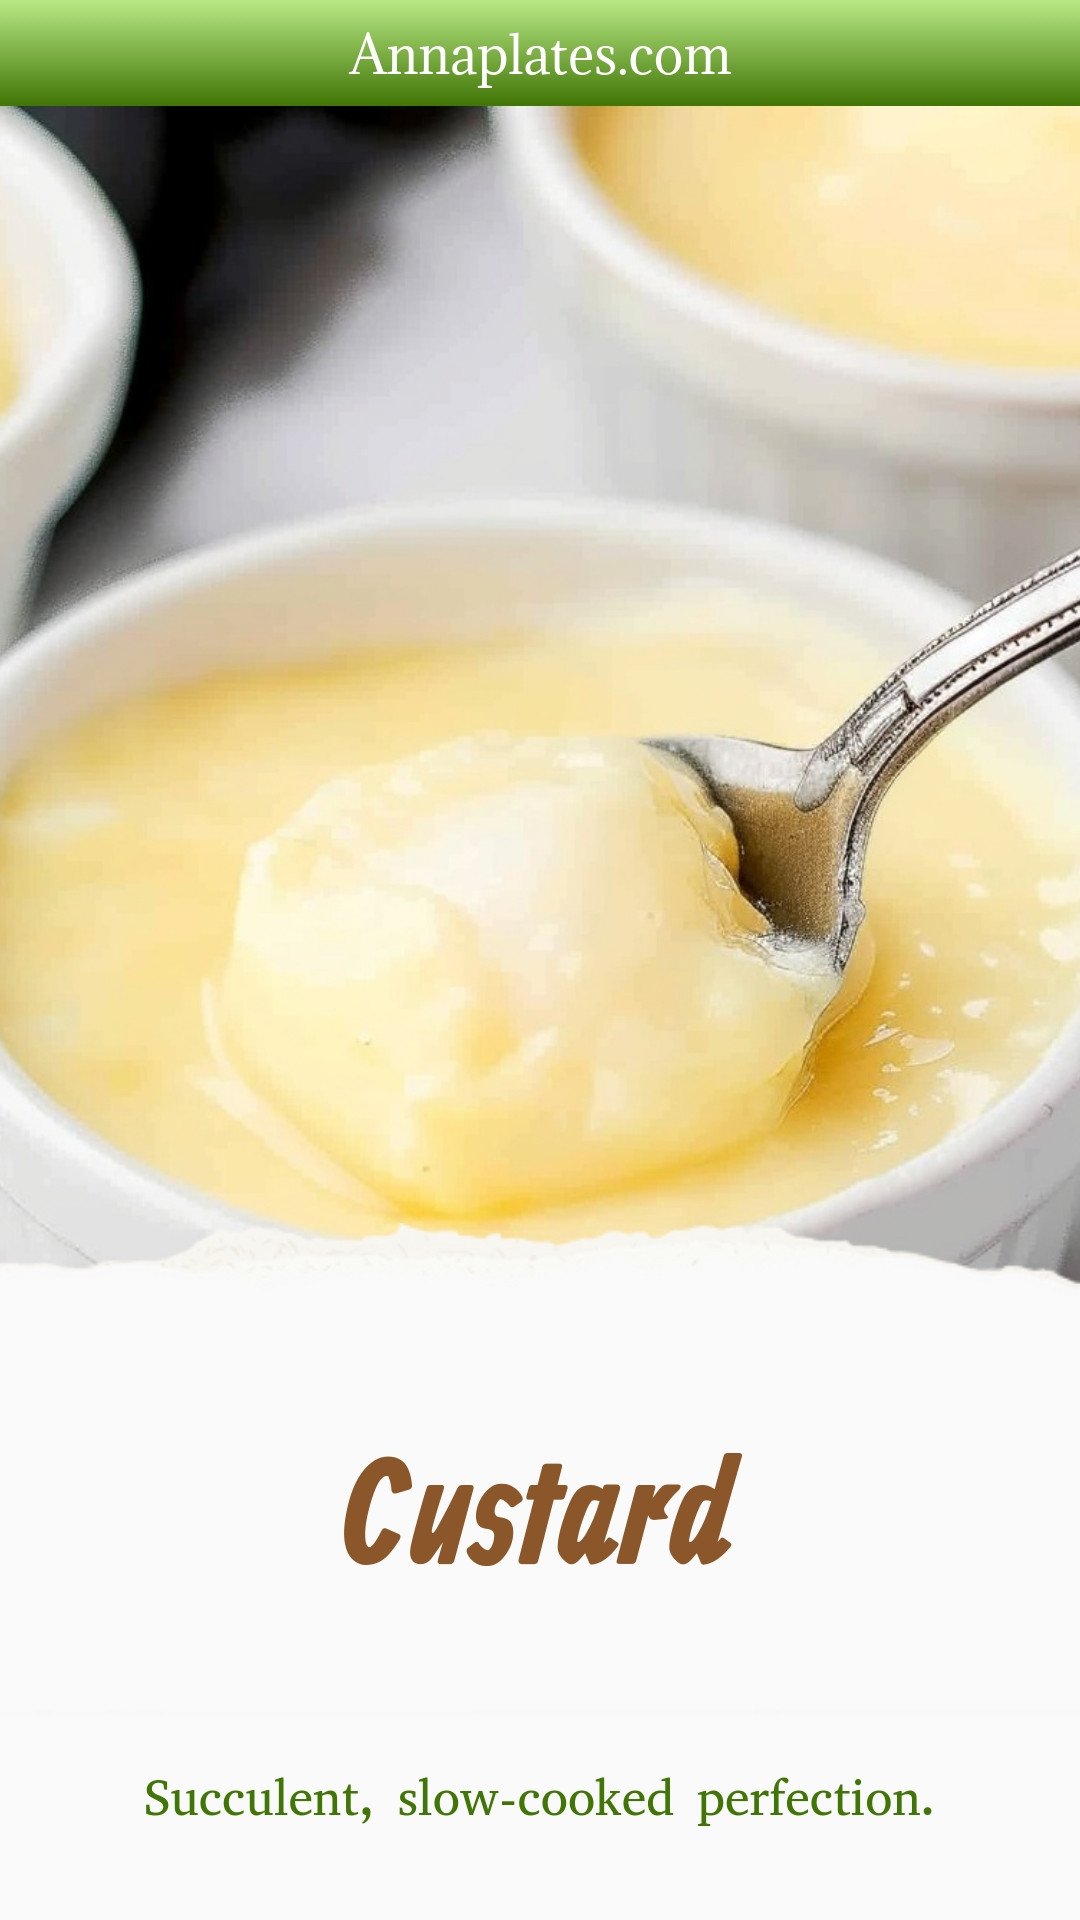
Custard: Succulent, slow-cooked perfection.
Description
Discover the creamiest, dreamiest custard recipes! From classic vanilla to creative twists, find your perfect dessert inspiration. Easy, delicious, and always a hit.
Ingredients
Instructions
- Using a 3 to 4 quart heavy-bottom saucepan over medium heat, add the granulated sugar, cornstarch and milk, and whisk. Whisk continually until the mixture reaches a low bubble and begins to thicken, about 6 to 8 minutes.
- Remove the saucepan from the heat, and whisk 1 cup of the mixture into the egg yolks.
- Whisk the egg yolk mixture back into the custard, and return the saucepan to the heat. Continue whisking for another 2 to 3 minutes.
- Remove the saucepan from the heat. Whisk in the butter and the vanilla.
- Strain the custard through a fine-mesh sieve.
- Pour the custard into a heat-safe medium-size bowl or your individual serving bowls. Cover the bowl or bowls with plastic wrap, making sure to allow the plastic wrap to cover the surface of the custard to keep a “skin” from forming. Refrigerate for 2 hours before serving.


Leave a Reply