

A Minty Memory
My grandson Sam helped me test this recipe. He crushed the Oreos with such focus. His face lit up when we added the green food coloring. “It’s like edible slime, Grandma!” he said. I still laugh at that.
This dessert is special. It’s not about being perfect. It’s about the fun you have making it. That’s why this matters. The mess and the laughter are part of the flavor. What’s your favorite kitchen memory with someone?
Why It’s So Easy
No baking! That’s the best part. You just mix and chill. The hardest part is waiting those two hours. Doesn’t that smell amazing? The mint fills the whole kitchen.
Using glasses is my little trick. It means no slicing. Everyone gets their own perfect little jar of joy. *Fun fact: The “Grasshopper” name comes from a classic mint-chocolate cocktail!*
The Flavor Dance
Let’s talk about that chill time. This is important. Why does it matter? It lets the mint soften into the cream cheese. The crust gets a little damp and chewy. All the flavors become friends.
The Peppermint Patties are the surprise. You get little chewy, chocolatey bits. They play off the crunchy Oreo crust. It’s a happy party in your mouth. Do you like more chocolate or more mint in your desserts?
Make It Your Own
The toppings are your playground. I sometimes skip the extra whipped cream. I just sprinkle on more cookie crumbs. It looks like a little garden.
The Creme de Menthe syrup is in the ice cream aisle. A tiny drizzle makes it fancy. But it’s just as good without. This recipe is for you, not for a fancy magazine. What topping would you invent for this?
A Sweet Little Lesson
Sam taught me something that day. He didn’t care if our cheesecakes looked messy. He just wanted to lick the spoon. I worry too much about things being pretty.
Food made with a happy heart always tastes best. That’s the real secret ingredient. It’s a good lesson for cooking and for life. Now, go make a sweet mess. I know you’ll love it.
Ingredients:
| Ingredient | Amount | Notes |
|---|---|---|
| Mint Oreo Cookies, crushed | 6 cookies | For the crust |
| Butter, melted | 2 teaspoons | For the crust |
| Cream cheese, softened | 8 ounces | For the cheesecake |
| Peppermint Patties, crushed or chopped | ½ cup | For the cheesecake |
| Mint extract | 1 teaspoon | For the cheesecake |
| Green food coloring | ½ teaspoon | For the cheesecake |
| Whipped topping, room temperature | 8 ounces | For the cheesecake |
| Whipped topping | – | Optional, for garnish |
| Creme De Menthe Syrup | – | Optional, for topping |
| Chocolate shavings | – | Optional, for topping |
| Chopped peppermint patties | – | Optional, for topping |
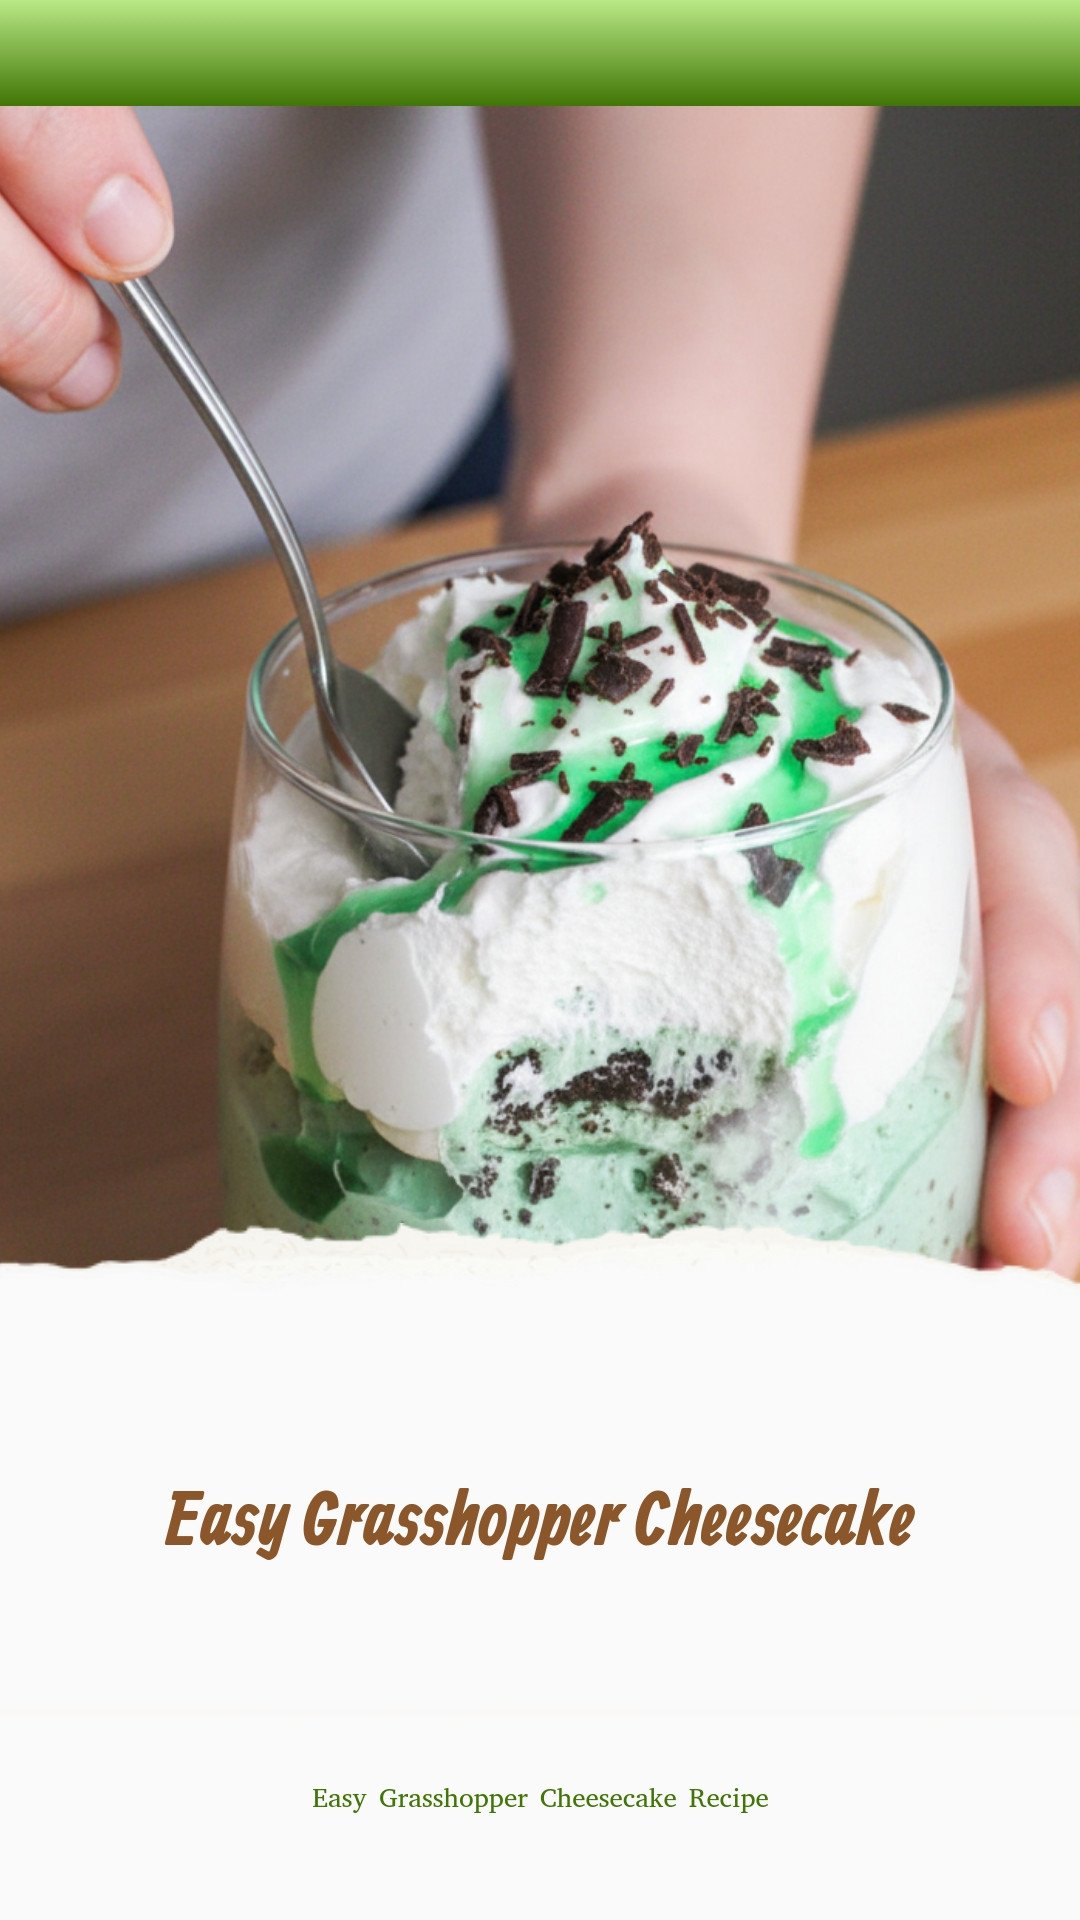
My Easy Grasshopper Cheesecake in a Glass
Hello, my dear! Come sit at the counter. Let’s make something fun. Today, we’re making my Easy Grasshopper Cheesecake. It tastes like a cool, minty cloud. I think of my granddaughter every time I make it. She calls it “The Leprechaun Dessert.” I still laugh at that.
We make it right in little glasses. No oven needed! It’s perfect for a hot day. The green color just makes me smile. Doesn’t that smell amazing? The mint is so fresh. Let’s begin our little project together.
- Step 1: First, we make the crust. Crush six Mint Oreos in a bag. A rolling pin works great for this. Mix the crumbs with melted butter. It will feel like damp sand. Press it into the bottom of two glasses. I use my fingers. Then, pop them in the fridge to chill.
- Step 2: Now for the fluffy filling. Beat the soft cream cheese and whipped topping. Keep going until it’s perfectly smooth. Add a teaspoon of mint extract. Then, just a drop or two of green food coloring. Fold in your chopped Peppermint Patties. (A hard-learned tip: Let the topping sit out first. If it’s too cold, it will be lumpy!).
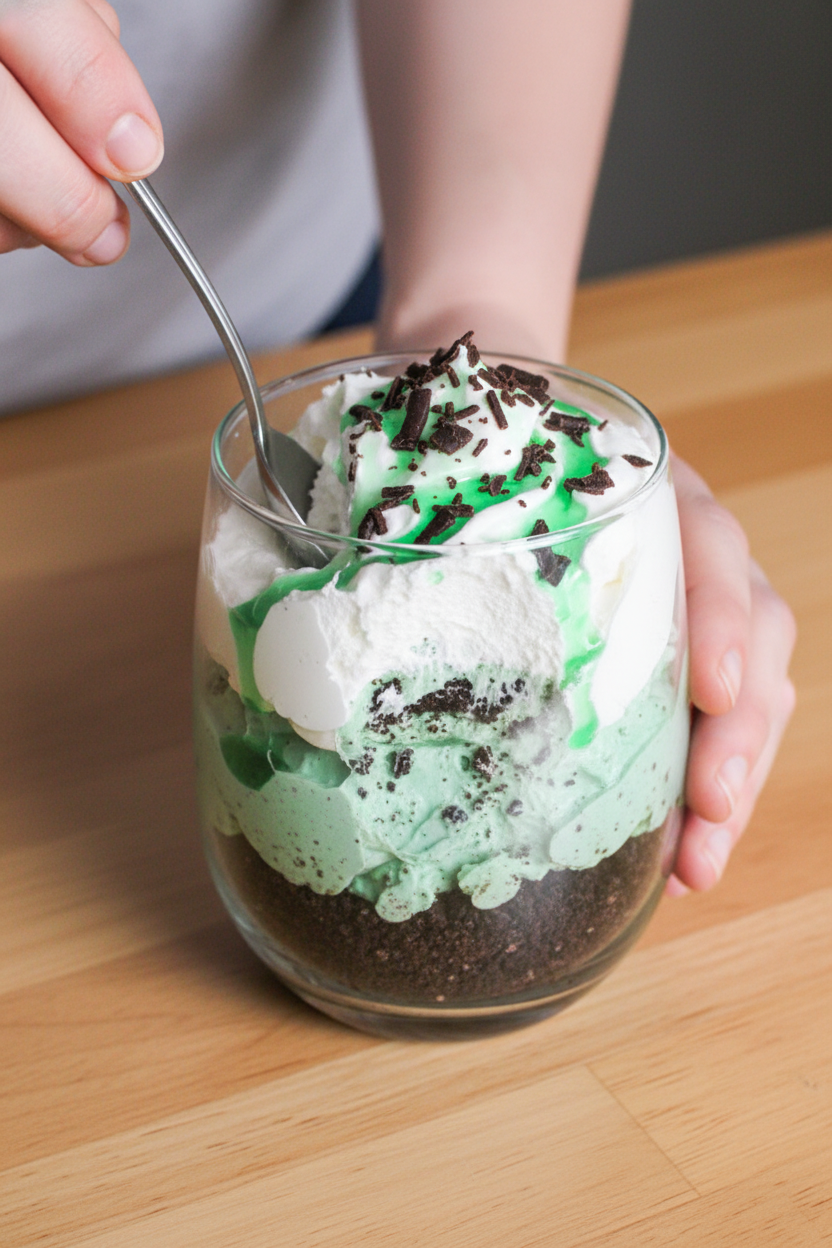
- Step 3: Take your glasses from the fridge. Spoon the green filling on top. I sometimes use a fancy bag to pipe it. But usually, I just spoon it in. It tastes the same! Cover them with plastic wrap. They need a long nap in the fridge. Wait at least two hours. This lets the flavors become good friends.
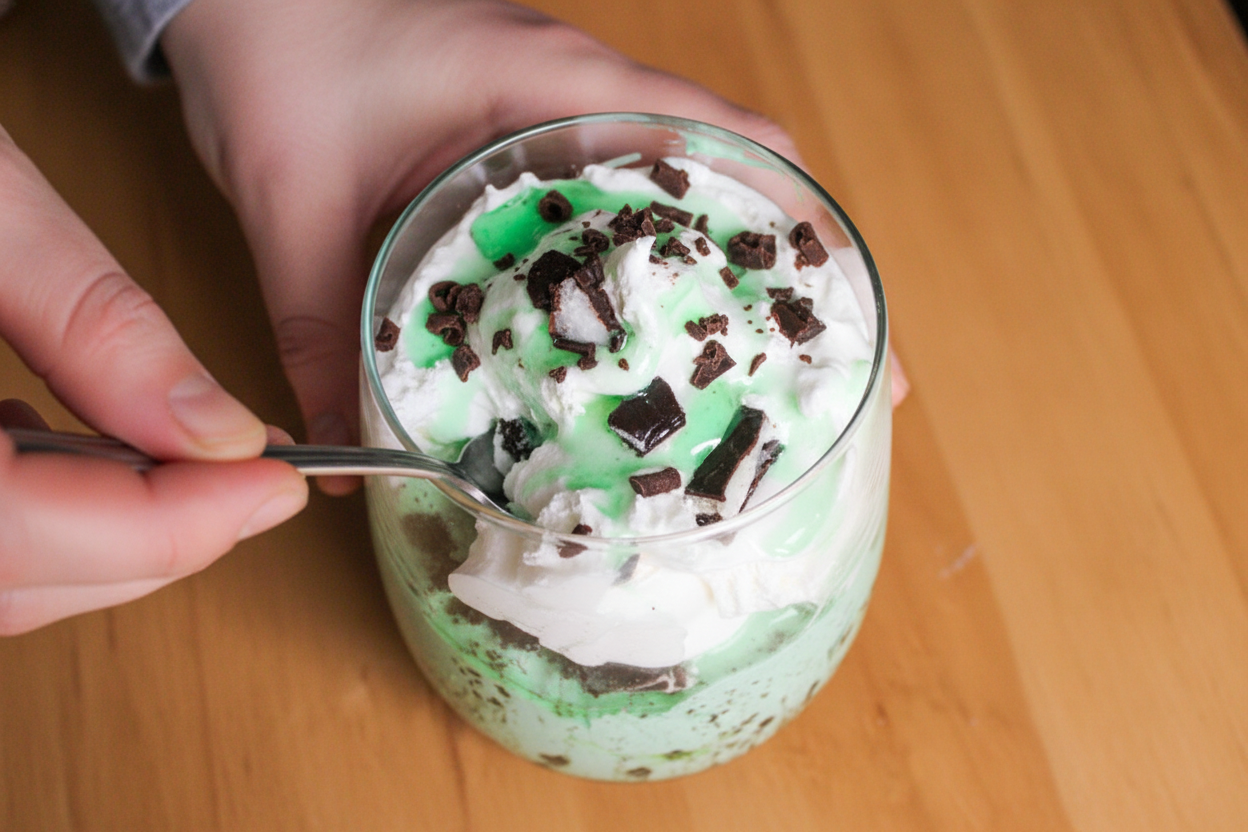
- Step 4: The fun part is the decoration! Add a dollop of extra whipped cream. Sprinkle on some chocolate shavings. A little extra crushed candy looks lovely. A drizzle of Creme de Menthe syrup is magic. It makes it look like a fancy restaurant dessert. What’s your favorite candy to crush for toppings? Share below!
Cook Time: 2 hours (chilling)
Total Time: 2 hours 20 minutes
Yield: 2 generous servings
Category: Dessert, No-Bake
Three Fun Twists to Try
This recipe is like a friendly base. You can play with it! Here are three ideas. They are all very simple. I’ve tried each one with my own family.
- Chocolate Lover’s Swap: Use regular Oreos for the crust. Skip the green food coloring. Add mini chocolate chips instead of the patties.
- Peppermint Sparkle: Perfect for December! Use a candy cane, crushed finely. Mix it right into the filling. It gives a little red sparkle and crunch.
- Brownie Bottom: Make a small pan of brownies. Let them cool. Crumble a layer into the glass first. Then add the Oreo crust and mint filling. So rich!
Which one would you try first? Comment below!
Serving It With Style
These little glasses are already pretty. But you can make them special. Serve them on a small plate. Place a thin chocolate cookie on the side. A fresh mint leaf on top looks so elegant. It’s a nice little touch.
What to drink? A cold glass of milk is always the best friend to dessert. For the grown-ups, a small cup of strong coffee is wonderful. The bitter coffee and sweet mint are a perfect pair. Which would you choose tonight?
Keeping Your Cheesecake Fresh and Fabulous
This easy grasshopper cheesecake loves the cold. The fridge is its best friend. Keep it covered tightly with plastic wrap. It will stay perfect for up to three days. You can also freeze it for a sweet treat later. Just wrap the whole glass in foil first. Thaw it in the fridge overnight before eating.
I love making a double batch. It means dessert is ready for days. I once forgot to cover a batch. The top dried out a little. Now I always press that wrap right on the surface. Storing food well saves money and time. It means less waste and more happy moments. Have you ever tried storing it this way? Share below!
Simple Fixes for Common Cheesecake Hiccups
Is your filling too runny? Your cream cheese might be too cold. Let it soften on the counter first. I remember when mine wouldn’t mix smoothly. It was a lumpy mess! Soft cheese makes everything blend like a dream. This matters because smooth batter means a creamy, lovely bite.
Is the crust too crumbly? You may need a bit more butter. Try adding another half teaspoon. Press it down firmly with a spoon. A good crust gives your dessert a solid start. Not enough green color? Add food coloring one drop at a time. You can always add more, but you can’t take it away. Which of these problems have you run into before?
Your Quick Grasshopper Cheesecake Questions
Q: Can I make this gluten-free? A: Yes! Use gluten-free mint cookies for the crust.
Q: How far ahead can I make it? A: Make it up to two days ahead. The flavors get even better.
Q: What if I don’t have mint extract? A: Use a drop of peppermint oil instead. Be careful, it’s strong!
Q: Can I make one big cheesecake? A: Absolutely. Just press the crust into a small pie dish.
Q: Are the toppings needed? A: No, but they are fun. The syrup adds a nice minty kick. *Fun fact: The name “grasshopper” comes from the drink it’s based on, which is green!* Which tip will you try first?
From My Kitchen to Yours
I hope you love making this cool, minty dessert. It always makes me think of springtime. Cooking is about sharing joy and creating memories. I would be so delighted to see your creation. Have you tried this recipe? Tag us on Pinterest! You can find me at @AnnaWhitmoreEats. I love seeing your kitchen adventures. Thank you for spending time with me today.
Happy cooking!
—Anna Whitmore.
Easy Grasshopper Cheesecake: Easy Grasshopper Cheesecake Recipe
Description
No-bake mint chocolate cheesecake with an Oreo crust! This stunning and easy dessert is perfect for St. Patrick’s Day or any celebration.
Ingredients
For the Crust:
For the Cheesecake:
For the Topping (optional):
Instructions
- In a small bowl, mix the melted butter together with the crushed mint oreo cookies. Get your glasses and divide the cookie mixture between two glasses. Push the mixture down into the glasses to form the crust. Put them in the fridge while you are making the rest of the ingredients. (about 10 minutes or so)
- In a medium bowl, beat the cream cheese and whipped topping until smooth. Add the mint extract and green food coloring and mix to combine. Fold in the peppermint patties.
- Remove the glasses from the fridge.
- Spoon the filling on top of the oreo cookie crust. Sometimes I use my pastry bag to fill it so it looks pretty, but when we made these I didn’t care how “pretty” they looked. haha Cover them with some plastic wrap and put them back in the refrigerator for at least 2 hours before you serve them. This allows the flavors to marry each other and the cheesecake to firm up a bit.
- As an optional finish, add some whipped cream and then garnish with crumbled peppermint patties or more mint oreos and creme de menthe syrup (found with the ice cream toppings).
Notes
- Nutrition Facts: Calories: 511kcal, Carbohydrates: 47g, Protein: 7g, Fat: 34g, Saturated Fat: 21g, Polyunsaturated Fat: 2g, Monounsaturated Fat: 8g, Trans Fat: 0.1g, Cholesterol: 64mg, Sodium: 311mg, Potassium: 200mg, Fiber: 1g, Sugar: 37g, Vitamin A: 868IU, Calcium: 102mg, Iron: 2mg


Leave a Reply