

My First Flat Chicken
Let me tell you about my first spatchcocked chicken. I was so nervous. I thought I would ruin a good bird. But you know what? It was easy. My kitchen shears did all the work. I still laugh at that.
Cutting out the backbone lets the chicken lay flat. This matters because it cooks evenly. No more dry breast and raw legs! Have you ever tried spatchcocking before? Tell me if you were nervous too.
Why We Let It Rest
After grilling, we let the chicken sit for ten minutes. This is a very important step. I know it’s hard to wait. The smell is amazing!
Letting it rest matters. All the tasty juices settle back into the meat. If you cut it right away, the juice runs out. Then your chicken is dry. Patience makes perfect chicken.
Keeping It Simple
This recipe only needs oil and salt. That’s it. Good food doesn’t need a crowd of ingredients. The flavor comes from the grill and the crispy skin.
Fun fact: The word “spatchcock” is old. It comes from a phrase meaning “dispatch the cock,” or cook the chicken fast! A flat chicken cooks much quicker. Do you prefer simple salt or lots of herbs on your chicken?
The Secret is The Sizzle
Start with a very hot grill. Place the chicken skin-side down first. Listen for that sizzle. It’s a happy sound. It gives you that golden, crispy skin everyone loves.
Then you flip it and turn the heat down. This lets the inside cook without burning the outside. A meat thermometer is your best friend here. It tells you when it’s perfectly safe and juicy.
Your Turn at the Grill
This is a great recipe for a weekend. It feels like a celebration. You get a whole beautiful chicken on the table. It feeds a family with leftovers for tomorrow.
What’s your favorite thing to make on the grill? Is it chicken, or maybe something else? I love hearing your stories. Sharing food stories is how we learn. Now, go get that chicken flat and sizzling.
Ingredients:
| Ingredient | Amount | Notes |
|---|---|---|
| Whole chicken | 1 (4-6 pounds) | |
| Cooking Oil (high heat) | 3-5 tablespoons | Canola, vegetable, or refined olive oil work well |
| Kosher Salt | To taste |
My Secret for the Crispiest Grilled Chicken
Hello, my dear. Come sit at the table. Let’s talk about chicken. I used to struggle with grilling a whole bird. The legs would be raw, but the breast was dry as dust. It was so frustrating. Then I learned an old trick called spatchcocking. It sounds funny, doesn’t it? It just means flattening the chicken. This lets it cook evenly from end to end. Now it’s my favorite summer dinner. The skin gets so wonderfully crispy. I still smile when I pull it off the grill.
You only need a chicken, some oil, and salt. Good salt makes all the difference. Trust me on this. The method is simple. Just follow these steps. You’ll feel like a kitchen expert. What’s your favorite thing to cook on the grill? Share below!
- Step 1: Get your grill very hot. Pat your chicken dry with a paper towel. A dry chicken gets the crispiest skin. Place it breast-side down on your board. You’ll see the backbone. We will remove it. Don’t be nervous.
- Step 2: Use strong kitchen shears. Cut along each side of that backbone. Snip, snip! It comes right out. I save the backbone for soup stock. Now flip the chicken over. Press down firmly on the breastbone. Listen for a little crack. It will flatten nicely.
- Step 3: Drizzle oil all over the chicken. Rub it into every nook. Then, sprinkle salt generously. Use more than you think. (My hard-learned tip: Season it like a little snowfall. It makes the flavor just right.) Doesn’t that feel good? Cooking with your hands is the best part.
- Step 4: Place the chicken skin-side down on the hot grill. Hear that sizzle? That’s the sound of crispiness starting. Let it cook for about 10 minutes. Don’t peek too much. You want the skin golden and marked by the grill.
- Step 5: Carefully flip the chicken over. Turn the grill heat down to medium-low. Now let it cook through. This takes about half an hour. A meat thermometer is your best friend here. The breast should read 165°F. The thigh should be 180°F.
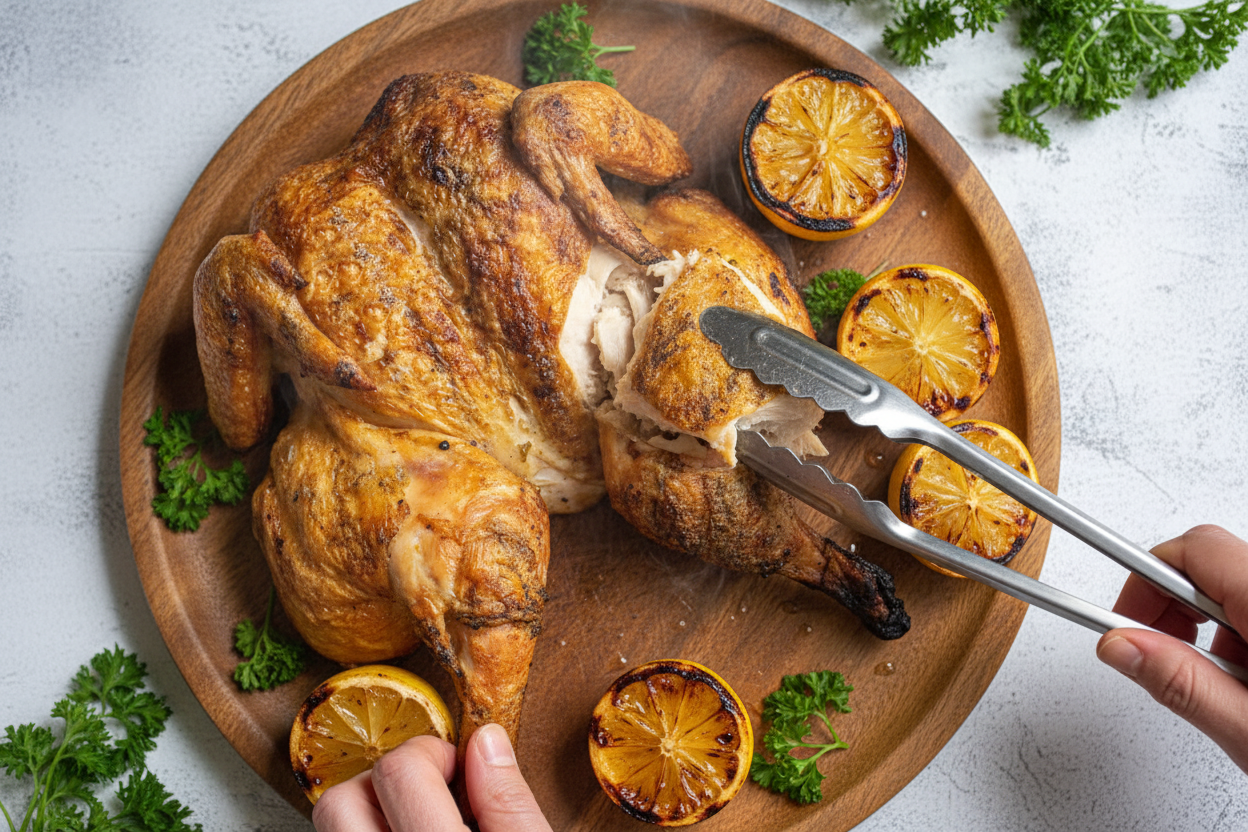
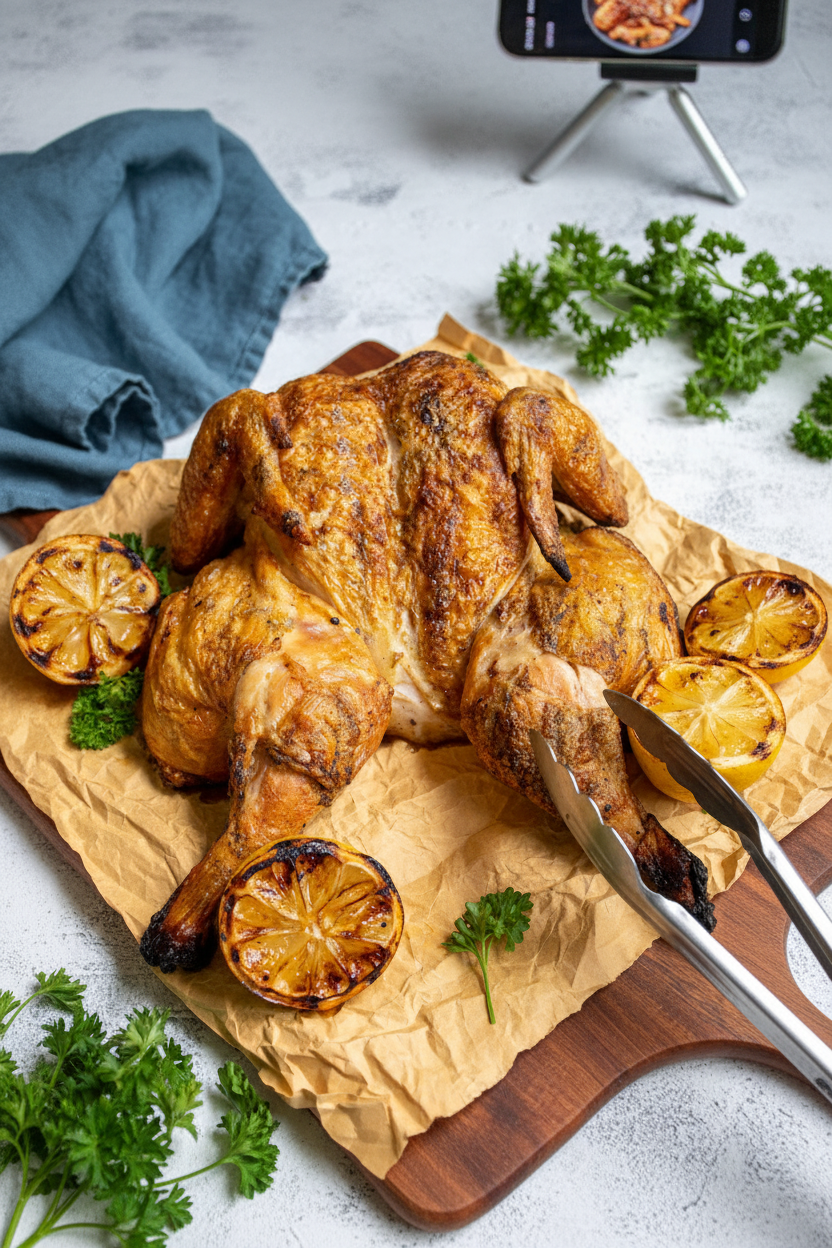
- Step 6: Move the chicken to a platter. Let it rest for 10 minutes. This keeps all the juicy goodness inside. Then carve it up and serve. Doesn’t that smell amazing? You did it!
Cook Time: 40-45 minutes
Total Time: 1 hour
Yield: 6 servings
Category: Dinner, Grilling
Three Fun Twists for Your Bird
This basic recipe is perfect. But sometimes, I like to play. Here are three easy ways to change the flavor. They are all wonderful. Try one next time.
- Lemon-Herb: Tuck thin lemon slices under the skin. Add fresh rosemary and thyme. It smells like a summer garden.
- Smoky & Spicy: Mix smoked paprika and a little garlic powder into the salt. It gives a warm, cozy kick.
- Sweet & Sticky: Brush the chicken with honey or maple syrup in the last 5 minutes. It makes a sweet, glossy glaze.
Which one would you try first? Comment below!
What to Serve With Your Chicken
This chicken is the star. But it needs good friends on the plate. I love simple, fresh sides. They make the meal feel special. A big green salad with tomatoes is perfect. Buttered corn on the cob is a must. Or some roasted potatoes that caught the drippings under the grill. Yum!
For a drink, lemonade is always my choice. It’s so refreshing. For the grown-ups, a chilled glass of rosé wine pairs beautifully. It just tastes like summer evening. Which would you choose tonight?
Keeping Your Grilled Chicken Happy Later
Let’s talk about leftovers. They are a gift to your future self. Once your chicken is cool, store it in the fridge. It will stay good for three to four days. You can also freeze it for up to three months. Wrap pieces tightly in foil first.
I love to make two chickens at once. One for dinner, one for later. This is called batch cooking. It saves so much time on a busy week. I remember my first time. I felt so clever having a ready-made meal.
To reheat, use your oven. Warm it at 350 degrees until hot. This keeps the skin from getting soggy. Storing food well means less waste and more easy meals. Have you ever tried storing it this way? Share below!
Fixing Common Grilling Hiccups
Grilling can have surprises. First, the skin might stick. Make sure your grill is very hot first. Also, pat the chicken very dry with a towel. I once flipped it too early. We had to gently peel it off!
Second, the chicken cooks unevenly. The breast can dry out. Flipping it skin-side down first protects the white meat. This matters because juicy chicken is the whole goal. Third, you might not have a thermometer. You really need one. It takes the guesswork out.
Knowing your chicken is safely cooked builds confidence. Fun fact: Spatchcocking helps the chicken cook evenly because it lays flat. Fixing small problems makes you a better cook. Which of these problems have you run into before?
Your Quick Questions, Answered
Q: Is this recipe gluten-free?
A: Yes, it is naturally gluten-free. Just check your salt label if you are very sensitive.
Q: Can I make it ahead?
A: You can spatchcock and salt the chicken a day early. Keep it covered in the fridge.
Q: What oil can I swap?
A: Any oil that handles high heat is fine. Avocado or grapeseed oil work well too.
Q: How do I feed more people?
A: Just grill two chickens side-by-side. The cooking time will be about the same.
Q: Any extra tips?
A: Let the chicken rest after cooking. This keeps all the tasty juices inside. Which tip will you try first?
My Kitchen Table to Yours
I hope you love this simple recipe. It reminds me of summer Sundays with my family. The smell of chicken on the grill is pure happiness. I would love to see your cooking adventures.
Share a picture of your golden-brown chicken. You can tag my blog on Pinterest. Let’s build a little community of good food right here. Have you tried this recipe? Tag us on Pinterest!
Happy cooking! —Anna Whitmore.

Grilled Spatchcocked Chicken (Spatchcocking Video) – The Schmidty Wife: Grilled Spatchcock Chicken Recipe with Video
Description
Learn how to spatchcock and grill the juiciest, most flavorful whole chicken with crispy skin. Perfect for easy weeknight dinners or weekend barbecues.
Ingredients
Instructions
- Preheat grill to high heat.
- Pat chicken dry with a paper towel. Place the chicken back bone side up on a cutting board. Use a sharp knife or kitchen shears to cut the backbone out of chicken. Once the backbone is out flip the chicken over and press down to lay flat.
- Drizzle with oil and rub over the chicken. Sprinkle the chicken generously with kosher salt.
- Place the chicken skin side down on the hot grill. Cook 8 – 10 minutes until the skin of the chicken appears golden brown.
- Carefully flip the chicken over and turn the grill down to medium-low. Cook another 30 to 35 minutes, this will depend fully on the size of your chicken having a nice meat thermometer is key. The breast should reach a temperature of at least 165º F and the thigh should reach a temerature of at least 180º F.
- Once done transfer the chicken to a platter and let rest 10 minutes before carving.
Notes
- Nutrition Information: Yield: 6, Serving Size: 1 breast, thigh, or drumstick, Calories: 259, Total Fat: 16g, Saturated Fat: 4g, Trans Fat: 0g, Unsaturated Fat: 10g, Cholesterol: 88mg, Sodium: 179mg, Carbohydrates: 0g, Fiber: 0g, Sugar: 0g, Protein: 27g


Leave a Reply