
My Kitchen Table Secret
I have a little secret. My grandkids think I’m a wizard. I just make their favorite cereal into a treat. It’s so simple. It makes them so happy.
We mix marshmallows with bright, colorful cereal. Then we add ice cream in the middle. It’s like a party in a pan. Doesn’t that sound fun? What was your favorite cereal as a kid? I’d love to know.
The Sticky, Happy Part
Let’s talk about the sticky part. You melt butter and marshmallows together. Stir, stir, stir! It gets all gooey and sweet. The smell is pure childhood. I still smile when I smell it.
Here’s a tip. Butter your hands before pressing the cereal mix. Trust me. It keeps your fingers clean. This matters because cooking should be fun, not frustrating. Little tricks make it easier.
A Sweet Layer of Why
Why put ice cream in the middle? Well, it’s about surprise. You get a cold, creamy bite with a crunchy shell. The textures play together. It’s more exciting that way.
*Fun fact*: The idea for cereal treats started a long time ago. People used puffed rice. Using colorful cereal is our new, happy twist. This matters because food memories are powerful. They connect us to good times.
Patience is a Cold Virtue
Now, you must be patient. The freezer is your friend. Let each layer get firm. I know, waiting is hard! But it makes the cutting so neat later.
Once, my grandson Sam tried to skip this step. Oh, what a messy, delicious puddle! We still laugh at that. Do you have more patience for baking or for eating? I’m usually better at the eating part.
Your Turn to Create
This recipe is just a start. You can use chocolate ice cream. Or try a different cereal. Make it yours! That’s the best part of cooking.
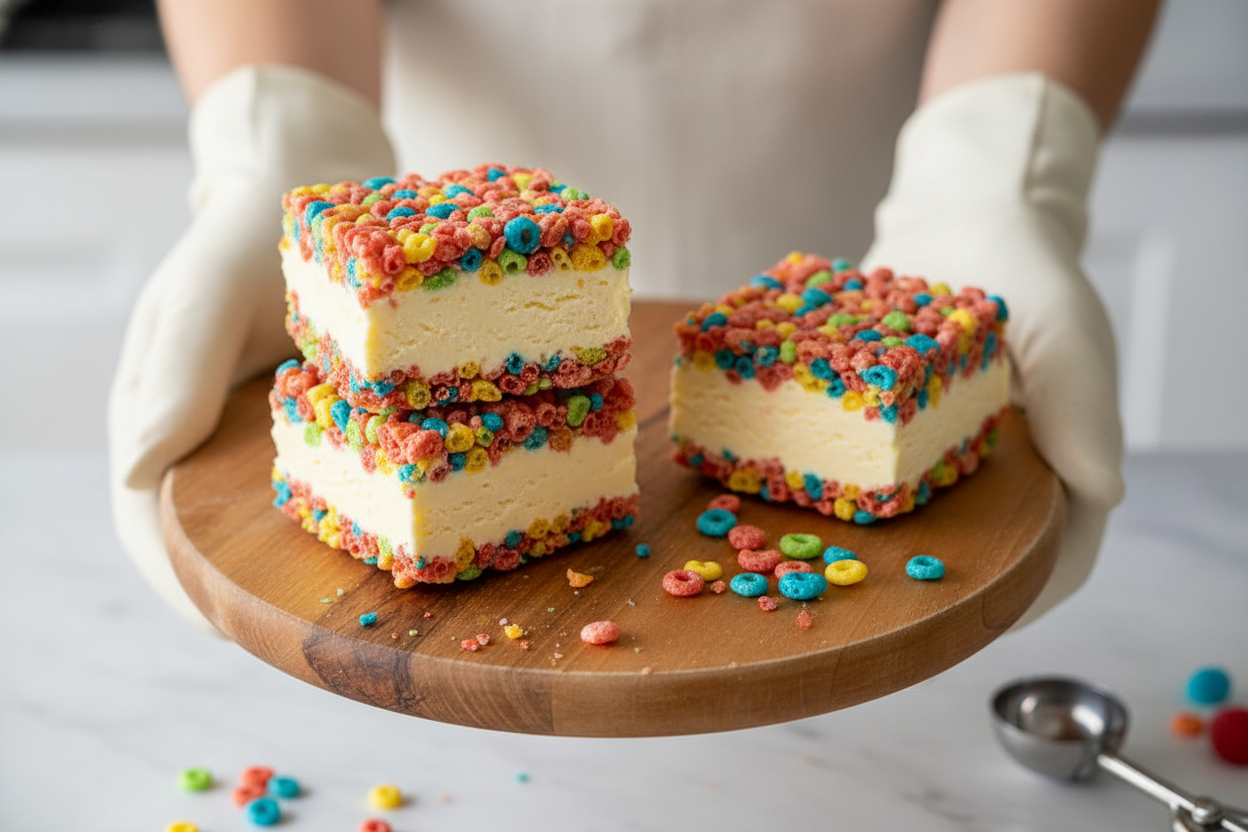
Cut your big block into squares. Share them with someone. See their eyes light up. That’s my favorite result. What ice cream and cereal combo would you try first? Tell me your idea.
Ingredients:
| Ingredient | Amount | Notes |
|---|---|---|
| colorful cereal (like Fruity Pebbles or Froot Loops) | 5 cups | For the marshmallow cereal base |
| unsalted butter | ¼ cup | For the marshmallow cereal base |
| mini marshmallows | 1 (10 oz) bag | For the marshmallow cereal base |
| vanilla extract | 1 teaspoon | For the marshmallow cereal base |
| vanilla or fruity ice cream (slightly softened) | 1 ½ quarts | For the ice cream layer |
My Grandkids’ Favorite Summer Treat
Hello, my dear. Come sit at the table. Let’s make something fun today. I remember my grandkids begging for this recipe. Their eyes would get so wide. I still laugh at that. We are making cereal ice cream sandwiches. They are crunchy, cold, and sweet. Perfect for a hot afternoon. Doesn’t that sound wonderful? It is easier than you think. We just need a few simple things. Let me tell you how we do it.
Step 1: First, line your baking pan with parchment paper. Let the paper hang over the sides. This is our little helper for later. It will lift our whole dessert out. Trust me, it saves a big mess. I learned this the hard way once. My first batch stuck terribly. (My hard-learned tip: Butter your hands before pressing the cereal. It is sticky stuff!).
Step 2: Now, melt the butter in a big pot. Add all those fluffy mini marshmallows. Stir, stir, stir until it is a smooth, gooey river. Oh, that smell is amazing. It reminds me of campfires. Take it off the heat and stir in the vanilla. Vanilla makes everything taste like home.
Step 3: Quickly pour in your colorful cereal. Gently fold it all together. You want every piece wearing a marshmallow coat. Work fast before it sets. What’s your favorite cereal for this? Share below! Press half of this mix into your pan. Pop it in the freezer for a short chill.
Step 4: Take your slightly soft ice cream. Spread it over the cold cereal layer. Be as even as you can. My grandson always tries to sneak a spoonful here. Back into the freezer it goes. Let the ice cream get firm again. This takes about half an hour.
Step 5: Finally, press the rest of the cereal mix on top. This is the sandwich’s other slice. Press it down gently. Freeze the whole pan for at least an hour. Patience is the last ingredient. Then, use the paper to lift it out. Cut it into happy little squares.
Cook Time: 1 hour 45 minutes (mostly freezing)
Total Time: 2 hours
Yield: 12 sandwiches
Category: Dessert, Frozen Treat
Let’s Get Creative With It
This recipe is like a blank canvas. You can paint it with so many flavors. Here are three of my favorite twists. They are all so simple and fun.
Chocolate Lover’s Dream: Use cocoa cereal and chocolate ice cream. Add mini chocolate chips to the marshmallow mix.
Berry Blast: Use berry-flavored cereal. Swirl raspberry jam into the vanilla ice cream layer. So fruity and bright.
Cookies & Cream: Use crushed chocolate sandwich cookies instead of cereal. Keep the vanilla ice cream. It’s a double treat.
Which one would you try first? Comment below! I’d love to hear your pick.
Serving With a Smile
These sandwiches are stars on their own. But a little presentation is nice. Serve them on a colorful plate. Add a few extra cereal pieces on the side. For a party, stick a small popsicle stick in each one. It keeps fingers from getting too cold.
What to drink? For the grown-ups, a cold glass of cream soda or a creamy stout beer is lovely. For everyone, a frosty glass of cold milk is the classic choice. It just goes together. Which would you choose tonight? I think I’ll have the milk.

Keeping Your Ice Cream Sandwiches Happy
Let’s talk about keeping these treats perfect. Your freezer is your best friend here. Wrap each square tightly in plastic wrap. This stops freezer smells from getting in. It also keeps the ice cream from getting icy.
You can make a whole batch at once. It is a great project for a rainy day. I remember my first batch. I didn’t wrap them well. They tasted like my frozen peas! Now I wrap them right away.
Storing them well matters. It means you always have a sweet, homemade treat ready. No need to run to the store. You can share a little joy anytime. Have you ever tried storing it this way? Share below!
Fixes for Common Kitchen Hiccups
First, the marshmallow mix can get too sticky. Just butter your hands well. This makes pressing it down easy. I once forgot to butter my hands. What a sticky mess!
Second, the ice cream might melt too fast. Work quickly and keep it cold. Slightly softened ice cream spreads nicely. But if it soupy, pop it back in the freezer for a bit.
Third, the top layer can be crumbly. Press it gently but firmly. Use a sheet of wax paper to help. Fixing these small issues builds your confidence. It also makes sure every bite is delicious. Which of these problems have you run into before?
Your Questions, My Answers
Q: Can I make this gluten-free? A: Yes! Just use your favorite gluten-free colorful cereal.
Q: How far ahead can I make them? A: They keep beautifully for two weeks in the freezer.
Q: What other ice cream can I use? A: Any flavor works! I love using strawberry. *Fun fact: This recipe was invented for a grandchild who loved rainbow cereal.*
Q: Can I make a smaller batch? A: Sure. Just cut all the ingredients in half. Use a smaller pan.
Q: Any optional tips? A: A pinch of salt in the marshmallow mix makes the flavors pop. Which tip will you try first?
From My Kitchen to Yours
I hope you have fun making these. I love imagining families in their kitchens. The sound of cereal pouring is a happy sound. It means something sweet is coming.
I would be so delighted to see your creations. Sharing food is how we share love. Have you tried this recipe? Tag us on Pinterest! You can find me at @AnnasCozyKitchen. I can’t wait to see your colorful sandwiches.
Happy cooking! —Anna Whitmore.
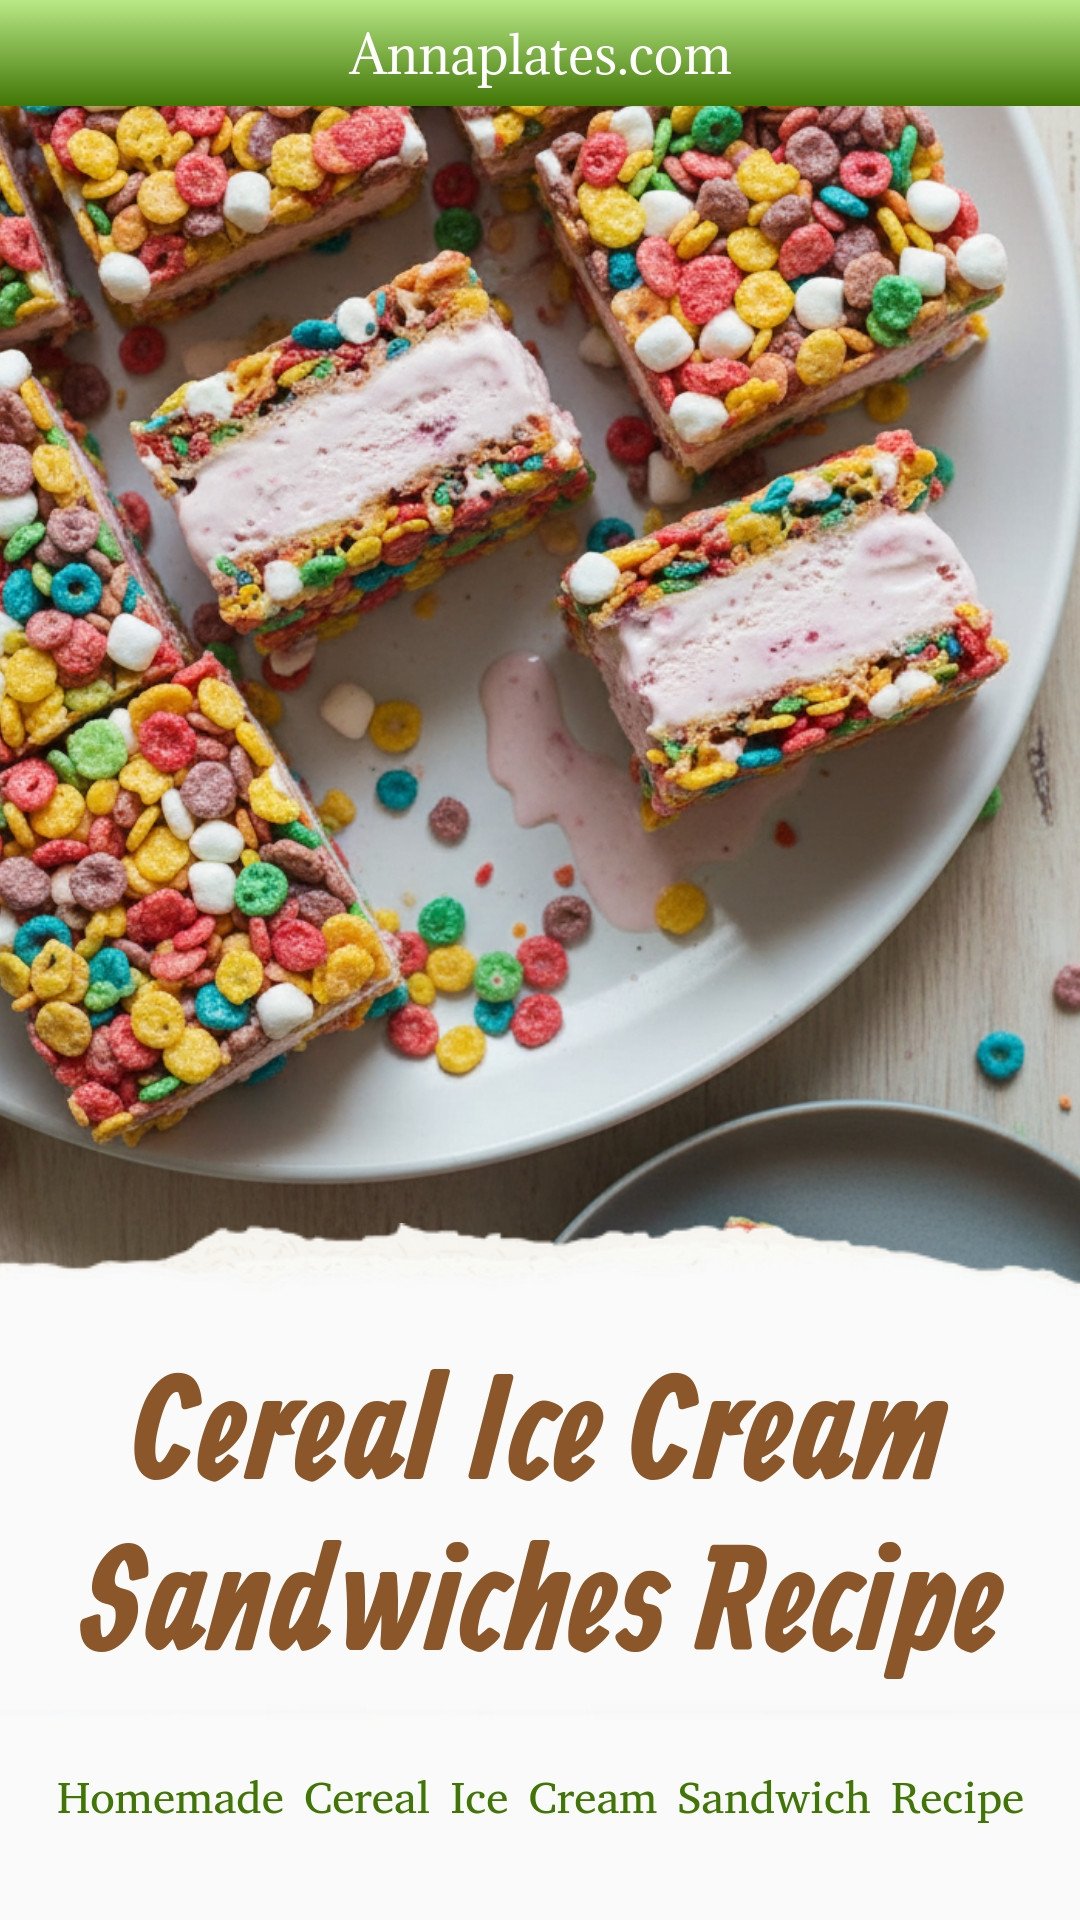
Homemade Cereal Ice Cream Sandwich Recipe
Description
Transform leftover cereal into a fun, no-bake frozen treat! These easy cereal ice cream sandwiches are the perfect crunchy, creamy summer dessert.
Ingredients
5 cups colorful cereal (like Fruity Pebbles or Froot Loops)
1 ½ quarts vanilla or fruity ice cream (slightly softened)
Instructions
- Prepare the Pan: Line a 9×13-inch baking pan with parchment paper, leaving overhang on the sides to make removal easy.
- Melt Butter and Marshmallows: In a large saucepan, melt the butter over medium heat. Add the mini marshmallows and stir continuously until fully melted and smooth. Remove from heat and stir in vanilla extract.
- Combine with Cereal: Quickly fold in the colorful cereal until all pieces are thoroughly coated with the marshmallow mixture.
- Form Bottom Layer: Using buttered hands or wax paper, press half of the cereal mixture firmly and evenly into the bottom of the prepared pan. Place in the freezer for 15 minutes to firm up.
- Add Ice Cream Layer: Spread the slightly softened ice cream evenly over the chilled cereal layer. Freeze again for 30 to 45 minutes, until the ice cream is firm.
- Add Top Layer: Press the remaining cereal mixture on top of the ice cream layer, forming the top sandwich layer. Freeze for at least 1 hour or until fully set.
- Serve: Lift the assembled dessert from the pan using the parchment paper overhang. Cut into squares and serve immediately or wrap individually in plastic wrap and store in the freezer for later enjoyment.
Notes
- For easier cutting, use a sharp knife dipped in hot water and wiped dry between cuts.


Leave a Reply