
My First Key Lime Adventure
I first made these cookies for my grandson, Leo. He loves anything sour. I was nervous. Would they be too tangy? He took one bite and his whole face lit up. I still laugh at that. Now they are our special treat.
That moment matters. Food is more than eating. It is about making memories with people you love. What is your favorite food memory? I would love to hear about it.
Why The Little Limes Matter
Key limes are tiny but mighty. They are more tart than regular limes. That tartness makes these cookies special. It cuts through the sweet sugar. Doesn’t that sound like a perfect match?
Fun fact: Key limes are also called Mexican or West Indian limes. They turn yellow when fully ripe. Always try to use fresh juice. The bottled kind just does not taste the same. Trust me on this.
The Secret is in the Chill
Do not skip chilling the dough. I know, waiting is hard. But it is the most important step. Chilled dough will not spread too thin in the oven. Your cookies will stay soft and thick.
This matters because texture is everything. A good cookie should be tender. It should melt in your mouth. While the dough chills, you can wash the dishes. Or just sit and enjoy the quiet for a minute.
Making the Sunshine Icing
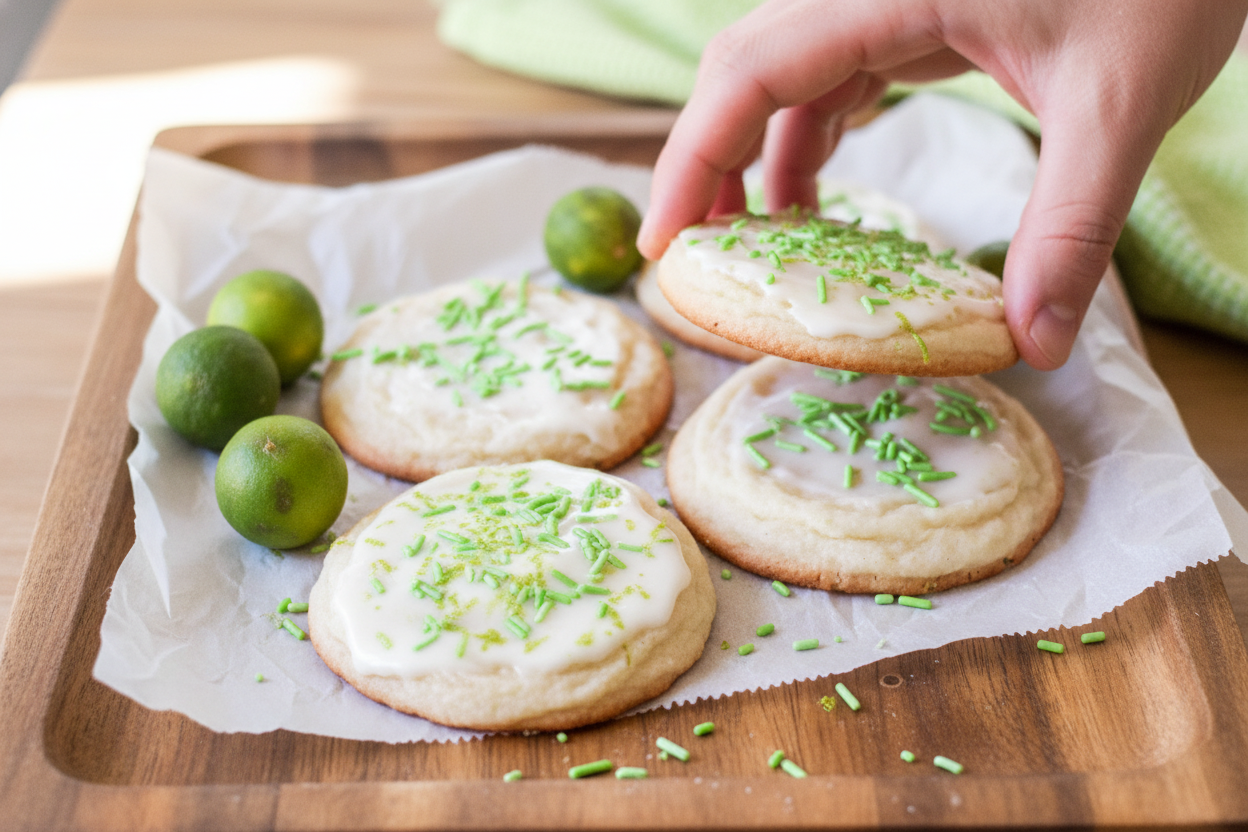
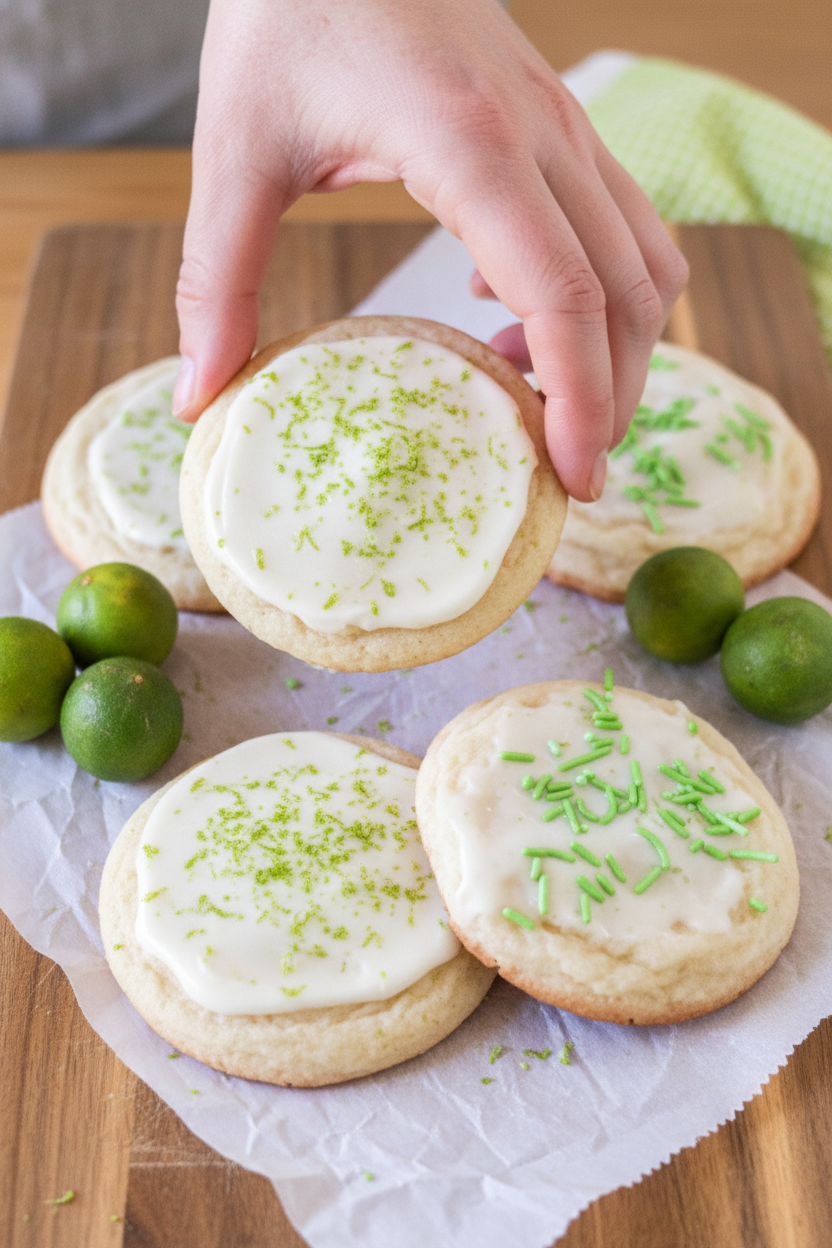
The icing is like sunshine in a bowl. Just powdered sugar and fresh lime juice. Stir it until it is smooth. It should be thick but pourable. Add a tiny splash of milk if it is too stiff.
Drizzle it over the warm cookies. The smell is amazing. It is sweet and citrusy all at once. Do you like a lot of icing or just a little? Tell me your style.
A Cookie for Sharing
These cookies are happiest on a big plate. Share them with neighbors or friends. Food tastes better when we share it. It is a simple way to show you care.
Store them in a tin to keep them soft. They will last about a week. If they last that long! What is your favorite cookie to share? Maybe it is chocolate chip or oatmeal raisin.

Ingredients:
| Ingredient | Amount | Notes |
|---|---|---|
| Unsalted butter | ½ cup | For cookies |
| Granulated sugar | 1 cup | For cookies |
| Eggs | 2 | For cookies, room temperature |
| All purpose flour | 1 ½ cups | For cookies |
| Baking powder | 1 teaspoon | For cookies |
| Salt | ½ teaspoon | For cookies |
| Fresh key lime juice | ¼ cup | For cookies |
| Key lime peel | 1 ½ teaspoons | For cookies, grated |
| Powdered sugar | 1 cup | For icing |
| Key lime juice | 3 Tablespoons | For icing |
| Key lime zest | 1 teaspoon | For icing |
| Milk | 1 Tablespoon | For icing |
Sunshine in a Cookie: My Key Lime Sugar Cookies
Hello, dear! Let’s bake some sunshine. These cookies remind me of Florida visits with my grandpa. He always had a key lime tree. The smell takes me right back to his sunny porch. We’re making soft, tangy cookies today. They’re like little bites of summer. Doesn’t that sound lovely?
You’ll want your butter soft. Just leave it on the counter for an hour. I still laugh at the time I tried to microwave it. What a melted mess! Room temperature eggs mix in much better, too. Trust your grandma on this one.
Step 1: First, heat your oven to 350 degrees. Grease your cookie sheets lightly. Now, let’s make the dough. Put the soft butter and sugar in a big bowl. Mix them until they look creamy and happy. Then, crack in the eggs. Whisk it all together until it’s smooth.
Step 2: Time for the sunny flavor! Squeeze your key limes. You’ll need a quarter cup of juice. Grate some of the green peel, too. Add both to your creamy butter mix. Stir it in. The smell is already amazing, isn’t it?
Step 3: In another bowl, mix the dry stuff. That’s flour, baking powder, and salt. Whisk it with a fork. Now, pour these dry ingredients into your wet bowl. Stir gently until no dry spots remain. The dough will be soft.
Step 4: Here’s a hard-learned tip: chill the dough. Pop the bowl in the fridge for an hour. This stops the cookies from spreading too flat. If you’re impatient, the freezer for 20 minutes works, too! Then, roll the dough into little balls. Place them on your prepared sheet.
Step 5: Bake them for 8 to 10 minutes. They should look just set, not brown. Let them rest on the sheet for 2 minutes. Then move them to a rack. They need to cool completely before we ice them. What’s your favorite cookie to eat warm from the oven? Share below!
Step 6: Let’s make the zingy icing. Mix powdered sugar, key lime juice, and zest. Stir in the milk until it’s smooth. It should be thick but pourable. Add a tiny more milk if needed. Now, spoon a little onto each cool cookie. Use your spoon to spread it gently.
Let the icing set. Then, you can take a bite. I promise it’s worth the wait. Store them in a tin to keep them soft. They never last a week in my house!
Cook Time: 10 minutes per batch
Total Time: 1 hour 30 minutes (with chilling)
Yield: About 2 dozen cookies
Category: Dessert, Cookies
Three Zesty Twists to Try
Once you master the classic, get playful! Here are three fun ideas. They make these cookies new again. I love a little kitchen experiment.
Cookie Sandwiches: Spread a little cream cheese frosting between two cookies. It’s like a tiny, tangy cake.
Lime & Coconut: Mix shredded coconut into the dough. It tastes like a tropical vacation in every bite.
Sparkling Sugar Rim: Roll your dough balls in green sanding sugar before baking. They’ll sparkle like jewels.
Which one would you try first? Comment below!
Serving Your Sunshine Cookies
These cookies are stars on their own. But presentation is part of the fun. Place them on a bright blue plate. It makes the green icing pop. You could add a tiny twist of lime zest on top. So pretty.
For a real treat, serve them with a scoop of vanilla ice cream. The cool cream and tangy cookie are perfect. For drinks, a glass of cold milk is always right. Grown-ups might like a crisp glass of prosecco. The bubbles cut through the sweetness nicely.
Which would you choose tonight?
Keeping Your Sunshine Cookies Fresh
These cookies are like little pockets of sunshine. You will want to keep them bright. Let them cool completely first. Then, store them in a tight-lidded container. They will stay happy for up to a week.
You can freeze the baked cookies, too. I wrap them in twos. This way, my grandson can grab a quick treat. The dough also freezes well. Just roll it into balls and freeze them on a tray.
Later, bake them straight from the freezer. Add a few extra minutes. I once forgot to label my frozen dough. We had a fun mystery dessert that night! Batch cooking like this saves future-you time.
It means a homemade treat is always close. That matters on busy days. Have you ever tried storing cookie dough this way? Share below!
Cookie Troubles? Let’s Fix Them Together
Sometimes cookies can be tricky. Do not worry. Here are simple fixes. First, if your dough is too sticky, just chill it. Cold dough is much easier to handle.
Second, if your cookies spread too flat, your butter might be too warm. I remember when my first batch melted into one big cookie! Chilling the dough always helps. This step matters for good texture.
Third, if your icing is too runny, add a bit more powdered sugar. If it is too thick, add a drop more milk. Getting the icing right makes the cookies look special. That builds your kitchen confidence. Which of these problems have you run into before?
Your Quick Cookie Questions, Answered
Q: Can I make these gluten-free? A: Yes! Use your favorite cup-for-cup gluten-free flour blend. It works well.
Q: Can I make the dough ahead? A: Absolutely. Keep it in the fridge for two days. Or freeze it for a month.
Q: No key limes? A: Regular limes work just fine. Your cookies will still be wonderfully zesty.
Q: Can I double the recipe? A: You sure can. It is perfect for a bake sale or a big family.
Q: Any extra tips? A: Use a microplane to zest your limes. Fun fact: The zest holds the brightest lime oil! Which tip will you try first?
Bake, Share, and Enjoy
I hope you love baking these tangy, sweet cookies. They always make my kitchen smell like a summer day. Sharing what you bake is the best part. It spreads joy.
I would be so delighted to see your creations. Please show me your cookie stacks and happy faces. Have you tried this recipe? Tag us on Pinterest! You can find me at @AnnasCozyKitchen. I cannot wait to see.
Happy cooking!
—Anna Whitmore.
Key Lime Sugar Cookies: Key Lime Sugar Cookies Recipe
Description
Zesty key lime sugar cookies with a soft, chewy center and a sweet-tart glaze. Perfectly bright, easy, and irresistible for spring or summer baking.
Ingredients
For Key Lime Icing:
Instructions
- Preheat your oven to 350 degrees F and spray your cookie sheets with nonstick spray.
- In a large mixing bowl, whisk together the butter, sugar and eggs until creamy (looks like really creamy butter). Add the lime juice and grated lime peel.
- In another bowl, whisk together the dry ingredients.
- Mix the dry ingredients into the wet ingredients until moistened.
- For best results refrigerate the dough for about 1 hour, or put in the freezer for about 20 minutes.
- Form the dough into balls and place on your prepared cookie sheet.
- Bake for 8-10 minutes. Allow to rest on cookie sheet for 2 minutes.
- In a small bowl, mix powdered sugar, key lime juice and zest in a bowl.
- Add in milk and continue stirring until mixed well and it’s a nice thick consistency, yet pourable. If you need to add a tiny bit more milk, it’s okay.
- Scoop frosting onto cookies and use the back of a spoon to smooth it on.
- Allow to set up on a cookie rack. Store in an airtight container for up to 1 week.
Notes
- Nutrition Facts (per serving, 1 cookie): Calories: 241kcal, Carbohydrates: 39g, Protein: 3g, Fat: 9g, Saturated Fat: 5g, Polyunsaturated Fat: 0.5g, Monounsaturated Fat: 2g, Trans Fat: 0.3g, Cholesterol: 48mg, Sodium: 145mg, Potassium: 42mg, Fiber: 0.5g, Sugar: 27g, Vitamin A: 283IU, Vitamin C: 3mg, Calcium: 32mg, Iron: 1mg


Leave a Reply