

A Pie with a Story
Let’s talk about Minny’s chocolate pie. You might know it from that movie. It’s a famous pie now. But it started in a home kitchen. I think about that a lot.
Food is never just food. It carries stories. Some are sweet. Some are hard. This pie holds both. That matters. It reminds us that the cook’s heart is in every bite. What’s a food that has a story in your family?
Why This Recipe Works
The ingredient list is beautifully short. That’s its magic. There’s no fancy cream or fussy steps. It’s just good, simple things coming together. The chocolate and butter do most of the talking.
This matters because simple recipes are honest. They let each flavor shine. You taste the real chocolate. You taste the sweet, buttery crust. It feels like a hug from the inside. Doesn’t that sound nice?
My First Time Making It
I remember my first try. I was so nervous. I worried it would be too bitter. That unsweetened chocolate is strong stuff! But magic happened in the oven.
The sugar and eggs worked with the chocolate. They made it rich and deep, not bitter. The whole house smelled like a bakery. I still smile at that memory. The smell told me I’d done it right. What’s a baking smell that makes you happy?
Let’s Get Baking
First, let your pie crust thaw. Preheat your oven to 350. Now, mix the flour, eggs, and sugar in a bowl. Just mix until it’s smooth.
Melt the butter and chocolate together. Be patient and stir often. Then pour that gorgeous chocolate into your sugar mix. Stir in the vanilla last. Pour it all into the waiting crust. Bake for 25 to 30 minutes. Your kitchen will smell amazing.
A Slice of Fun & Facts
*Fun fact*: That unsweetened chocolate? It’s sometimes called “baking chocolate.” It’s pure cocoa solids and cocoa butter. No sugar added! That’s why we add a whole cup of sugar to the pie. It balances everything out.
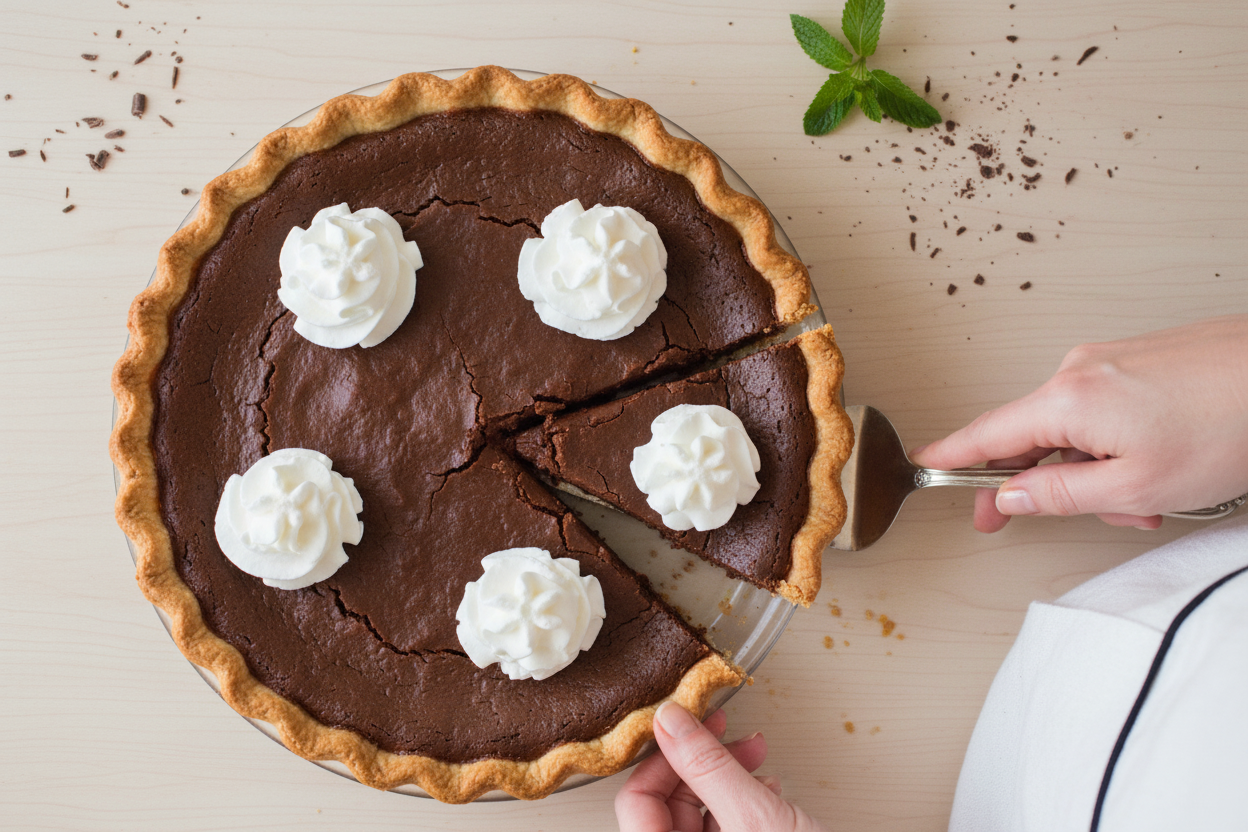
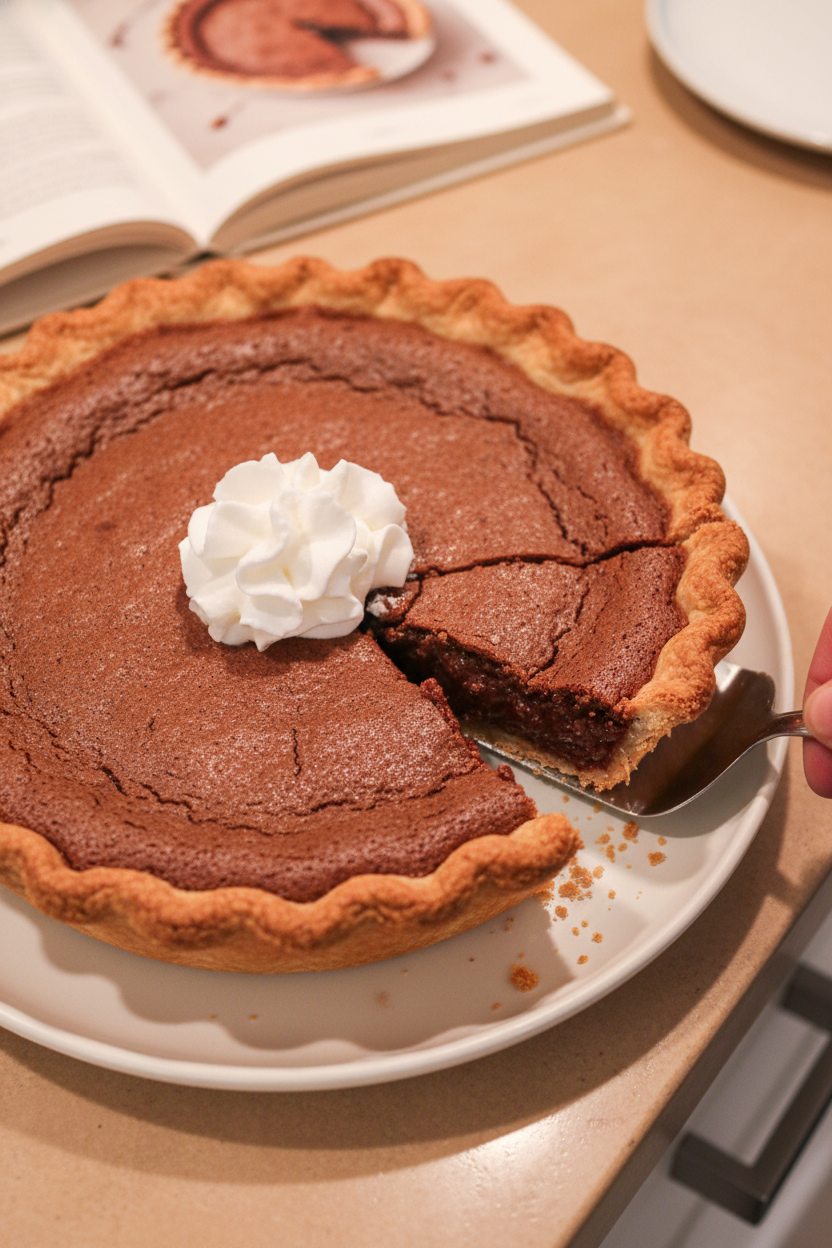
This pie is rich. A small slice is plenty. It’s perfect with a glass of cold milk. I love seeing the shiny, crackly top on the finished pie. It looks so proud of itself. Do you like your pie warm, or cooled down?
Ingredients:
| Ingredient | Amount | Notes |
|---|---|---|
| 9″ pie crust | 1 | |
| Flour | 1/4 cup | |
| Eggs | 2 | |
| Granulated sugar | 1 cup | |
| Butter | 1/4 cup | |
| Unsweetened baking chocolate squares | 2 oz | |
| Vanilla extract | 1/4 teaspoon |
Minny’s Famous Chocolate Pie
Let me tell you about this chocolate pie. It is pure magic. My granddaughter begged me to make it after watching a certain movie. We had the best afternoon together. The kitchen smelled like a sweet dream.
This recipe is simple and honest. It reminds me of pies from my childhood. We used to eat it still warm from the oven. I still laugh at that. Everyone would sneak a fingerful of filling.
Here is how we make it. Get your ingredients ready first. That always makes everything easier. Now, let’s begin our baking story.
- Step 1: First, take your pie crust from the freezer. Let it sit on the counter. It needs about twenty minutes to thaw. This is a good time to preheat your oven. Set it to 350 degrees. I always forget to do this first!
- Step 2: Now, grab a medium bowl. Crack in two eggs. Add the sugar and flour. Mix it all together until it’s smooth. No lumps allowed! It will look a little pale and thick. That’s just perfect.
- Step 3: Time to melt the chocolate. Use a double boiler if you have one. If not, a bowl over a pot of simmering water works. Stir the butter and chocolate squares often. (Hard-learned tip: Don’t let the bowl touch the water directly. It can scorch your chocolate!). Doesn’t that smell amazing?
- Step 4: Pour that gorgeous melted chocolate into your sugar mixture. Stir everything together well. The color becomes so rich and dark. Now, add your vanilla extract. Just a little splash makes all the difference.
- Step 5: Pour your chocolate batter into the waiting pie shell. Gently place it in the hot oven. Bake it for 25 to 30 minutes. The top will look set and maybe crack a little. What’s your favorite smell from the kitchen? Share below!
Cook Time: 25–30 minutes
Total Time: About 1 hour
Yield: 8 slices
Category: Dessert, Pie
Three Sweet Twists to Try
This pie is wonderful just as it is. But sometimes, it’s fun to play. Here are three little ideas for you. They are all delicious in their own way.
- Minty Fresh: Add a drop of peppermint extract with the vanilla. It tastes like a chocolate mint candy.
- Nutty Buddy: Sprinkle chopped pecans or walnuts on top before baking. They get all toasty and nice.
- Berry Swirl: Drop spoonfuls of raspberry jam on the filled pie. Use a knife to swirl it gently.
Which one would you try first? Comment below!
Serving It Up Right
This pie is rich. A little slice goes a long way. I love it with a dollop of whipped cream. The white on the dark chocolate is so pretty. A few fresh raspberries on the side look lovely too.
For drinks, a cold glass of milk is the classic choice. It just feels right. For the grown-ups, a small glass of ruby port wine is a nice match. It sips like a sweet, dark berry.
You could eat it warm or chilled. I can never wait for it to cool completely. Which would you choose tonight?
Keeping Your Chocolate Pie Perfect
This pie keeps well in the fridge. Just cover it with plastic wrap. It stays good for about four days.
You can also freeze it for later. Wrap the whole pie tightly in foil. It will be good for two months.
Thaw it overnight in the fridge. I once served a frozen slice by mistake. My grandson said it was “chocolate ice cream pie!”
You can make the filling ahead. Mix it up and keep it in a bowl. Pour it into the crust when you are ready.
This matters because life gets busy. Having a treat ready makes any day sweeter. Have you ever tried storing it this way? Share below!
Simple Fixes for Common Pie Problems
Is your filling too runny? Bake it for five more minutes. The center should be just a little wobbly.
Does the crust edge burn? Cover it with foil strips. I remember when I forgot this once. We called it our “campfire pie.”
Is the chocolate seizing up? Make sure no water gets in the bowl. Water makes chocolate get lumpy and grainy.
Fixing small problems builds your cooking confidence. You learn that mistakes can often be saved. This leads to better flavor every time.
Fun fact: The baking chocolate in this recipe is unsweetened. That’s why we add a full cup of sugar! Which of these problems have you run into before?
Your Pie Questions, Answered
Q: Can I make this gluten-free? A: Yes. Use a gluten-free pie crust. The filling has no gluten.
Q: Can I make it ahead? A: Absolutely. Bake it the day before. It sets nicely in the fridge.
Q: What if I don’t have baking chocolate? A: Use 6 tablespoons of cocoa powder. Add 2 tablespoons of butter or oil.
Q: Can I double the recipe? A: You can. Just make two pies. Doubling in one pan does not work well.
Q: Any optional tips? A: A tiny pinch of salt in the filling. It makes the chocolate taste even richer. Which tip will you try first?
From My Kitchen to Yours
I hope you love making this pie. It is a simple, classic joy. Sharing it with someone makes it taste better.
I would love to see your creation. Your kitchen stories make my day. Have you tried this recipe? Tag us on Pinterest! You can find me at @AnnasCozyKitchen.
Thank you for baking with me today. I am so glad you are here. Happy cooking!
—Anna Whitmore.
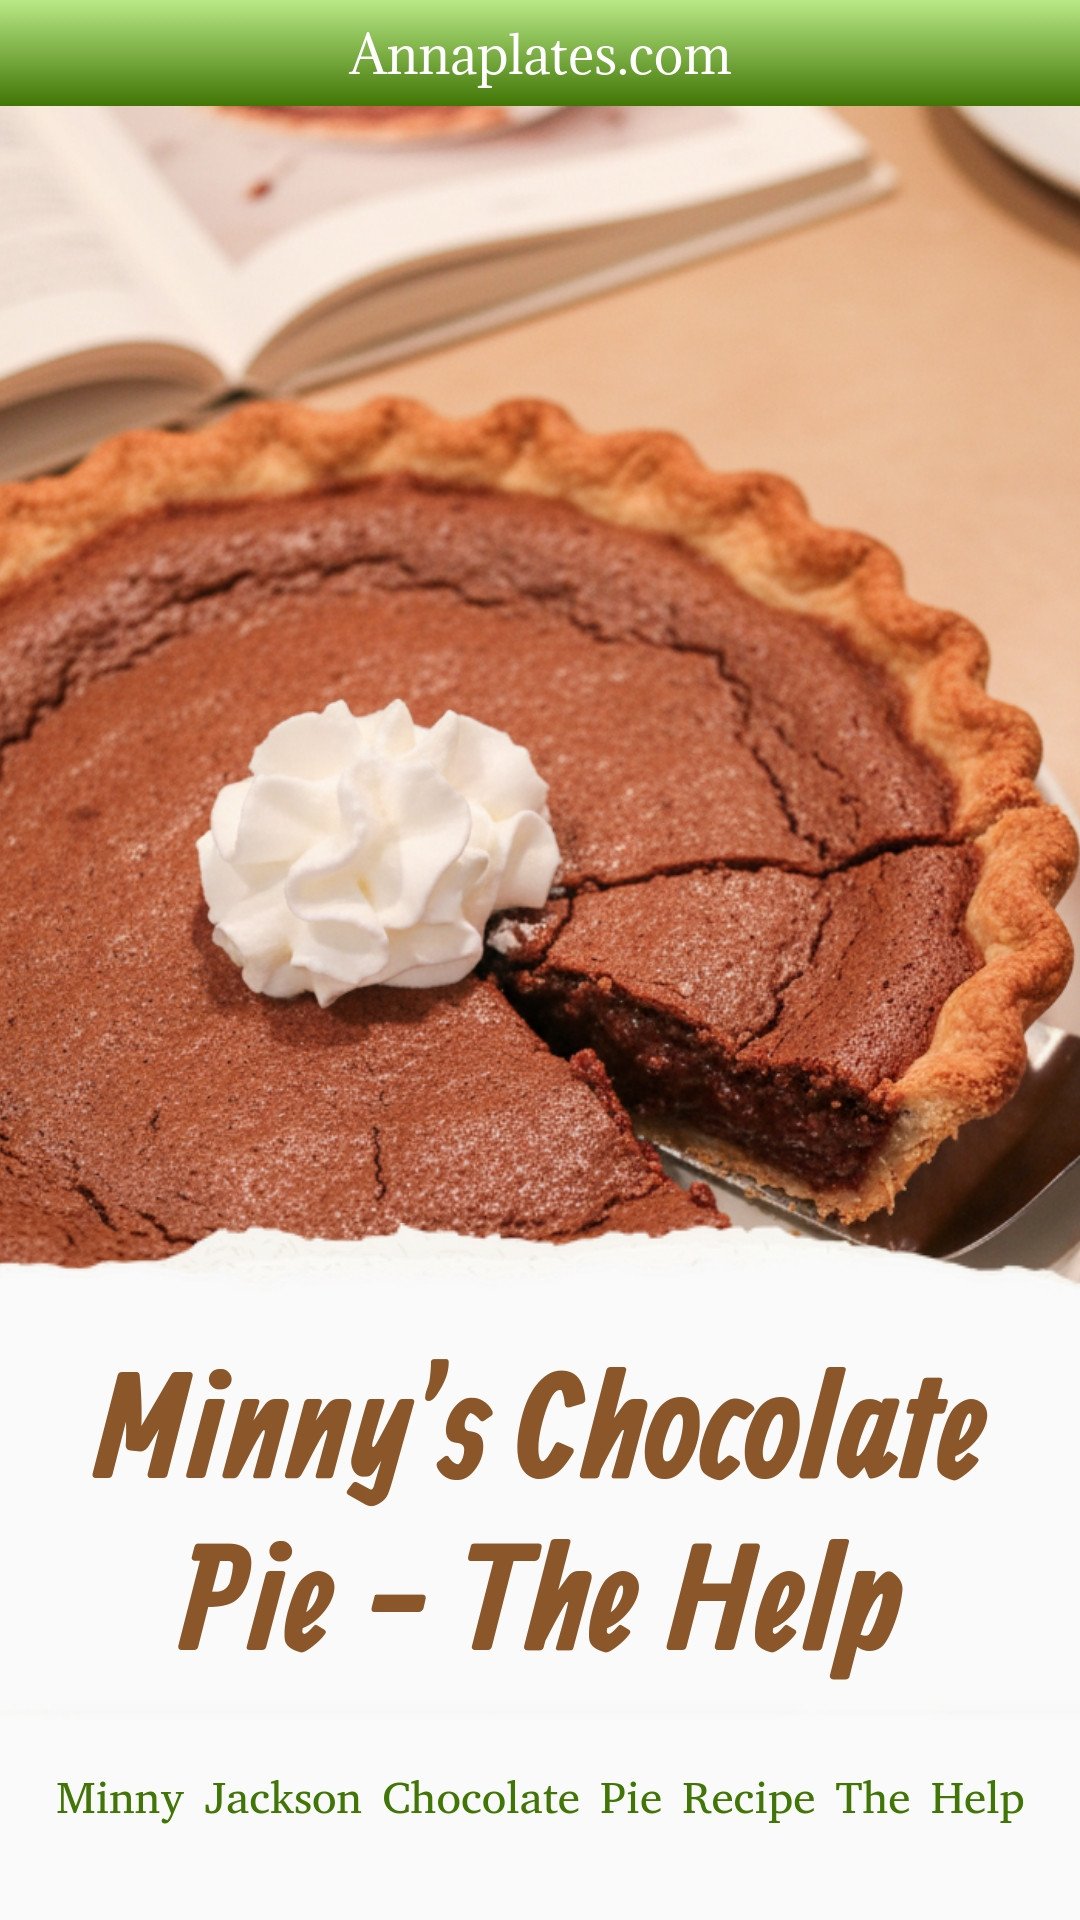
Minny’s Chocolate Pie – The Help: Minny Jackson Chocolate Pie Recipe The Help
Description
The infamous chocolate pie from The Help. A rich, decadent dessert with a surprising secret ingredient. A must-try for movie fans and bakers.
Ingredients
Instructions
- Preheat oven to 350°F (175°C). Remove the pie crust from the freezer and allow to thaw for about 20 minutes before using.
- In a medium mixing bowl, mix together the flour, eggs and sugar until mixed well.
- Using a double boiler, melt the butter and chocolate, stirring frequently until completely mixed.
- Add the melted chocolate mixture to the flour/sugar mixture and mix everything together well.
- Mix in the vanilla.
- Pour the chocolate batter into the pie shell and bake in a 350 degree oven for 25 to 30 minutes.
Notes
- A rich, decadent dessert with a surprising secret ingredient. A must-try for movie fans and bakers.


Leave a Reply