

The Magic of Yeast
Let’s start with the magic trick. You mix warm water, sugar, and yeast. Then you wait. I love this part. I set the timer and do some dishes. When I come back, it’s foamy and bubbly. It smells a bit like bread already. Doesn’t that smell amazing?
This foam means your yeast is awake and happy. It’s eating the sugar. This matters because happy yeast makes your bread rise. It makes it light and soft. If you don’t see bubbles, start over. Your yeast might be asleep for good. Have you ever had bread that didn’t rise? What did you do?
Kneading is Like a Hug
Now, add your flour, salt, and butter. Time to knead. You push and fold the dough for ten minutes. It’s a good arm workout. I think of it as giving the dough a big hug. You are helping it get strong.
The dough will change in your hands. It starts sticky. Then it becomes smooth and springy. You’ll know it’s ready. It feels like a soft baby’s cheek. This matters because kneading makes the bread’s texture just right. It builds little pockets for the air. That air is what makes the bread fluffy later on.
The Patient Rise
Put your dough ball in a bowl. Cover it up. Find a warm spot. I use my kitchen counter. Then you walk away for an hour. This is the hard part for me. I always want to peek. But don’t lift the cover.
When you come back, it will be big and puffy. It always surprises me. I still laugh at that. Then you punch it down. It’s fun to push your fist right into that soft pillow. That punch lets out the old air. This makes room for a fresh, new rise in the pan.
Shaping Your Loaves
Cut the dough in half. Shape each piece. You fold it over itself many times. This makes a nice, tight loaf. It keeps your slices neat for sandwiches. Place them in your greased pans.
Let them rise again, uncovered. They will double in size. This second rise is the final fluff-up. *Fun fact: This is called “proofing.” Bakers say the dough is proofing when it does this last rise.* Are you a patient baker, or do you rush the rising time like I sometimes want to?
The Best Smell in the World
Bake your loaves at 350 degrees. Soon, your whole house will smell wonderful. It is the best smell in the world. It smells like home. I bake mine for 35 minutes. The top turns a golden brown.
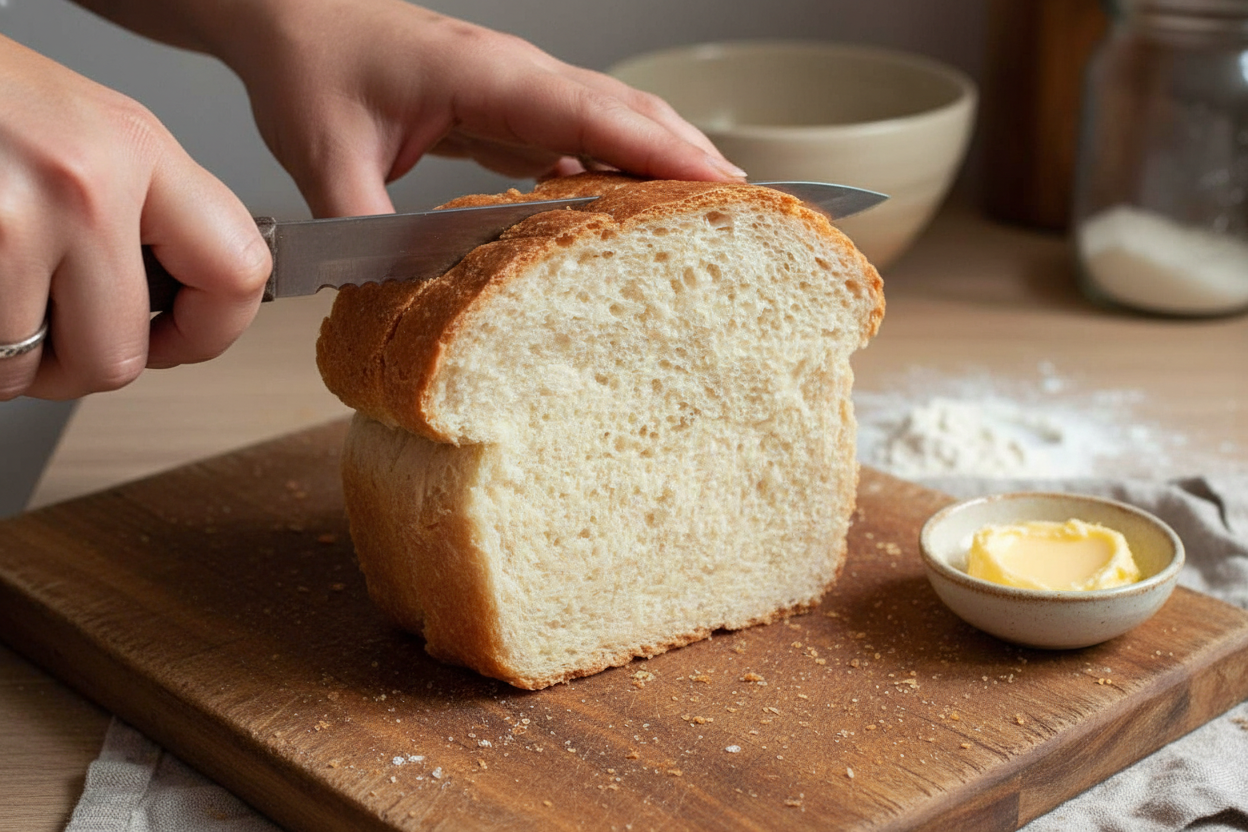
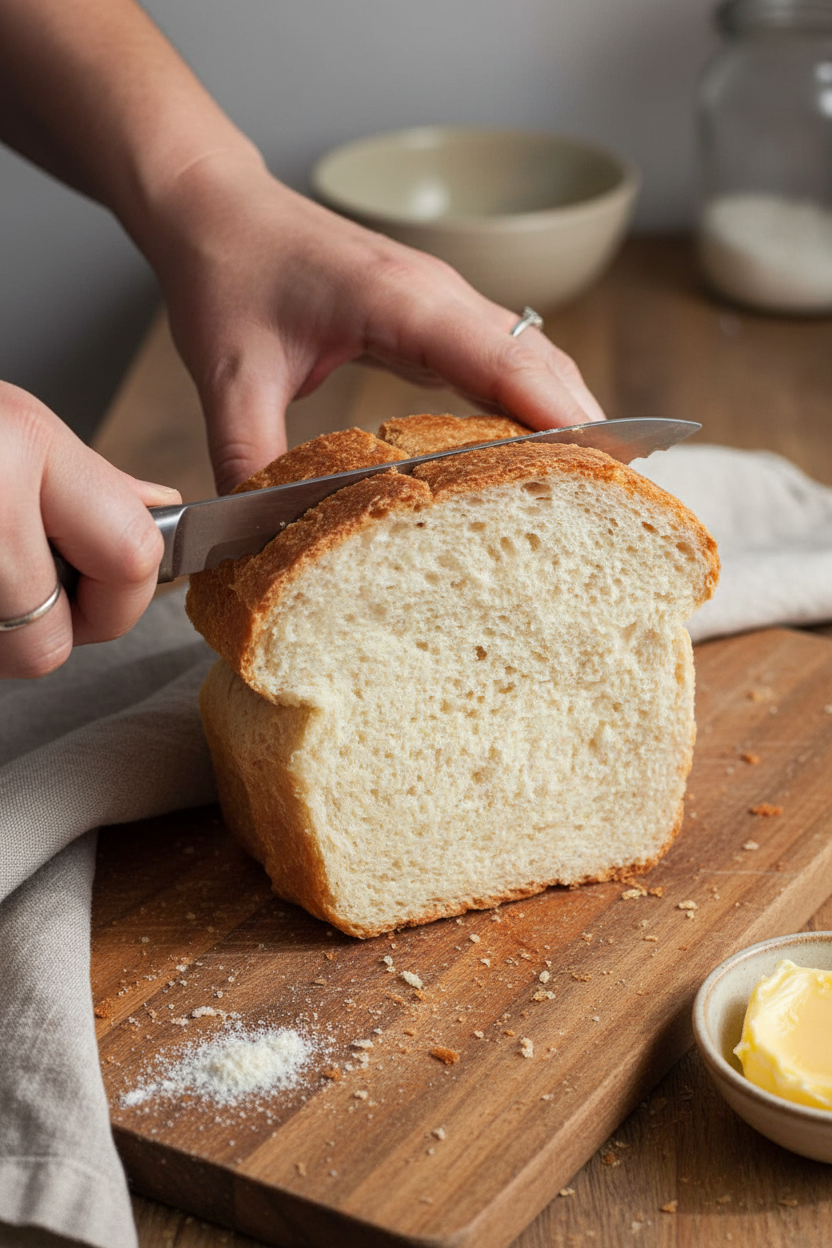
Let the bread cool completely before you slice. I know it’s hard to wait. But warm bread can be crumbly. Cool bread makes perfect slices. Then you can make the best sandwich. What will you put on your first slice? Butter, jam, or maybe peanut butter?
Ingredients:
| Ingredient | Amount | Notes |
|---|---|---|
| Warm water | 2 cups | |
| Granulated sugar | 2 tablespoons | |
| Dry active yeast | 1 tablespoon | |
| Salt | 1 teaspoon | |
| All purpose flour | 5 ½ cups | |
| Butter, softened | 2 ½ tablespoons |
Our Favorite Homemade Sandwich Bread
Hello, dear! Come sit. Let’s make some bread. This recipe is my go-to. It fills the whole house with a cozy smell. I still laugh at that. My grandson calls it “Grandma’s Cloud Bread.” He says it’s perfect for peanut butter.
Making bread is like a little science project. You get to watch it grow! The secret is being patient. Let the dough take its naps. It’s worth the wait, I promise. Here’s how we do it, step-by-step.
Step 1: First, we wake up the yeast. Mix the warm water and sugar in a big bowl. Sprinkle the yeast on top. Give it a gentle stir. Now, walk away for 10 minutes. When you come back, it should be foamy. Doesn’t that smell amazing? That foam means your yeast is alive and happy.
Step 2: Add the flour and salt to your foamy yeast. Slice the butter into little pieces and toss them in. (A hard-learned tip: smaller butter bits mix in much easier!). Now, roll up your sleeves. Time to knead! Push and fold the dough for about 10 minutes. You’ll feel it become smooth and springy.
Step 3: Shape the dough into a soft ball. Place it in a clean, oiled bowl. Cover it with a damp kitchen towel. I tuck mine in the corner, out of drafts. Let it rest for one whole hour. It will get big and puffy! This is its first nap. What do we call this rising step? Share below!
Step 4: After an hour, uncover your dough. Give it a gentle punch right in the middle! This lets the air out. Knead it in the bowl for just a minute. Then, divide the dough into two equal pieces. Shape each into a loaf for your pans. Let them rise again, uncovered, for another hour.
Step 5: Heat your oven to 350 degrees. Bake your loaves for about 35 minutes. They will turn a beautiful golden brown. Let them cool in the pan for 5 minutes. Then, move them to a rack. Wait until they are completely cool before slicing. This keeps your sandwich bread from getting crumbly.
Cook Time: 35 minutes
Total Time: About 3 hours (includes rising)
Yield: 2 loaves (about 32 slices)
Category: Baking, Bread
Three Tasty Twists to Try
Once you master the basic loaf, you can play! Here are three of my favorite simple twists. They make everyday bread feel special.
Honey Whole Wheat: Swap one cup of white flour for whole wheat. Use honey instead of sugar. It tastes like sunshine.
Everything Bagel Bread: Before the second rise, brush the loaves with water. Sprinkle on “everything bagel” seasoning. So savory!
Cinnamon Swirl: Roll each dough piece into a rectangle. Brush with melted butter and cinnamon-sugar. Roll it up, then bake. Perfect for toast.
Which one would you try first? Comment below!
Serving Your Masterpiece
Fresh bread needs little else. But here are some lovely ways to enjoy it. For a simple lunch, toast a slice and add ripe tomato slices. A little salt and pepper is magic. For breakfast, use thick slices for French toast. It’s heavenly.
What to drink? With a tomato sandwich, I love icy cold lemonade. It’s so refreshing. In the evening, a warm slice with butter pairs nicely with a cup of chamomile tea. It’s the perfect end to a day. Which would you choose tonight?
Keeping Your Homemade Bread Fresh
Fresh bread is a wonderful treat. Let’s keep it that way. Once your loaf is cool, store it in a bread bag or airtight container. It will stay good on the counter for about four days.
You can also freeze it for later. Wrap the whole loaf or individual slices tightly in plastic wrap. Then pop them in a freezer bag. They will keep for three months. Thaw slices right in the toaster.
I once froze a loaf for my grandson’s visit. He toasted a slice and said it tasted just-baked. That made my whole week. Batch cooking matters because it saves you time on busy days. You can have fresh bread anytime.
Have you ever tried storing it this way? Share below!
Bread Troubles and Easy Fixes
Sometimes bread doesn’t rise right. If your yeast doesn’t bubble, it might be old. Your water could also be too hot. This matters because good yeast makes light, fluffy bread.
Is your dough too sticky? Just add a little more flour. Sprinkle it in slowly while you knead. I remember when my dough stuck to everything. A bit more flour fixed it right up.
Did your bread turn out dense? You might have needed to knead longer. Proper kneading develops the gluten. This creates that perfect, soft sandwich texture. Which of these problems have you run into before?
Your Bread Questions, Answered
Q: Can I make this gluten-free? A: I don’t recommend it. This recipe needs regular flour to work right.
Q: Can I make the dough ahead? A: Yes. After the first rise, punch it down. Cover the bowl and put it in the fridge overnight.
Q: What can I use instead of butter? A: You can use the same amount of vegetable oil. The flavor will be a little different.
Q: Can I make just one loaf? A: Absolutely. Just cut all the ingredients in half. Use one bread pan.
Q: Any optional tips? A: Brush the tops with melted butter after baking. Fun fact: This gives it a soft crust and lovely shine. Which tip will you try first?
From My Kitchen to Yours
I hope you love this recipe as much as I do. There is nothing like the smell of baking bread. It fills a home with love and warmth.
I would be so thrilled to see your creations. Have you tried this recipe? Tag us on Pinterest! You can find me at @AnnasCozyKitchen. Share your photos and stories with me.
Happy cooking!
—Anna Whitmore.

Homemade Sandwich Bread – Our favorite! You’ll love it!: Our Favorite Homemade Sandwich Bread Recipe
Description
Discover our favorite homemade sandwich bread recipe! Soft, fluffy, and perfect for every meal. Easy to make and incredibly delicious. Try it today!
Ingredients
Instructions
- Take the time to proof your yeast first. In a bowl, pour the water and the sugar. Mix until dissolved. Add the yeast. Again, mix until dissolved. Set it aside for 10 minutes. When you come back it should have bubbles formed all over the top of it. This is how you know it’s “alive” and ready to go.
- Next, throw in the flour and the salt. Then, slice up the butter into smaller pieces and add it. This just makes it easier for it to blend when you’re mixing.
- Now comes the fun part. Knead the ingredients together for about 10 minutes by hand, about 5 minutes with a mixer. You can usually tell it’s done when it feels slightly elastic, smooth and isn’t sticking to anything.
- Knead the dough into a ball and place it in a clean bowl. Cover it with some plastic wrap that you have sprayed with cooking spray or rubbed with some oil. Set the bowl in a warm place. I actually just cover mine with two kitchen towels and put it on the counter in the back out of the way. Allow it to rise for one hour.
- After an hour uncover the dough. It should be pretty big and poofy at this point. Take your hand and punch into it once or twice to get it to push all the air out of it.
- Knead it again (you don’t have to take it out of the bowl, I do it right in the bowl) for about a minute or so, forming it into a ball.
- Sprinkle flour onto your table or other wooden work surface. Put the ball in the middle of the work surface. Cut the ball into two equal pieces using a bencher, or I just use a kitchen knife.
- Taking one half of the dough, knead it a little folding it over itself over and over. Create a sort of ovalish shape with it and then place it into your lightly greased loaf dish. Now repeat everything with the second wedge of dough.
- Put both pans back where you had the bowl for the first rise, but leave them uncovered. For one hour.
- Preheat your oven to 350 degrees. When your dough has risen the second time and doubled in size, it’s time to put them in the oven. Just put ‘em in there for 35-40 minutes. I’m pretty faithful with my 35 minute timing, but it could take more in your neck of the woods.
- When they’re done, pull ‘em out of the oven and allow them to sit in the pans for 5 minutes. After the 5 minutes, using a potholder or towel, turn the bread out onto a cooling rack and allow them to cool the rest of the way. Since you’re aiming for sandwich bread, it is better not to cut them until they are completely cooled, otherwise they get a little crumbly.
Notes
- Once cooled, trim into slices and store at room temperature or in the refrigerator for up to 4 days (if it lasts that long!).


Leave a Reply