

A Sweet Idea from a Hot Day
Hello, dear. It’s Anna. Come sit a spell. I was thinking about summer. I remember one very hot Fourth of July. The kids were melting. I had yogurt and fruit about to go soft. So, I got an idea. Let’s make layered popsicles! They were a hit. I still laugh at that messy, happy kitchen.
This matters because it turns “oops” into “yum.” No waste, just joy. What’s your favorite way to use up ripe fruit? I’d love to hear your tricks.
Let’s Talk Layers
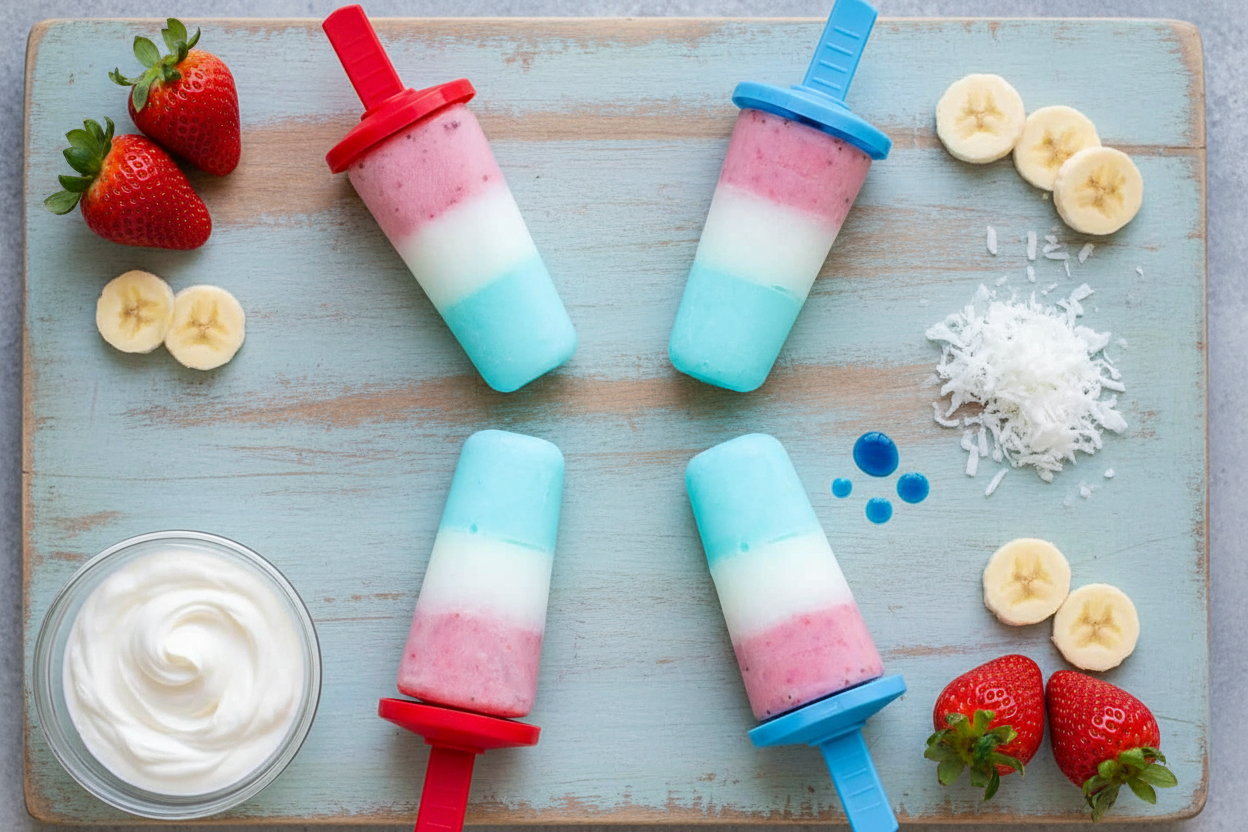
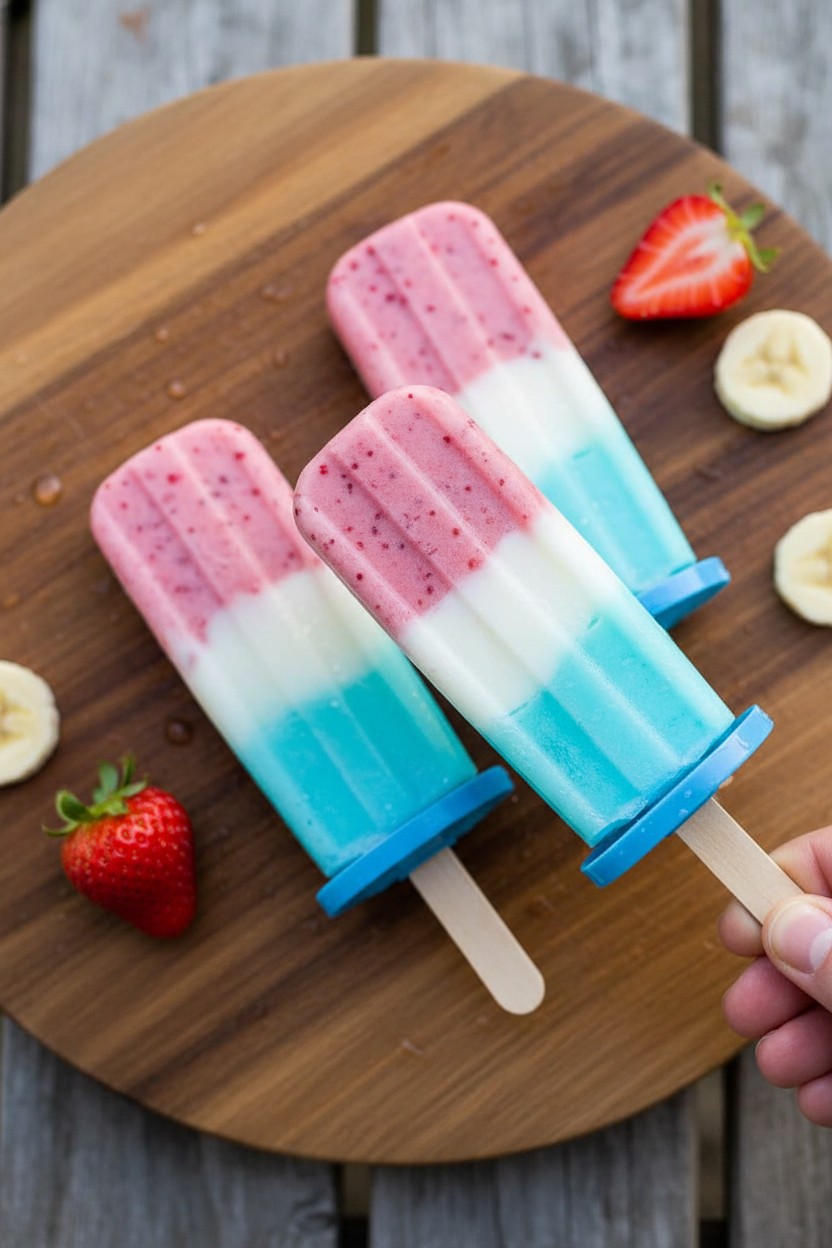
Our popsicles have three stripes. Red, white, and blue. They look fancy but are simple. The secret is freezing each layer a little before adding the next. This keeps them from mixing into a muddy purple. Patience is your friend here.
You can use any yogurt flavors you like. Strawberry for red. Vanilla or coconut for white. For blue, I mix vanilla yogurt with one tiny drop of food coloring. Fun fact: long ago, blue food coloring came from plants! Doesn’t that smell amazing, mixing fruit and yogurt?
A Little Help from Coconut Milk
Now, why coconut milk? It makes the popsicle creamy. It also helps it freeze nice and smooth. No icy chunks. Just a cool, soft bite. This matters for texture. A good treat should feel good in your mouth, too.
We mix it right into the yogurt in the blender. Easy. If you had to pick, which layer do you think you’d taste first? I always go for the red berry part.
The Waiting Game
Here is the hardest part. Waiting. You freeze the blue layer first. Then the white. Then the red. It takes a few hours total. I make them in the morning. They are ready by afternoon. Perfect for a sunny day.
While you wait, clean the blender. Or just sit and dream of summer. To get them out, run warm water on the mold. They slide right out. Have you ever made popsicles before? What shape are your molds?
More Than Just a Snack
These popsicles are a little celebration. They are colorful and fun. But they are also pretty good for you. Protein from yogurt. Fruit for vitamins. This matters. Food can be both a party and fuel for your body.
Making them together is the best part. My grandson loves to mash the banana. It’s a sweet memory in the making. Share them with someone you love. That’s the real recipe.
Ingredients:
| Ingredient | Amount | Notes |
|---|---|---|
| Chobani Greek Yogurt | 6 ounce container | Any flavor |
| Chobani Greek Yogurt | 6 ounce container | Any flavor |
| Chobani Greek Yogurt | 6 ounce container | Any flavor |
| Strawberries | 1/4 cup | Finely chopped |
| Banana | 1/2 banana | Mashed |
| Coconut milk | 1 cup | Divided |
| Blue Food Coloring | As desired | Can use whatever color you have |
Patriotic Popsicles from My Sunny Kitchen
Hello, my dear! It’s Anna. Come sit with me. Summer is for cold treats, isn’t it? I love making these popsicles. They remind me of my grandkids on the Fourth of July. Their faces were always so blue and red from eating them! I still laugh at that. Let’s make some together. They are easier than you think. We just need patience between layers. Doesn’t that smell amazing? The coconut and fruit together is so nice.
Step 1: First, we make the blue layer. Blend the vanilla yogurt, mashed banana, and 1/3 cup coconut milk. It gets so smooth! Add just one drop of blue coloring. My bottle is very strong. (Hard-learned tip: Too much color stains your tongue! Start with one drop.) Pour it into your molds, only one-third full. Pop them in the freezer for half an hour.
Step 2: Time for the white layer. Clean your blender. Now add the coconut yogurt and another 1/3 cup of milk. Blend it up. It looks like fresh snow. After 30 minutes, take out your molds. The blue part will be slushy. Gently pour the white layer on top. Back into the freezer it goes! This time for just 20 minutes.
Step 3: Last is the red layer. Blend the strawberry yogurt, real chopped strawberries, and the last of the milk. That real fruit makes it special. Pour this on top of the white layer. Now, push your sticks in. The middle layer is soft, so it’s easy. What other red fruit could we use? Share below! Freeze everything for a few hours until solid.
Step 4: The fun part is eating! To get them out, run warm water on the mold. Just for a few seconds. Then gently twist the stick. They should slide right out. If they don’t, a little more warm water helps. I once pulled too hard. The stick came out alone! We had to eat it with a spoon. It was still delicious.
Cook Time: 3-4 hours (freezing)
Total Time: 3 hours 15 minutes
Yield: About 6 popsicles
Category: Dessert, Snack
Let’s Mix It Up Next Time!
You don’t always need the same flavors. Try these fun twists. Use what you have in your kitchen. Cooking is about playing, too.
Tropical Twist: Use pineapple yogurt and mango bits for the yellow layer. It tastes like sunshine.
Berry Blast: Skip the food coloring. Use blueberry yogurt for blue and raspberry for red. All natural colors!
Chocolate Dream: Make the white layer with vanilla yogurt and a spoonful of cocoa powder. A sweet surprise in the middle.
Which one would you try first? Comment below!
Serving with a Smile
These pops are perfect on their own. But sometimes, I like to make a little party. For a plate, roll the pops in sprinkles right after taking them out. The sprinkles will stick! Or place them on a bed of crushed graham crackers. It looks like sand.
For drinks, a cold glass of lemonade is my favorite. The tartness is nice with the sweet yogurt. For the grown-ups, a little sparkling rosé is lovely. It feels very fancy. Which would you choose tonight? I think I’ll have the lemonade. Always.
Keeping Your Popsicles Perfect
These popsicles are best kept frozen until you eat them. I store them in their molds. Or, you can pop them out once frozen solid. Then, place them in a freezer bag. This saves space for more batches.
I love making a big batch. It is perfect for a hot week. My grandkids visit often in summer. Having these ready makes everyone smile. No reheating needed, just grab and go!
I once tried to rush the freezing. The layers mixed together. It was a messy, purple surprise! Patience gives you those pretty stripes. Batch cooking matters. It means more time for fun later.
Have you ever tried storing popsicles in a bag? Share below!
Popsicle Problems Solved
First, the stick won’t stand up. The mixture was too thin. Freeze each layer a bit first. This gives the stick a firm place to sit.
Second, the popsicles won’t come out. Don’t pull! Just run the mold under warm water. I remember when I pulled too hard. The stick came out alone. A little warmth loosens everything nicely.
Third, the colors bleed together. You did not freeze the layers long enough. Wait the full time. This keeps the red, white, and blue separate. Fixing these issues builds your confidence. It also makes your food look as good as it tastes.
Which of these problems have you run into before?
Your Popsicle Questions Answered
Q: Is this recipe gluten-free? A: Yes, all these ingredients are naturally gluten-free. Just check your yogurt labels to be sure.
Q: Can I make them ahead? A: Absolutely! They need hours to freeze. Making them the night before is a smart plan.
Q: What if I don’t have coconut milk? A: Any milk will work. Almond milk or regular cow’s milk are fine swaps. Fun fact: I used orange juice once for a creamsicle flavor!
Q: Can I double the recipe? A: You sure can. Just make sure you have enough popsicle molds for all that yummy mix.
Q: Any other tips? A: Use ripe bananas for sweetness. You might not need extra sugar. Which tip will you try first?
Share Your Kitchen Creations
I hope you have fun making these festive treats. Cooking should be joyful and simple. I would love to see your red, white, and blue layers.
Show me your kitchen results. It makes my day to see families cooking together. Your version might give me a new idea to try.
Have you tried this recipe? Tag us on Pinterest! Use our handle @AnnasCozyKitchen. Happy cooking!
—Anna Whitmore.
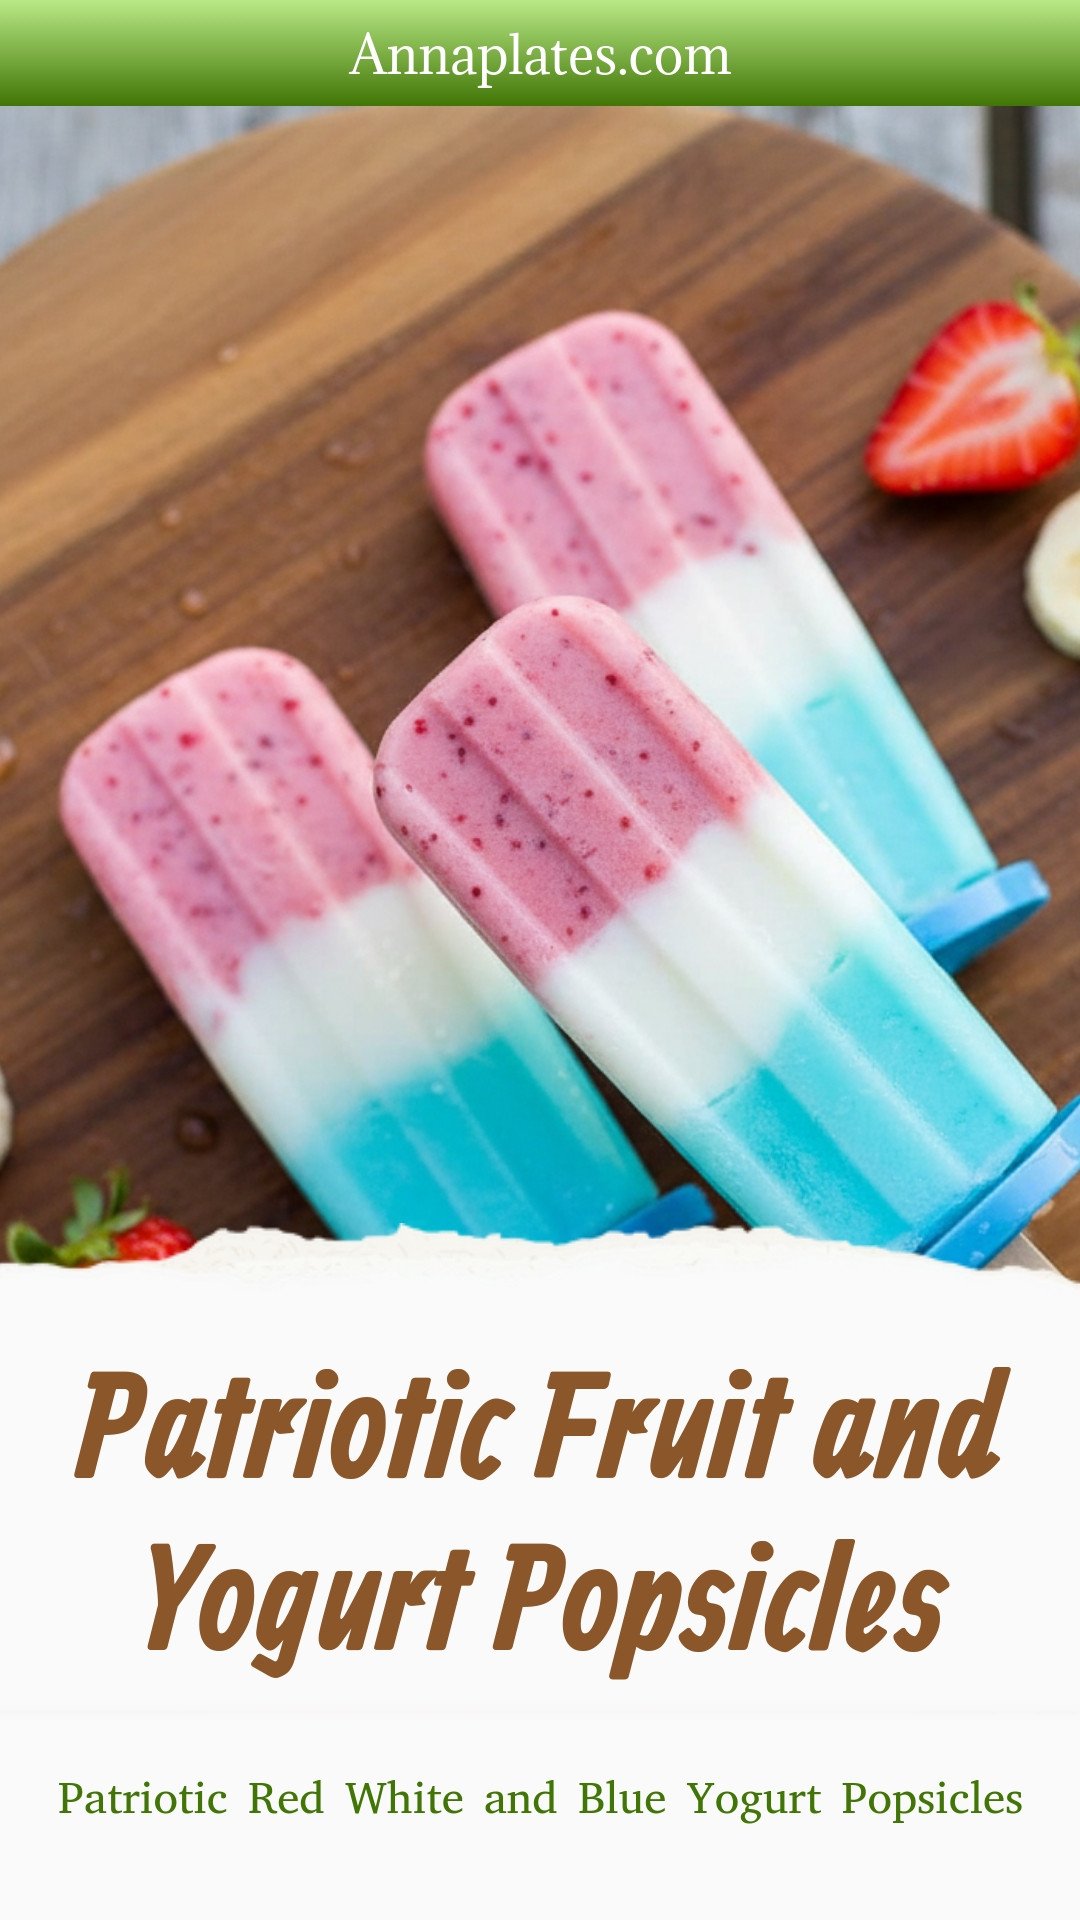
Patriotic Fruit and Yogurt Popsicles: Patriotic Red White and Blue Yogurt Popsicles
Description
Celebrate with these red, white, and blue popsicles! A healthy, kid-friendly summer treat perfect for Memorial Day or the Fourth of July.
Ingredients
Instructions
- Blue Layer: In a blender, mix together the vanilla yogurt, the banana, and 1/3 cup of coconut milk. Blend until smooth. Add 1 drop of blue food coloring if you want to make them with a blue layer. (I only needed one drop with the icing color I used but if you use regular food coloring, you might need a couple of drops to get the desired shade) Blend until complete combined.
- Pour the blue layer into the popsicle molds filling 1/3 full. Put in the freezer for 30 minutes. While they are in there freezing, you can begin to make the next layer.
- White Layer: Clean out the blender, now add the coconut yogurt from the Chobani Flip pack. We ate the almonds and chocolate mix ins separately. Don’t put them in the yogurt. Mix the coconut yogurt with 1/3 cup of coconut milk. The coconut yogurt already has coconut in it, but if you want more, you’ll need to add some coconut flakes… we usually just use it as is. Blend the yogurt and milk together and after 30 minutes of freezing the blue layer, pour the white layer on top. Now put back into the freezer, this time for only about 20 minutes or so.
- Red Layer: In a clean blender, mix the strawberry yogurt with the strawberries and 1/3 cup of coconut milk. Pour the red layer on top of the white layer.
- Insert the popicle stick at this point. The white layer shouldn’t be frozen solid after only 20 minutes so getting the popsicle stick into that layer only takes gentle pushing.
- Put them back in the freezer for at least another 2-3 hours or so. We make them in the morning and they are ready after lunch.
- To release the popsicles from the molds, run warm water over the bottom of the molds. Very gently twist and turn until they come out. Enjoy!
Notes
- Nutrition Facts (per serving): Calories: 82kcal, Carbohydrates: 5g, Protein: 2g, Fat: 7g, Saturated Fat: 5g, Polyunsaturated Fat: 0.1g, Monounsaturated Fat: 1g, Cholesterol: 7mg, Sodium: 27mg, Potassium: 155mg, Fiber: 0.2g, Sugar: 3g, Vitamin A: 55IU, Vitamin C: 3mg, Calcium: 67mg, Iron: 1mg


Leave a Reply