

My Candy Window Memory
Let me tell you about my grandson, Sam. One cold December, we made these lollipops. He pressed his nose to the cold window, watching them cool. He said they looked like stained glass. I still smile at that.
Making them together was the real treat. It wasn’t just about candy. It was about sharing a warm kitchen on a cold day. That matters more than a perfect shape.
Your Simple Sweet Supplies
You only need a few things. Grab red and green Jolly Ranchers. You will also need lollipop sticks and parchment paper. The oven does the hard work for you.
Fun fact: The first lollipops might be from ancient times. People used honey and sticks! I like using parchment paper. It stops the candy from sticking. Trust me, it makes life easy.
The Magic Melting Moment
Now, this is the important part. Your oven must be very low, just 200 degrees. Unwrap your candies. Place them in little groups on the sheet. I use three candies per lollipop.
Do not walk away. Watch them like a hawk. In about five minutes, they will melt. Pull them out the second they look liquid. Doesn’t that smell amazing? If they melt too much, they become a puddle. I learned that the hard way!
A Quick Twist of the Wrist
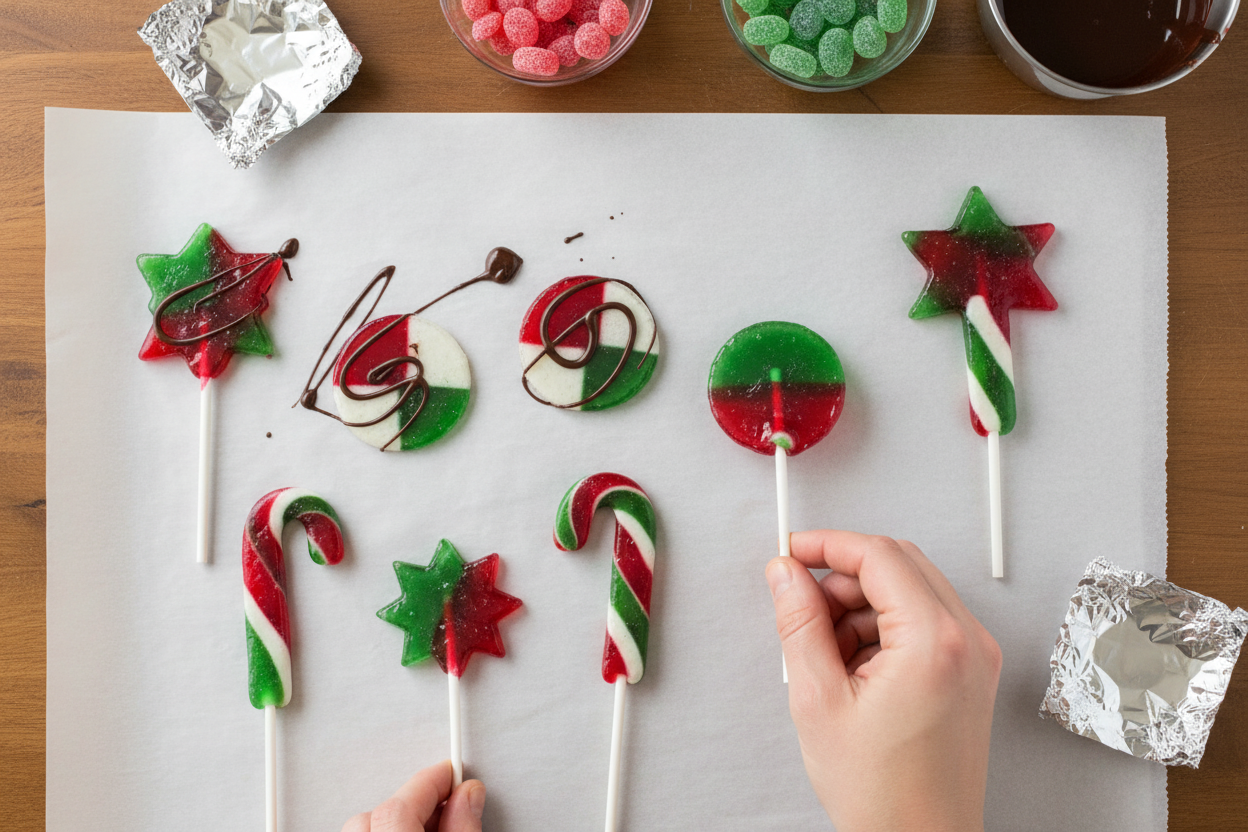
Work fast here. As soon as the pan is out, press a stick into each soft candy pool. Give the stick a little roll. This coats it and makes it strong.
The candy sets up quickly. Then you just wait. In twenty minutes, you have your lollipops. What color pattern did you make? I love mixing red and green.
Why This Little Recipe Matters
This isn’t just a snack. It’s a tiny piece of joy you made yourself. Giving a homemade lollipop says, “I thought of you.” That feeling is the best ingredient.
It also teaches patience and care. Good things often need a watchful eye. Do you have a favorite memory of making something simple with someone?
Your Turn to Create & Share
Now you try. Will you dip the tops in a little melted chocolate? Or leave them shiny and clear? Tell me how yours turn out.
Who will you make these with? A sibling, a parent, a friend? Share your kitchen stories with me. I love to hear them. What other candy colors would be fun for different holidays?
Ingredients:
| Ingredient | Amount | Notes |
|---|---|---|
| Jolly Ranchers Candy (red and green) | 2 cups | |
| Chocolate, melted | ¼ cup | Optional, for dipping |
| Aluminum foil | as needed | |
| Lollipop sticks | as needed | |
| Parchment paper | as needed |
My Easy Christmas Lollipop Trick
Hello, my dear! It’s Anna. Come sit with me in the kitchen. I want to share my favorite Christmas trick. We turn simple candies into beautiful lollipops. It’s magic. My grandkids love helping with this one. The oven does most of the work. Doesn’t that sound nice?
We make these every year. The red and green colors are so cheerful. I still laugh at the first time I tried. I walked away from the oven. What a sticky mess we had! So let’s make some together. I’ll guide you through each step.
Step 1: First, heat your oven to 200 degrees. Cover a cookie sheet with foil. Then add parchment paper on top. This paper is our secret. It makes cleanup so easy. The lollipops just pop right off later. Trust me on this.
Step 2: Now, unwrap your Jolly Ranchers. Use red and green ones. Place them in little groups on the sheet. I like three candies per lollipop. Try a red, green, red pattern. Leave lots of space between groups. You need room for the stick later.
Step 3: Carefully slide the sheet into the oven. Try not to bump it. Now, you must watch closely. Do not walk away! Peek after about 3 minutes. You want them just melted. (My hard-learned tip: If they melt too much, they become a puddle. It happens fast!).
Step 4: Take them out the second they melt. Work quickly now. Press a lollipop stick into each soft candy group. Roll the stick a little. This coats it and makes it strong. They cool so fast, especially in a chilly kitchen.
Step 5: Let them cool on the pan for 20 minutes. Then, they should lift off easily. You can eat them right away. Or we can wrap them in clear plastic. They make the sweetest little gifts. What friend would you give these to? Share below!
Cook Time: 5–7 minutes
Total Time: 30 minutes
Yield: About 10 lollipops
Category: Dessert, Candy
Fun Twists to Try Next Time
Once you know the basics, you can play! Here are some fun ideas. My grandson loves the chocolate-dipped ones. It makes them feel extra fancy.
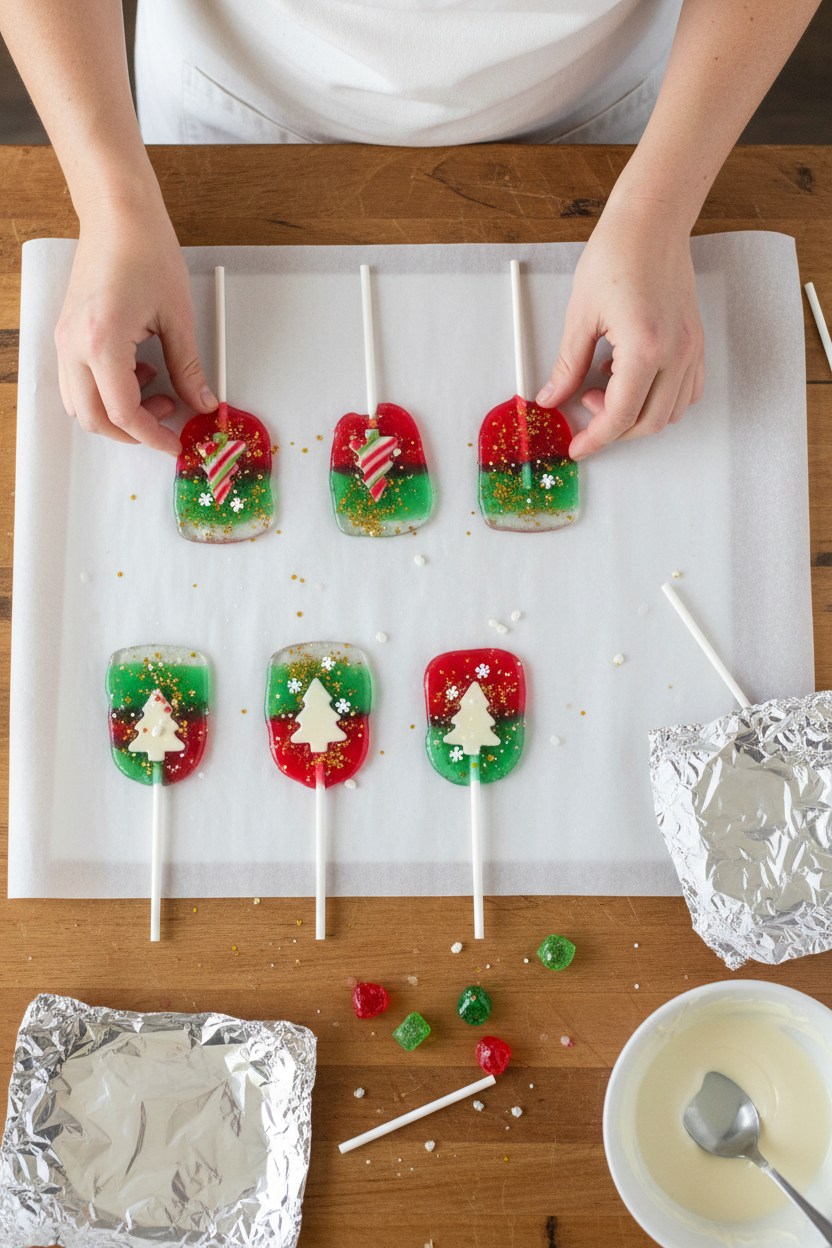
Chocolate Dip: Melt a little chocolate. Dip half of each cooled lollipop in it. Let it harden on parchment paper. So pretty!
Confetti Sparkle: Right after adding the stick, sprinkle on edible glitter. It looks like tiny snowflakes caught in the candy.
Mixed Berry: Use blue and red candies instead. They taste like mixed berries. It’s a nice change from just red and green.
Which one would you try first? Comment below!
Serving Them Up With Style
These lollipops are stars all on their own. But presentation is part of the fun. Stick them in a pretty mug filled with sugar. It looks like a little lollipop garden. You can also tie ribbons on the sticks. Use them as gift tags on presents.
What to drink with them? A cold glass of milk is always perfect. It balances the sweet candy. For the grown-ups, a cup of hot coffee is lovely. The bitter taste pairs so well with the sweet. Which would you choose tonight?
Storing Your Sweet Creations
These lollipops are best enjoyed fresh. But you can store them for a few days. Just let them cool completely first. Then layer them between parchment paper in a sealed container. Keep them at room temperature, away from heat.
Do not put them in the fridge or freezer. The moisture makes them sticky. I learned this the hard way. I once made a big batch for a party. I stored them in a cold garage. They got all soft and sad!
You can make many batches ahead of time. This is perfect for holiday gifts. It saves you last-minute kitchen stress. That matters because holidays should be joyful, not frantic. Have you ever tried storing it this way? Share below!
Quick Fixes for Common Troubles
First, candies melting into a blob? Your oven was too hot. Use an oven thermometer to check. I remember when my first batch became one giant candy puddle. It was a colorful mess!
Second, the stick won’t stay in? You didn’t roll it enough. As soon as the candy comes out, twirl the stick. Coat it well in the melted candy. This makes a strong seal.
Third, candy is too hard to remove? You forgot the parchment paper. The foil alone will make them stick. Always use that parchment layer. Fixing small problems builds your cooking confidence. It also makes treats that look as good as they taste. Which of these problems have you run into before?
Your Questions, Answered
Q: Is this recipe gluten-free? A: Yes, Jolly Ranchers are gluten-free. Always check your specific candy package.
Q: Can I make them ahead? A: Absolutely! Make them up to three days before. Store them as I mentioned above.
Q: What other candy can I use? A: Try hard butterscotch or cinnamon candies. *Fun fact: The first lollipops were likely made with honey!*
Q: Can I double the recipe? A: Yes, but bake them on two sheets. Do not crowd the candies together.
Q: Is the chocolate dip needed? A: No, it’s just for fun. It makes them extra special for gifts. Which tip will you try first?
From My Kitchen to Yours
I hope you have fun making these. Cooking is about sharing joy. It is about making sweet memories with your hands.
I would love to see your colorful lollipops. Did you make stripes or swirls? Your creations inspire me. Have you tried this recipe? Tag us on Pinterest! You can find me at @AnnasCozyKitchen.
Thank you for spending time with me today. I am so glad you are here. Now, go make something wonderful.
Happy cooking!
—Anna Whitmore.

Easy and Quick Lollipops for Christmas: Quick and Easy Christmas Lollipop Recipes
Description
Make festive Christmas lollipops in minutes! Simple recipes & creative decorating ideas for delicious holiday treats. Perfect for gifts & parties.
Ingredients
Instructions
- Preheat oven to 200 degrees F. Cover a cookie sheet with tinfoil and then add a layer of parchment paper on top.
- Unwrap Jolly Rancher candies. Arrange them on the prepared sheet in small groups of 2 or 3 candies, mixing red and green colors. Leave plenty of space between groups for the lollipop sticks.
- Carefully place the cookie sheet in the preheated oven. Bake for 5-7 minutes, watching closely from the 3-minute mark. Remove immediately when the candies are just melted.
- Working quickly, place a lollipop stick into each melted candy group. Roll the stick to coat it and secure it in the candy. The candy will set fast.
- Allow lollipops to cool completely on the pan for about 20 minutes. Once cool, they will easily release from the parchment paper.
- Optional: Dip the cooled lollipops in melted chocolate for extra decoration. Enjoy immediately or wrap for gifts.
Notes
- For best results, do not walk away from the oven while the candies are melting. They can go from perfect to a runny mess very quickly. Work fast when adding the sticks as the candy cools and hardens rapidly.


Leave a Reply