
A Little Bit of Magic
I have always loved red velvet. It feels like a celebration. My grandson calls them my fancy cookies. I still laugh at that.
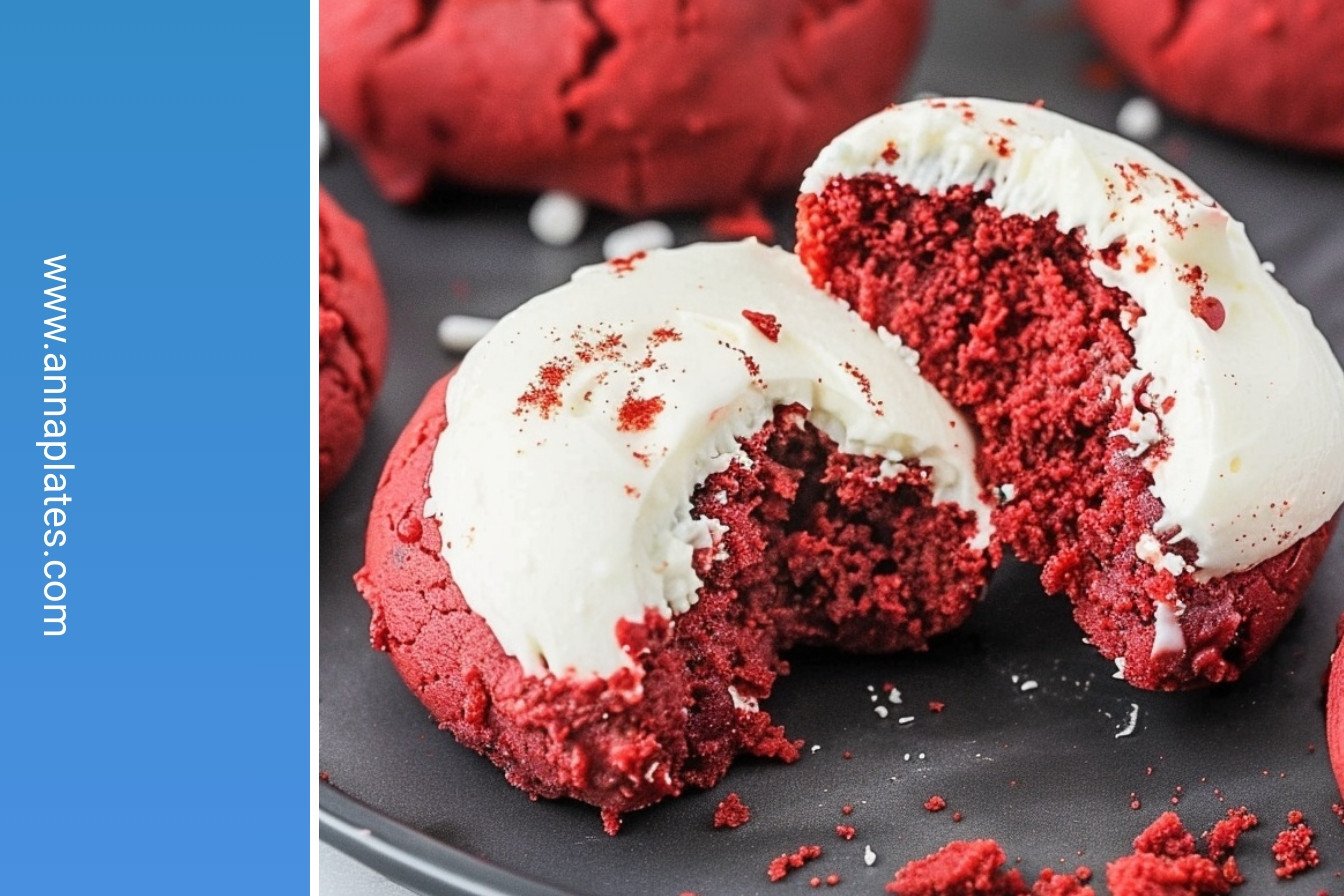
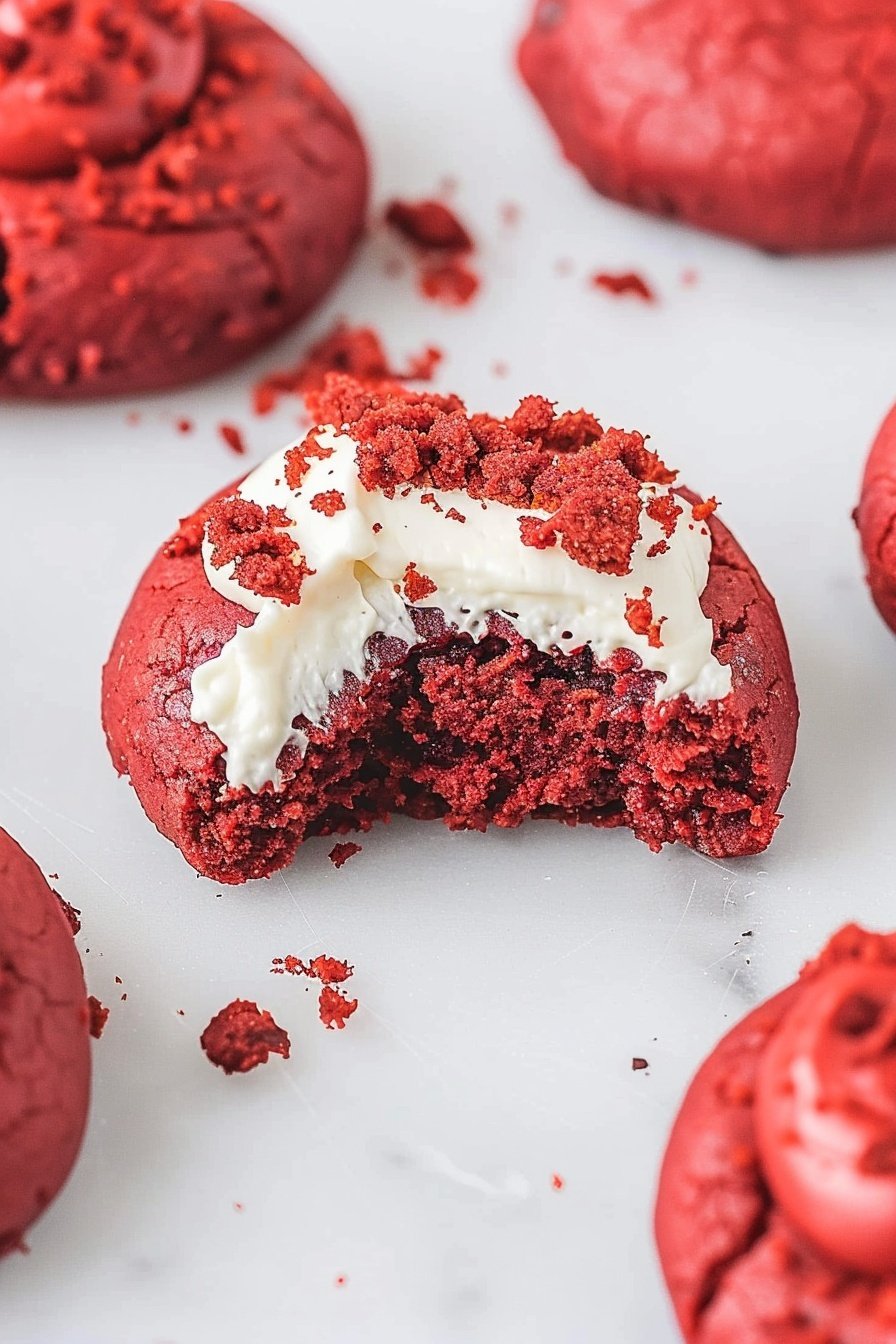
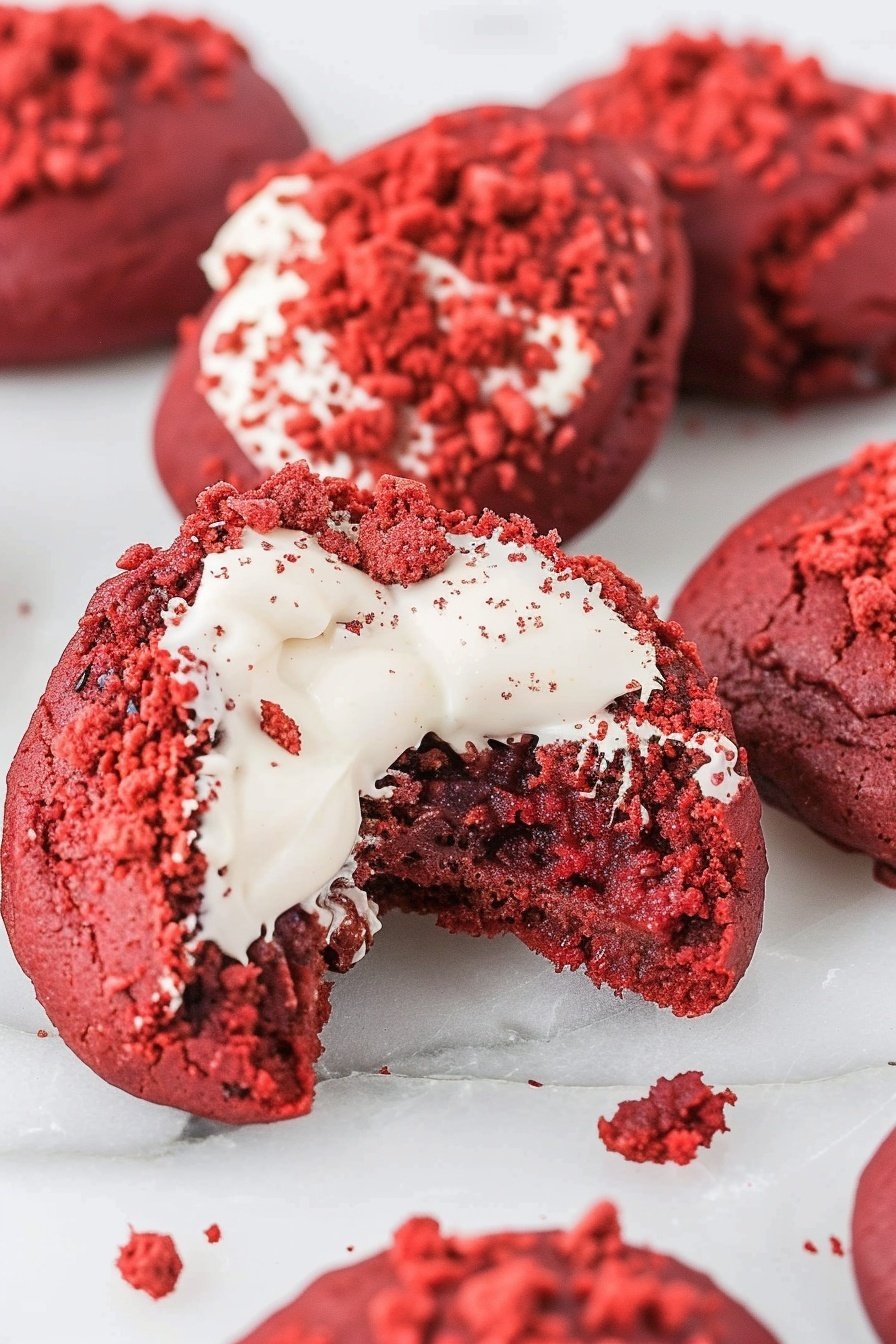
These cookies mix two wonderful things. You get a soft, red cookie. Then you top it with a creamy, tangy frosting. Does not that sound like a perfect treat?
Why We Start Simple
This recipe uses a cake mix. Some folks think that is cheating. I think it is just smart.
It makes everything so much easier. You can have warm cookies in no time. This matters because it gets you baking. Anyone can feel like a baker today.
My Frosting Fumble
Let me tell you about my first time. I was in a hurry. I did not soften the cream cheese first.
Let us just say my frosting was lumpy. Little bits of cream cheese everywhere. Now I always take my time. It makes the frosting so smooth and dreamy.
The Fun Part
Mixing the red dough is my favorite part. It gets so vibrantly red. It just makes me happy to look at it.
Fun fact: The red color in old recipes came from a reaction between cocoa and buttermilk! Now we use food coloring for that bright pop. What is your favorite colorful food to bake?
Sharing the Warmth
Food tastes better when you share it. I love making these for my neighbors. It is a small way to show I care.
This matters more than the recipe itself. It is about the connection. Who would you love to share a plate of these cookies with?
Your Kitchen, Your Rules
Do not worry about being perfect. Your cookies do not need to look like a magazines. They just need to be made with a happy heart.
That is the real secret ingredient. What is your favorite shortcut ingredient that makes baking easier for you?
Ingredients:
| Ingredient | Amount | Notes |
|---|---|---|
| Red velvet cake mix | 15.25 ounces | |
| Baking powder | 2 teaspoons | |
| Butter | 6 tablespoons | melted |
| Eggs | 2 | |
| Cream cheese | 8 ounces | softened |
| Unsalted butter | 4 tablespoons | softened |
| Vanilla extract | 1 teaspoon | |
| Powdered sugar | 2½ cups |
A Cookie as Special as Valentine’s Day
I have always loved red velvet cake. My grandson, Leo, requests it every birthday. One year, I decided to turn it into a cookie. I thought, why should cake have all the fun? The result was these lovely, soft red velvet cookies. They are like little bites of celebration. Doesn’t that sound wonderful?
They are surprisingly simple to make. We start with a cake mix, which is a wonderful little shortcut. (My hard-learned tip: Don’t overmix the dough! It makes the cookies tough). Just a few ingredients and you are on your way. The smell that fills your kitchen is pure happiness. It reminds me of a bakery I loved as a little girl.
- Step 1: First, get your oven ready at 325°F. Line your baking sheets with parchment paper. This little step saves so much cleaning later. I still laugh at the time I forgot it. What a sticky mess we had!
- Step 2: Now, grab a small bowl. Whisk your red velvet cake mix with the baking powder. This gives our cookies a perfect little lift. Just mix until you see no more white streaks. It’s like a pretty red and white sand.
- Step 3: In a bigger bowl, mix the melted butter and eggs. I use a simple whisk for this. Then, pour in your dry mixture. Stir it with a spoon until it all comes together. The dough will be very thick and shiny.
- Step 4: Use an ice cream scoop to drop the dough onto your pans. This makes all the cookies the same size. It’s my favorite trick for perfect cookies every single time. How many cookies did you get? Share below!
- Step 5: Bake them for about 13 to 15 minutes. They will look puffy and amazing. Let them cool completely on the pan. This is very important for the frosting. Patience is a cook’s best friend.
- Step 6: For the frosting, beat the soft cream cheese and butter together. Add the vanilla. Then, slowly mix in the powdered sugar. Keep mixing until it is smooth and dreamy. I always sneak a little taste here. So good!
- Step 7: Finally, pipe a beautiful swirl onto each cool cookie. I like to crush one cookie for crumbs on top. It looks so professional and pretty. And there you have it! A treat made with love.
Cook Time: 15 minutes
Total Time: 25 minutes
Yield: 10 cookies
Category: Dessert, Cookies
Let’s Get Creative With Your Cookies!
Once you master the basic recipe, you can play. I love adding little twists to my baking. It makes each batch a new adventure. Here are a few of my favorite ideas for these cookies. They are all so simple and fun.
- Chocolate Chip Swirl: Add a handful of white chocolate chips to the dough. The creamy chips look so pretty with the red.
- Peppermint Party: Use peppermint extract in the frosting instead of vanilla. Top with crushed candy canes for a holiday feel.
- Fruity Fun: Mix some freeze-dried raspberry powder into the frosting. It gives a lovely pink color and a little tang.
Which one would you try first? Comment below! I love reading about your own kitchen experiments. It makes me so happy.
The Perfect Way to Serve Them Up
These cookies are a star all on their own. But I think every treat is better with friends. For a real special occasion, try one of these ideas. They make everything feel more festive, don’t you think?
I love serving them on a fancy cake stand. It shows them off! You could also crumble one over a scoop of vanilla ice cream. Or pack them in a pretty box as a gift for a friend. That always brings a smile.
For a drink, a cold glass of milk is the classic choice. It just goes together. For the grown-ups, a little glass of dessert wine is lovely. It’s sweet and sips nicely with the creamy frosting. Which would you choose tonight?
Keeping Your Red Velvet Cookies Fresh
These cookies are best enjoyed the day you make them. But they will keep for three days in the fridge. Just put them in a sealed container. The frosting needs to stay cool.
You can also freeze the cookies without frosting. I wrap them tightly in plastic wrap. Then I pop them in a freezer bag. My grandson loves finding these in my freezer for a surprise treat.
Let frozen cookies thaw on the counter. This keeps them soft and chewy. Batch cooking saves you time for busy weeks. It means a homemade treat is always close by.
Have you ever tried storing it this way? Share below!
Simple Fixes for Cookie Troubles
Is your dough too sticky? This happens to everyone. Just chill it in the fridge for twenty minutes. I remember when my first batch spread too much. Chilling the dough fixed it perfectly.
Is your frosting too runny? Your butter might have been too soft. Add a little more powdered sugar. This makes it thick and pipeable. Getting the texture right builds your cooking confidence.
Are your cookies too cakey? You might have over-mixed the dough. Mix just until you see no more dry spots. A gentle hand makes for a much better cookie texture. Good flavor comes from good technique.
Which of these problems have you run into before?
Your Red Velvet Cookie Questions
Q: Can I make these gluten-free? A: Yes, just use a gluten-free red velvet cake mix. It works just the same.
Q: Can I make the dough ahead? A: Absolutely. Keep it covered in the fridge for up to two days.
Q: What if I don’t have an ice cream scoop? A: Two spoons work fine. Just drop the dough onto the sheet.
Q: Can I double the recipe? A: You can. Just bake one sheet at a time for even heat.
Q: Any extra tips? A: A pinch of cinnamon in the dough is my little secret. It adds a warm, cozy flavor.
Which tip will you try first?
Bake Some Joy Today
I hope you love baking these beautiful cookies. They always make my kitchen feel happy. Sharing them with family is the best part.
I would love to see your creations. Your cookies will bring a smile to someone’s face. Have you tried this recipe? Tag us on Pinterest!
Happy cooking!
—Anna Whitmore.
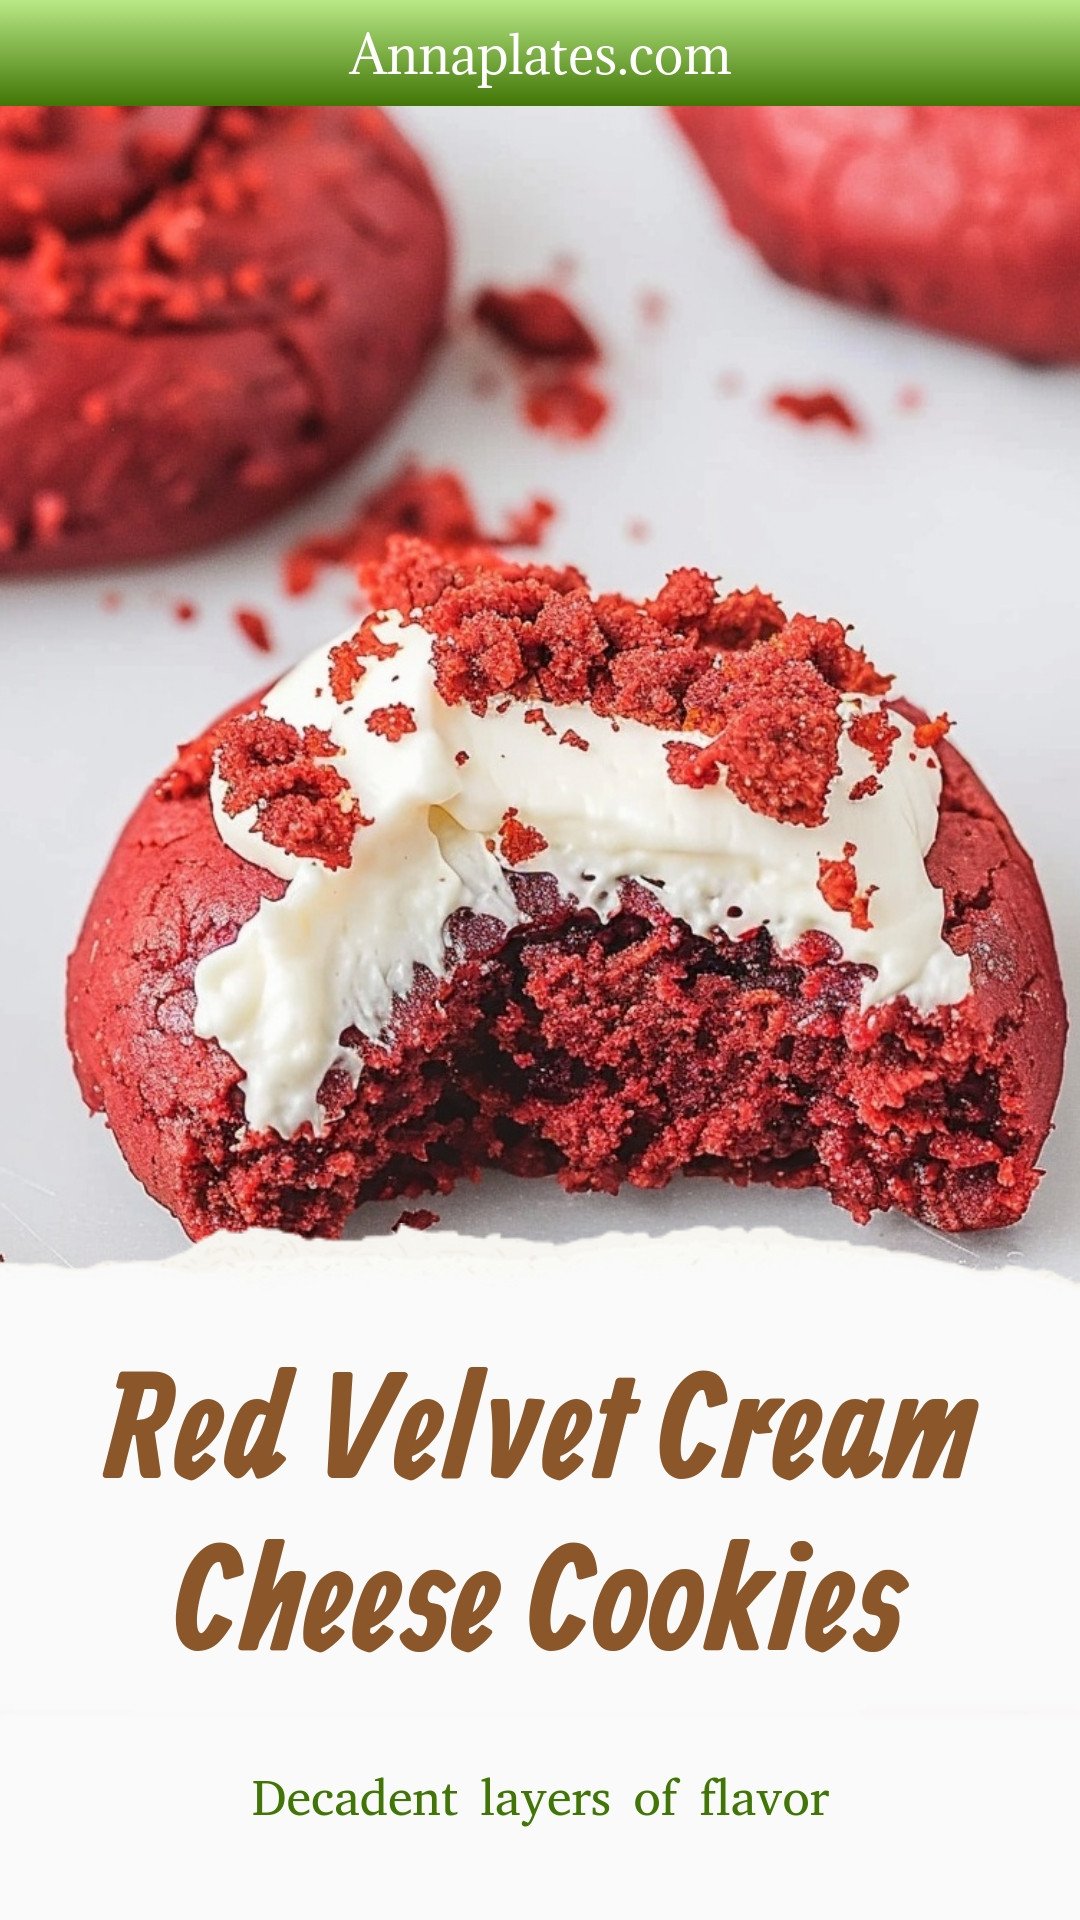
Red Velvet Cream Cheese Cookies: Decadent layers of flavor
Description
The ultimate holiday cookie! These soft red velvet cookies are stuffed with a rich cream cheese filling. Easy recipe with stunning results.
Ingredients
=== Red Velvet Cookies ===
=== Cream Cheese Frosting ===
Instructions
- Preheat the oven to 325°F and prepare 2 baking sheets with parchment paper. Set aside.
- In a small mixing bowl, whisk together the cake mix and baking powder until combined. Set aside.
- Whisk together the melted butter and eggs in a separate large mixing bowl. Add the dry mixture and mix with a spoon until completely combined.
- Using an ice cream scoop, scoop 6 dough balls evenly spaced onto each baking sheet.
- Bake at 325°F for 13-15 minutes. Remove the cookies and let them cool completely while making the frosting.
- In a large mixing bowl, beat the cream cheese, butter, and vanilla extract until smooth and creamy. Add the powdered sugar a little bit at a time until completely combined.
- Transfer the frosting into a piping bag and pipe a spiral onto each cookie. Top with crumbs from a crushed cookie, and enjoy!
=== For The Cookies ===
=== For the Frosting ===
Notes
- Nutrition: Calories: 496kcal | Carbohydrates: 63g | Protein: 5g | Fat: 27g | Saturated Fat: 13g | Polyunsaturated Fat: 3g | Monounsaturated Fat: 8g | Trans Fat: 0.5g | Cholesterol: 86mg | Sodium: 496mg | Potassium: 270mg | Fiber: 1g | Sugar: 47g | Vitamin A: 703IU | Calcium: 130mg | Iron: 2mg


Leave a Reply