
My Skillet Pizza Secret
Let me tell you about skillet pizza. It changed my kitchen life. The crust gets so crisp on the bottom. The cheese melts perfectly. It feels like a little magic trick.
I learned this from my neighbor, Margie. She brought one over when my oven broke. I was so worried about dinner. That pizza saved the night. I still laugh at that. Why does this matter? Because good food doesn’t need fancy tools. Just a good skillet and a warm heart.
All About That White Pesto
Now, white pesto is the star here. It’s creamy and herby. It’s not the usual red tomato sauce. Doesn’t that smell amazing? It makes the pizza feel special.
Fun fact: Traditional pesto is green from basil. “White” pesto often uses nuts, cheese, and oil without the greens. It’s a gentle, cozy flavor. Have you ever tried a white sauce on pizza before? I’d love to know what you think.
The Topping Dance
Here’s my little tip. Cook your sausage and bacon first. It makes them nice and crispy. Then I toss the peppers and mushrooms in that same pan. They get a bit of that tasty flavor.
I layer the spinach and olives raw. The warm pizza wilts the spinach just right. Why this matters? Cooking each thing a little first makes every bite better. It’s a small step with a big reward. What’s your must-have pizza topping? Mine will always be olives.
Watching the Crust
The key is watching the heat. Start hot to get bubbles in the dough. I love to pop them with my spatula. Then you flip it, add your toppings, and cover it.
Turn the heat down to medium. Let the cheese melt and the bottom turn gold. Peek under the crust after 4 minutes. Do you like a soft crust or a crispy one? I go for crispy every time.
Sharing the Table
Let the pizza cool for a few minutes. This is the hardest part! But it lets the cheese set. Then you can slice it cleanly. The skillet keeps it warm for a long time.
Why this matters? Food made with patience tastes better shared. This pizza is perfect for a family game night. It’s hearty and fun. What’s your favorite meal to make for a cozy night in?

Ingredients:
| Ingredient | Amount | Notes |
|---|---|---|
| Pizza crust | 1 | |
| Olive oil | 1 tablespoon | |
| White pesto sauce | 1 cup | |
| Kielbasa sausage, sliced | 1 cup | |
| Bacon | 3 strips | Cut into smaller strips |
| Green bell pepper | 1 small | Sliced |
| Baby spinach | ½ cup | |
| Mushrooms, sliced | ¼ cup | |
| Black olives, sliced | ¼ cup | |
| Shredded cheese (e.g., Provel or Mozzarella) | 1 – 2 cups |
My Skillet White Pesto Pizza Adventure
Hello, my dear! Let’s make a pizza together. We will use a skillet. This is how my own grandma cooked. It makes the crust wonderfully crispy. I love the sizzle it makes.
First, gather all your toppings. I like to slice the kielbasa and bacon first. The smell of bacon cooking is pure happiness. Doesn’t that smell amazing? I still laugh at that time I forgot to cook the bacon first. What a greasy mess! (My hard-learned tip: cook any raw meat or veggies before they go on the pizza).
Step 1: Get your skillet nice and warm. Pour in a little olive oil. Swirl it around. Place your pizza crust right in the pan. Let it cook for a minute or two. You might see bubbles! That’s a good sign.
Step 2: Carefully flip the crust. It should be lightly golden. Now, spread your white pesto sauce all over. Use the back of a spoon. I think pesto tastes like a summer garden. Then, sprinkle a big handful of cheese.
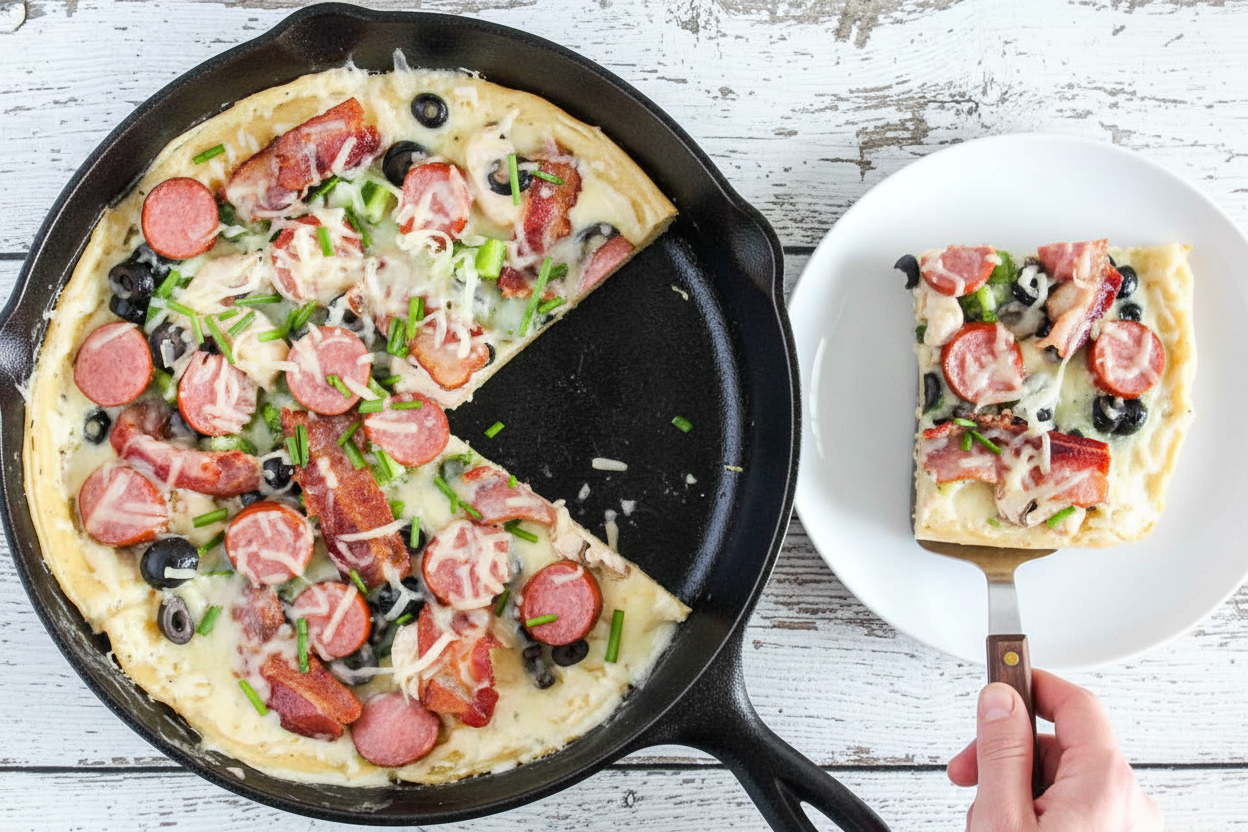
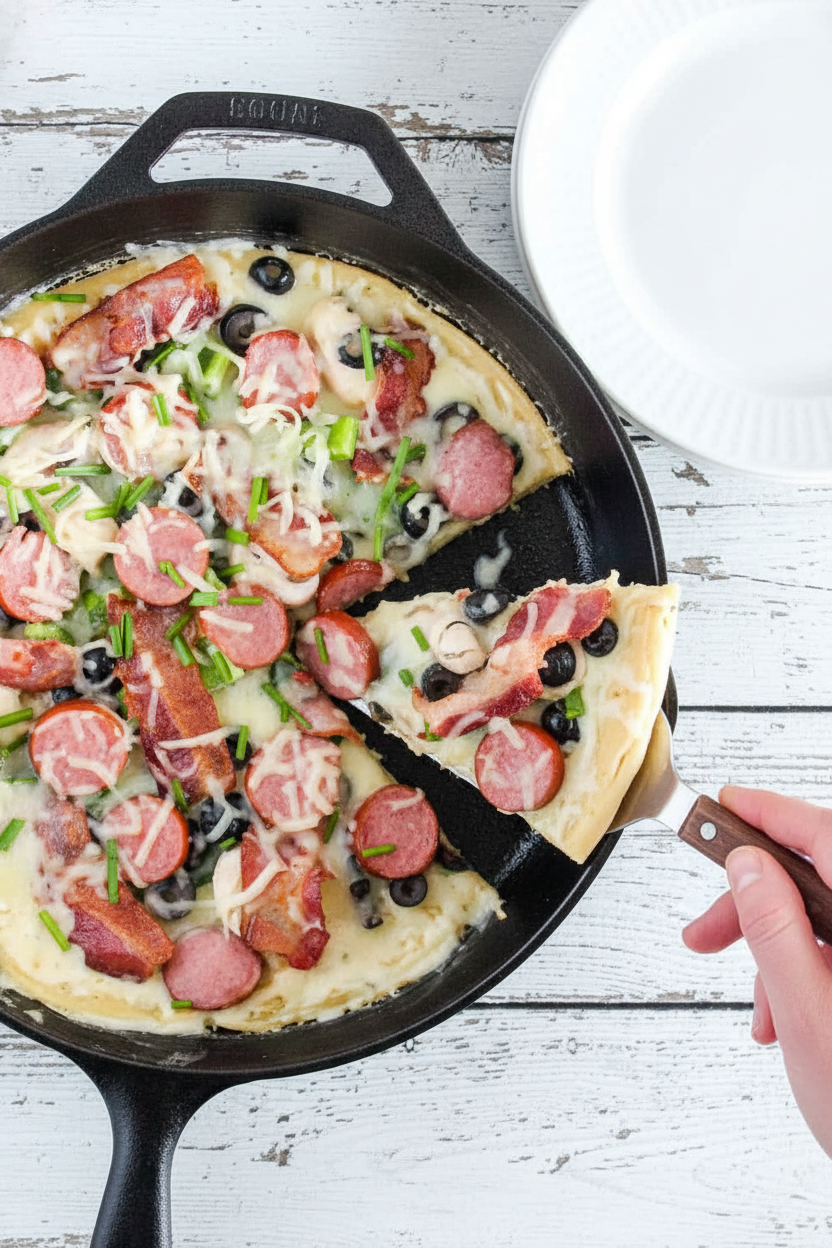
Step 3: Now for the fun part! Add all your toppings. I layer on the sausage, bacon, and peppers. Then comes spinach, mushrooms, and olives. Top it with a little more cheese. This holds everything in place. Do you like black olives on your pizza? Share below!
Step 4: Put the lid on your skillet. Turn the heat to medium. Let it cook for about 5 minutes. The magic is happening under that lid! The cheese is melting. The crust is getting crispy.
Step 5: Lift the pizza to peek at the bottom. Is it a beautiful golden brown? If not, cook a bit longer. When it’s perfect, slide it onto a board. Let it cool for just a few minutes. Then slice and enjoy your creation!
Cook Time: 10–15 minutes
Total Time: About 25 minutes
Yield: 4–6 slices
Category: Dinner, Quick Meal
Three Tasty Twists to Try
This pizza is like a blank canvas. You can paint it with any flavors you love. Here are three ideas from my kitchen. Each one tells a different little story.
The Garden Party: Skip the meat. Add artichoke hearts and sun-dried tomatoes. It feels so fancy, but it’s easy.
The Spicy Kick: Use spicy sausage. Add pickled jalapeño slices. It will make your taste buds dance!
The Autumn Harvest: Try roasted butternut squash and sage. Use a little goat cheese. It tastes like a cozy fall day.
Which one would you try first? Comment below!
Serving Your Masterpiece
This pizza is a full meal. But I love to add a little something extra. A simple green salad is perfect. It balances the rich pizza. You could also serve it with carrot sticks. That’s a nice crunch.
For a drink, I have two favorites. A chilled lemonade is always refreshing. For the grown-ups, a crisp cider pairs beautifully. It tastes like apples and happiness. Which would you choose tonight?
Keeping Your Skillet Pizza Tasty Later
Let’s talk about keeping your pizza yummy for tomorrow. Cool it completely first. Then wrap slices tightly. They will last in the fridge for three days.
You can freeze it too. I wrap each slice in foil. Then I put them all in a freezer bag. This stops freezer burn. It’s perfect for a quick meal later.
To reheat, use your skillet again. It keeps the crust crispy. I once used a microwave and got soggy pizza. The skillet is much better. It makes it taste fresh.
Batch cooking matters for busy families. Making two pizzas takes little extra time. You get a ready-made dinner for another night. It’s a gift to your future self. Have you ever tried storing it this way? Share below!
Simple Fixes for Common Pizza Problems
Sometimes cooking has little bumps. Here are easy fixes. First, a soggy crust. Your heat might be too low. Make sure your skillet is hot before adding dough.
Second, toppings not cooking. Slice them thinly. I remember when my bell peppers were too thick. They stayed crunchy. Thin slices cook perfectly under the lid.
Third, cheese not melting. You might have used too much. A heavy layer blocks heat. Use a good sprinkle, then add your toppings. Add a little more cheese on top.
Fixing these issues builds your confidence. You learn how your stove and pan work. It also makes the flavors better. Everything cooks evenly and tastes great. Which of these problems have you run into before?
Your Pizza Questions, Answered
Q: Can I make this gluten-free?
A: Yes! Use your favorite gluten-free pizza crust. Just follow the same cooking steps.
Q: Can I prepare anything ahead?
A: Absolutely. Slice all your toppings the night before. Store them in containers in the fridge.
Q: What are easy ingredient swaps?
A: Use pre-cooked chicken instead of sausage. Try red peppers or onions instead of green peppers.
Q: Can I make a smaller pizza?
A: Of course. Use a smaller crust. Just use less of all the toppings and sauce.
Q: Any optional tips?
A: Let the pizza sit for 3 minutes after cutting. This lets the cheese set so it doesn’t slide off! Which tip will you try first?
From My Kitchen to Yours
I hope you love this cozy skillet pizza. It always reminds me of cooking with my grandkids. We make a big mess and have more fun.
I would love to see your creation. Did you add your own special topping? Your kitchen stories make me so happy. Have you tried this recipe? Tag us on Pinterest!
Thank you for cooking with me today. Remember, the best recipes are the ones you make your own.
Happy cooking!
—Anna Whitmore.
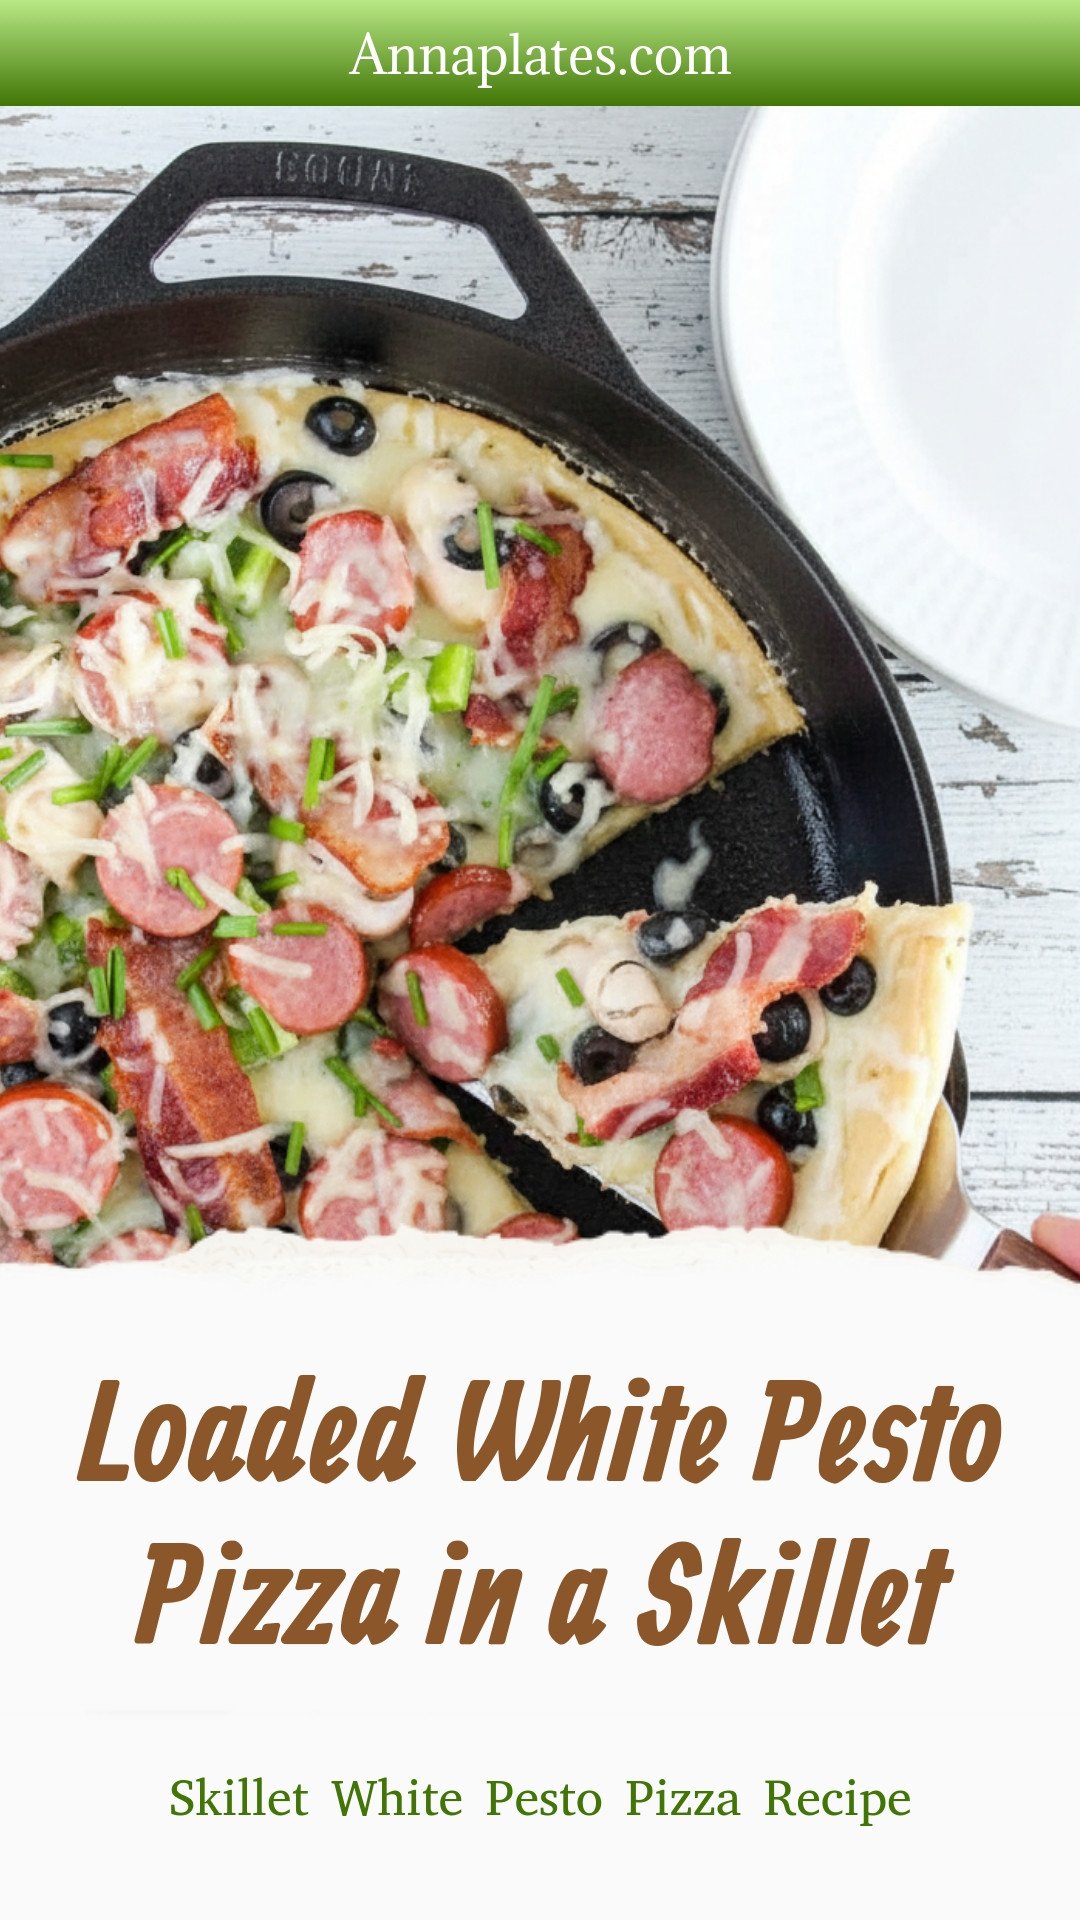
Loaded White Pesto Pizza in a Skillet: Skillet White Pesto Pizza Recipe
Description
Creamy white pesto, mozzarella, and sun-dried tomatoes make this skillet pizza a decadent, easy dinner. Ready in 30 minutes!
Ingredients
Instructions
- Gather your sauce and pizza toppings together. If you have any raw toppings you want to cook, go ahead and get those done before starting the pizza.
- Turn your burner on medium-high heat. Coat your skillet with a very thin layer of olive oil and allow to begin heating.
- Place your round pizza crust into the skillet. Cook the pizza dough for about a minute or two. You will start seeing bubbles forming, you can pop them or just let them cook that way. After about a minute use a spatula to flip the pizza crust over.
- Immediately add your sauce and spread it around. Then sprinkle a generous amount of your cheese, follow with other toppings and if you want, add a bit more cheese (We do to kind of hold the toppings in place).
- Cover the skillet with a lid and reduce heat to medium. Cook for an additional 4-5 minutes.
- Lift the pizza up and check for a golden color. Turn up if needed. We like our pizza a little thinner and crispier so we went a little longer to give it a deeper color. Go less if you want a softer crust.
- Pizza is finished when cheese is melted and bottom of pizza is a golden brown.
- Remove from heat and transfer the pizza to a cutting board. Allow to cool for 2-3 minutes, and then slice with a pizza cutter and serve.


Leave a Reply