
The Best Kind of Surprise
My grandson Sam loves mint brownies. He calls them “magic squares.” I think he’s right. You get three layers in one bite. It’s a lovely surprise.
I first made these for a school bake sale years ago. They sold out in ten minutes. I still laugh at that. Now, they are my go-to treat for happy days. What’s your favorite treat to share with friends?
Building Your Brownie Base
Let’s start with the foundation. Melt your butter and whisk it with the sugar. It will get smooth and shiny. This step matters. It gives you that perfect crackly top.
Then stir in your cocoa, salt, and baking powder. Add the eggs and vanilla next. Finally, fold in the flour. Just mix until you see no more white streaks. Too much mixing makes tough brownies. Pour the batter into your pan. Doesn’t that smell amazing already?
A Cool Minty Cloud
While the brownies cool, make the mint frosting. Use softened butter. Beat it until it’s creamy. Slowly add the powdered sugar and milk.
Now for the fun part. Add the peppermint extract. I always add a tiny drop of green food coloring. It just feels more minty that way. *Fun fact: Peppermint is a natural hybrid of two other mint plants!* Spread this fluffy cloud over your cooled brownies. Then, the fridge helps it firm up. This chill time matters. It keeps the layers from mixing together.
The Glossy Chocolate Blanket
The final layer is ganache. It sounds fancy, but it’s simple. It’s just chocolate and cream warmed together. Microwave it in short bursts. Stir well each time.
You will get a glossy, pourable chocolate. Pour it over the mint layer. Tilt the pan to help it spread. This creates a smooth, professional finish. Do you prefer milk, dark, or semisweet chocolate for toppings like this?
Slice, Share, and Smile
Patience is the last ingredient. Let the ganache set in the fridge. Then, use a sharp knife to cut squares. I run the knife under hot water first. It gives you clean slices.
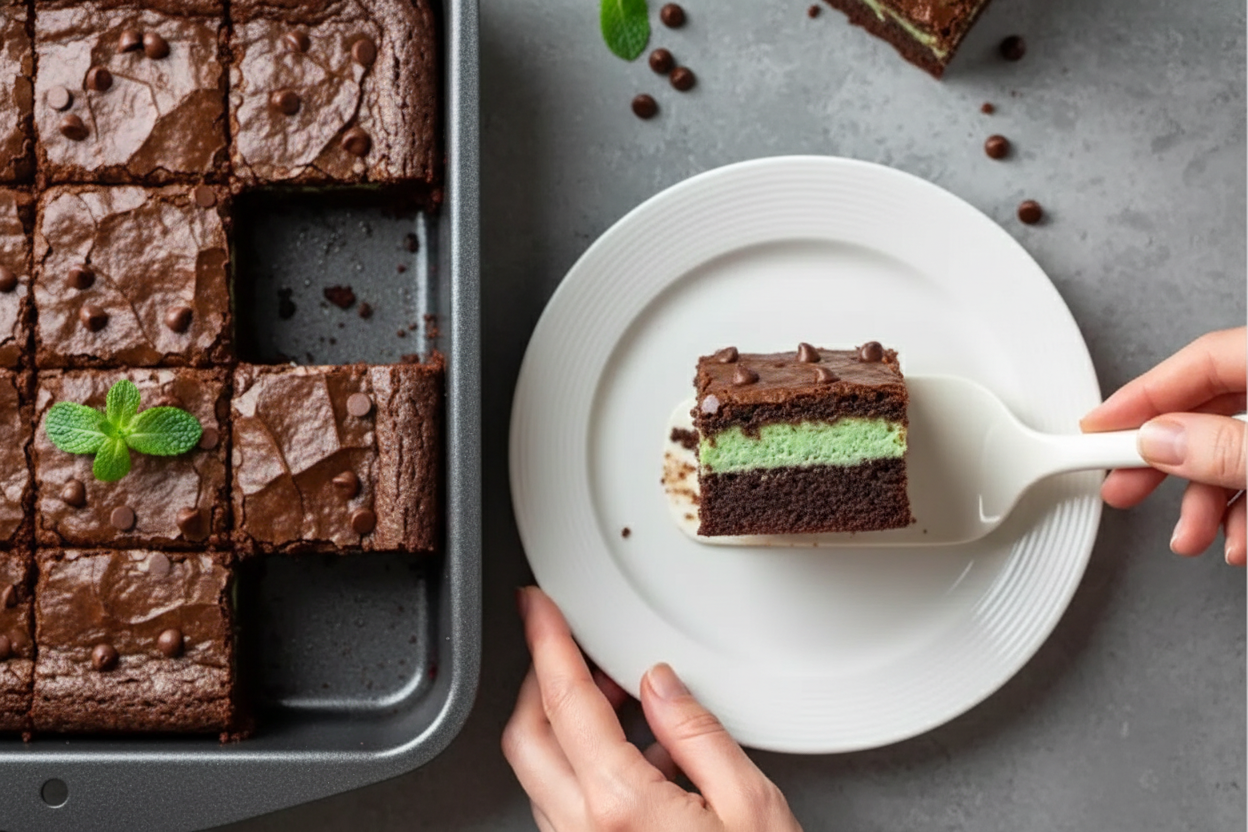
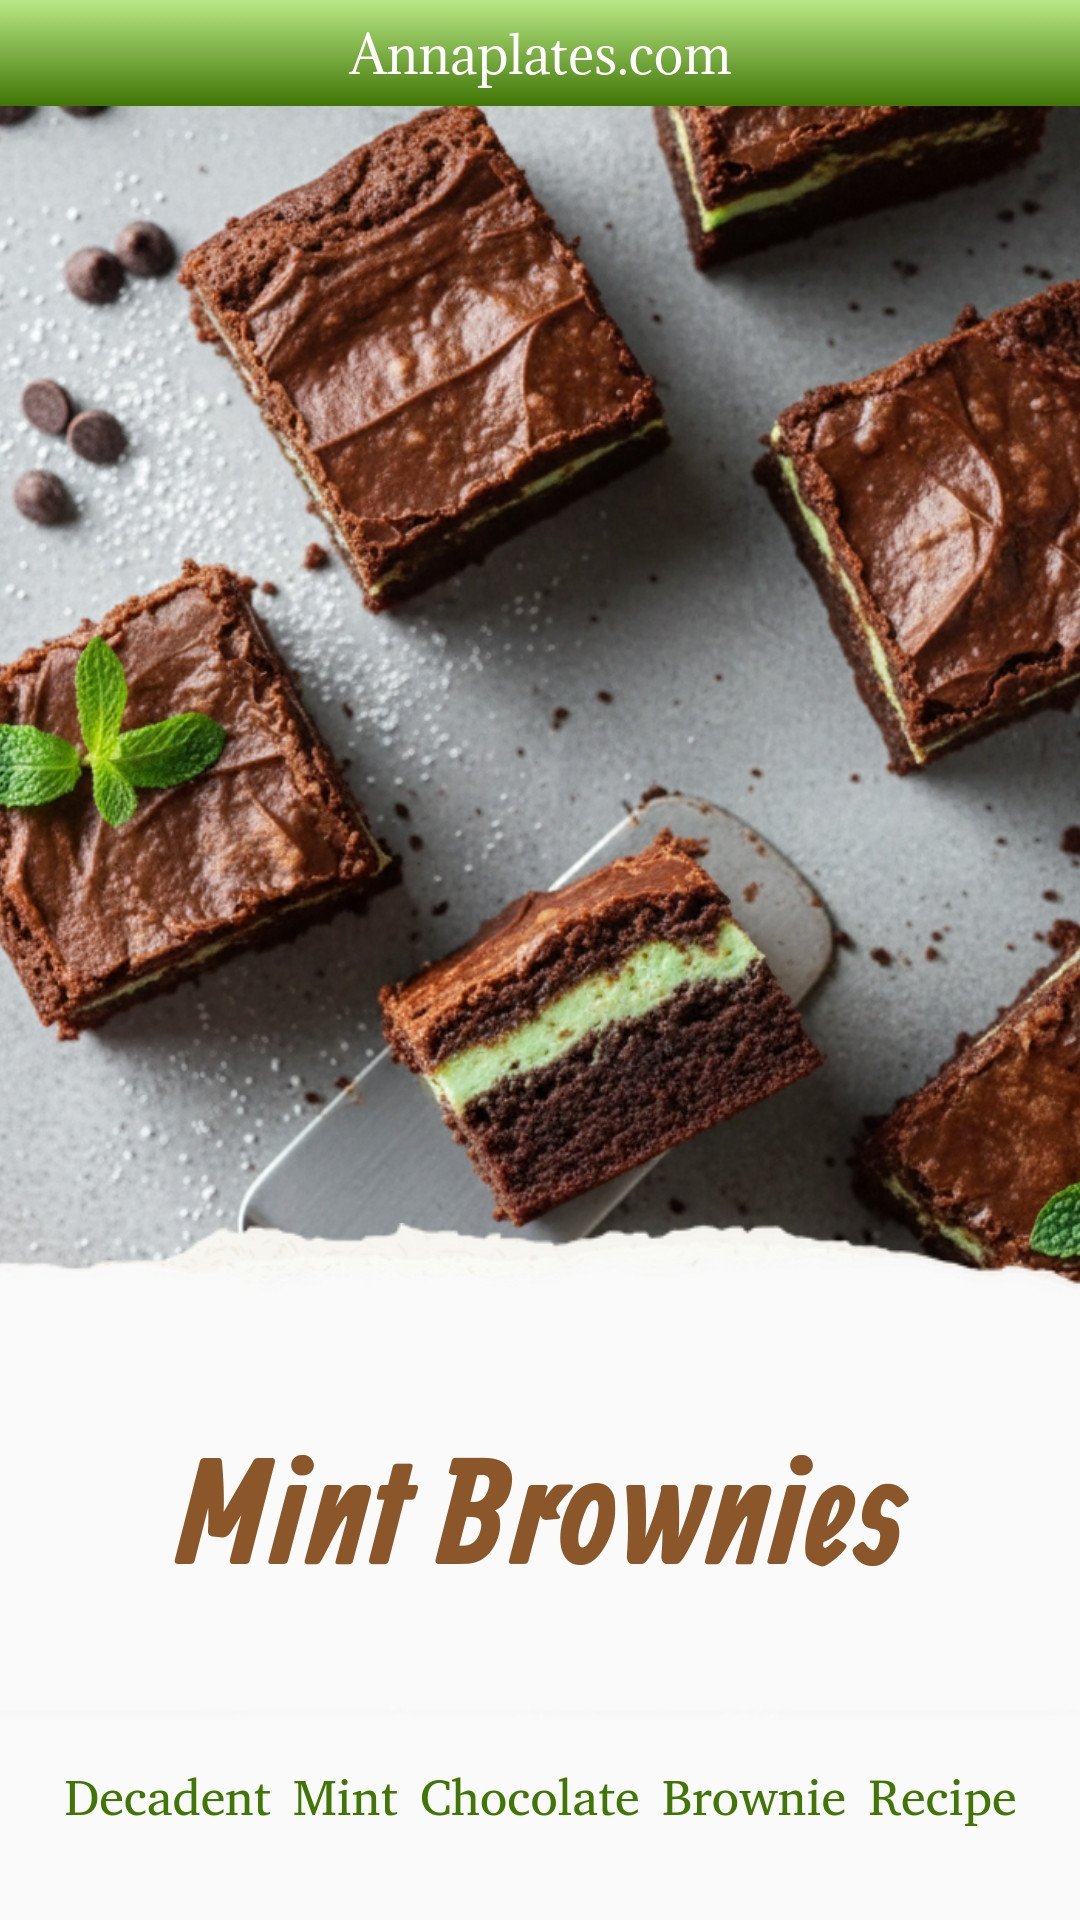
See all three layers? That’s the magic. Each one has a job. The brownie is fudgy. The mint is cool and creamy. The chocolate is rich and smooth. Making food with layers teaches you about balance. It’s a good lesson for life, too. What three-layer dessert should we try next?
Ingredients:
| Ingredient | Amount | Notes |
|---|---|---|
| unsalted butter | ¾ cup | melted, for brownie layer |
| white sugar | 1 ½ cups | |
| cocoa powder | ¾ cup | |
| salt | ½ teaspoon | |
| baking powder | ½ teaspoon | |
| large eggs | 2 | |
| vanilla extract | 1 teaspoon | |
| all-purpose flour | ½ cup | |
| unsalted butter | ¼ cup | softened, for mint frosting |
| powdered sugar | 1 ½ cups | |
| milk | 1 tablespoon | |
| peppermint extract | ½ teaspoon | |
| green food coloring | optional, for mint frosting | |
| semisweet chocolate chips | ¾ cup | for chocolate ganache |
| heavy cream | ¼ cup | for chocolate ganache |
My Favorite Mint Chocolate Brownies
Hello, my dear! Come sit at the counter. Let’s bake my favorite brownies. They have three wonderful layers. First, a fudgy chocolate base. Then, a cool mint frosting. Finally, a shiny chocolate hat on top. Doesn’t that sound like a party? I first made these for my grandson’s birthday. He still asks for them every year. I still laugh at that. The secret is letting each layer cool completely. Patience makes them perfect. Are you ready? Let’s begin our baking story together.
Step 1: First, we make the brownie base. Warm your oven to 350°F. Line your square pan with parchment paper. This little paper sling helps lift the brownies out later. Whisk the melted butter and sugar in a big bowl. It will look smooth and shiny. This makes that lovely crackly top we all love. Stir in the cocoa, salt, and baking powder. Then add the eggs and vanilla. Mix it all until it’s one happy family. Gently fold in the flour until no white streaks remain. (A hard-learned tip: Don’t overmix the flour, or the brownies get tough!). Pour the batter into your pan. Bake for about 25 minutes. A toothpick should have a few sticky crumbs, not be clean. Let it cool completely on the rack. This is the hardest part—waiting!
Step 2: Now for the minty middle! Beat the softened butter until it’s creamy. Slowly add the powdered sugar and milk. Keep beating until it’s fluffy and smooth. Add the peppermint extract. I always add a tiny drop of green food coloring. It just feels more minty that way, don’t you think? Spread this fluffy cloud over your cooled brownies. Be gentle. Then, pop the whole pan into the fridge. Let it chill for at least 30 minutes. This firms up the frosting so the next layer doesn’t mix in. Do you like your mint frosting thick or thin? Share below!
Step 3: Time for the chocolate ganache topping. This is the fancy part, but it’s easy. Put the chocolate chips and cream in a microwave-safe bowl. Heat it for 30 seconds, then stir. Do this once or twice more until it’s glossy and smooth. Doesn’t that smell amazing? Pour this beautiful chocolate over the chilled mint layer. Tilt the pan to help it spread evenly. I use the back of a spoon to smooth it. Then, back into the fridge it goes! Let it set for another 30 minutes. The waiting is almost over.
Step 4: Finally, we get to slice and serve! Use a sharp knife. For the cleanest cuts, run the knife under hot water and dry it. The warm blade slides right through the chocolate. Cut into squares. I usually get 16 small ones. But you can make 9 big, generous squares. Each bite is a perfect trio: fudgy, creamy, and chocolatey. I love seeing the three neat layers on the side. It makes all the waiting worthwhile. Now, find a plate and pour some milk. You’ve earned the first bite.
Cook Time: About 1 hour 30 minutes (plus chilling)
Total Time: About 2 hours 30 minutes
Yield: 16 brownies
Category: Dessert, Brownies
Three Fun Twists to Try
Once you master the classic, try playing with it! Here are three of my favorite twists. They are simple and add a little surprise. Cooking should be fun, after all. My neighbor Sue gave me the candy cane idea. It’s now a December tradition in my house.
Crunchy Candy Cane: Sprinkle crushed candy canes on the wet ganache. It adds a festive crunch and more mint!
Dark Chocolate Swap: Use dark chocolate chips for the ganache. It makes the whole treat a little less sweet, and very grown-up.
Cookie Dough Layer: Skip the mint. Spread store-bought edible cookie dough over the cooled brownies. Then add the ganache. My grandkids go wild for this one.
Which one would you try first? Comment below!
Serving Them Up Right
These brownies are stars on their own. But a little presentation makes them extra special. For a party, place each brownie in a small paper liner. Dust the tops with a bit of powdered sugar. You could also add a tiny fresh mint leaf on top. It looks so pretty on a plate. Serve them with a scoop of vanilla ice cream. The warm brownie and cold ice cream are a dream team.
What to drink? For a cozy night, a glass of cold milk is always the best choice. For the adults, a small glass of coffee liqueur or a rich stout beer pairs wonderfully. The bitter notes love the sweet chocolate. Which would you choose tonight?

Keeping Your Brownies Fresh and Fabulous
Let’s talk about keeping these treats tasty. First, cool them completely. Then, store them in an airtight container. They will stay fresh on the counter for three days.
For longer storage, the freezer is your friend. Wrap squares tightly in plastic wrap. Then, place them in a freezer bag. They keep for three months! Thaw at room temperature when you crave one.
I once sent a whole batch to my grandson. I forgot to tell him to freeze some. He called, so sad they got stale. Batch cooking matters. It means a sweet treat is always ready for surprise guests.
To reheat, just microwave a square for 10 seconds. It makes the chocolate soft and gooey again. It feels like it just came out of the oven. Have you ever tried storing it this way? Share below!
Simple Fixes for Common Brownie Troubles
Even grandmas have kitchen mishaps. Here are easy fixes. First, brownies too cakey? You may have over-mixed the batter. Just fold in the flour until combined. This keeps them fudgy.
Second, frosting too runny? Your butter might have been too soft. Chill the bowl for 10 minutes. Then beat it again. I remember when my mint layer once slid right off. I had to start over!
Third, ganache too thick or thin? If thick, add a teaspoon of warm cream. If thin, add a few more chocolate chips. Getting these layers right matters. It builds your cooking confidence. It also makes every bite perfectly balanced. Which of these problems have you run into before?
Your Brownie Questions, Answered
Q: Can I make these gluten-free? A: Yes! Use a gluten-free flour blend. Use one that substitutes 1:1 for regular flour.
Q: Can I make them ahead? A: Absolutely. Make the full pan up to two days early. Keep it covered in the fridge until serving.
Q: What if I don’t have peppermint extract? A: You can use vanilla extract instead. You will get a lovely vanilla chocolate brownie.
Q: Can I double the recipe? A: For sure. Double all ingredients. Use a 9×13 inch pan. Bake for a few minutes longer.
Q: Any optional tips? A: Try a sprinkle of sea salt on top. It makes the chocolate flavor pop. *Fun fact: Salt helps balance sweetness on your tongue.* Which tip will you try first?
From My Kitchen to Yours
I hope you love making these brownies. I love thinking of families baking together. It creates the sweetest memories. Please tell me all about your baking adventure.
I would be so delighted to see your creation. Share a photo of your beautiful layered squares. Have you tried this recipe? Tag us on Pinterest! You can find me at @AnnasCozyKitchen.
Thank you for spending time in my kitchen today. I will be back soon with another story and recipe. Happy cooking!
—Anna Whitmore.
Decadent Mint Chocolate Brownie Recipe
Description
Fudgy mint brownies with a creamy layer and chocolate topping. An easy, decadent dessert that’s always a hit. Perfect for holidays and parties.
Ingredients
For the Brownie Layer:
For the Mint Frosting:
For the Chocolate Ganache
Instructions
- Preheat your oven to 350°F (175°C). Line an 8×8-inch square baking pan with parchment paper, leaving a slight overhang for easy removal later.
- In a large mixing bowl, whisk together melted butter and sugar until smooth and shiny. This creates that crackly top we all love. Stir in the cocoa powder, salt, and baking powder. Then, add eggs and vanilla, mixing until fully combined.
- Fold in the flour just until no dry streaks remain. Spread the brownie batter evenly into your prepared pan and bake for about 22-26 minutes, or until a toothpick inserted comes out with only a few moist crumbs.
- Let the brownies cool completely before moving to the next layer.
- In a medium bowl, beat the softened butter until smooth. Gradually add powdered sugar and milk, beating until creamy. Mix in the peppermint extract and, if desired, a drop or two of green food coloring for that signature minty look.
- Once the brownies are completely cool, spread the mint frosting evenly on top. Chill in the fridge for at least 30 minutes to help it firm up.
- Place chocolate chips and heavy cream in a microwave-safe bowl. Microwave in 30-second increments, stirring in between, until smooth and glossy. This only takes about 1–1.5 minutes.
- Pour the ganache over the chilled mint frosting and use an offset spatula to smooth it out. Chill the entire pan again for another 30 minutes to allow the ganache to set.
- Once the chocolate layer is firm, use a sharp knife (run it under hot water for cleaner slices) to cut the brownies into squares. Each bite has a perfect trio of fudgy, creamy, and chocolatey layers.
Notes
- For best results, ensure brownies are completely cool before adding the mint layer. Store in an airtight container in the refrigerator.


Leave a Reply