

I hope you enjoy making these sweet and savory pears. They always feel like a special occasion. I love seeing your kitchen creations.
Please share your photos with me. It makes my day to see them. Have you tried this recipe? Tag us on Pinterest! You can find me at @AnnasCozyKitchen.
Thank you for cooking with me today. I can’t wait to hear your stories. Happy cooking!
—Anna Whitmore.
Roasted Pears with Blue Cheese, Walnuts and Honey
Description
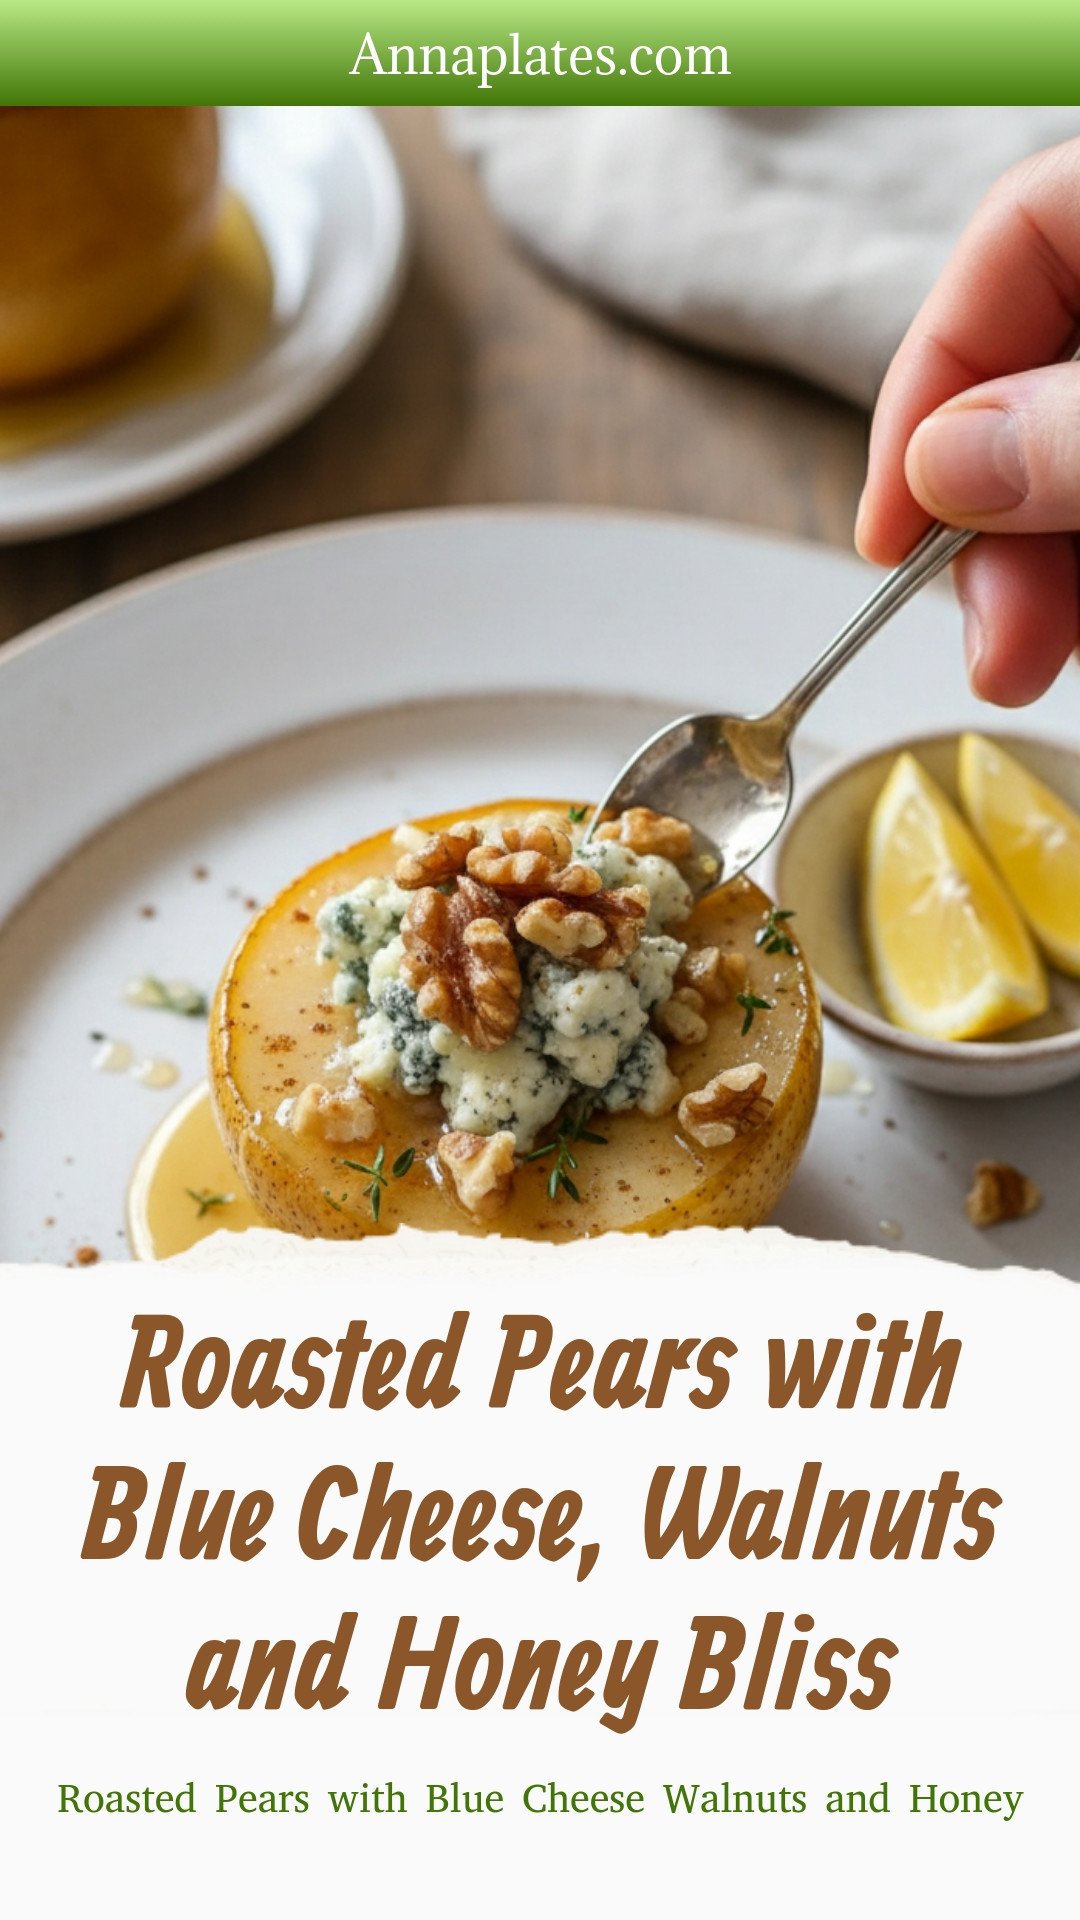
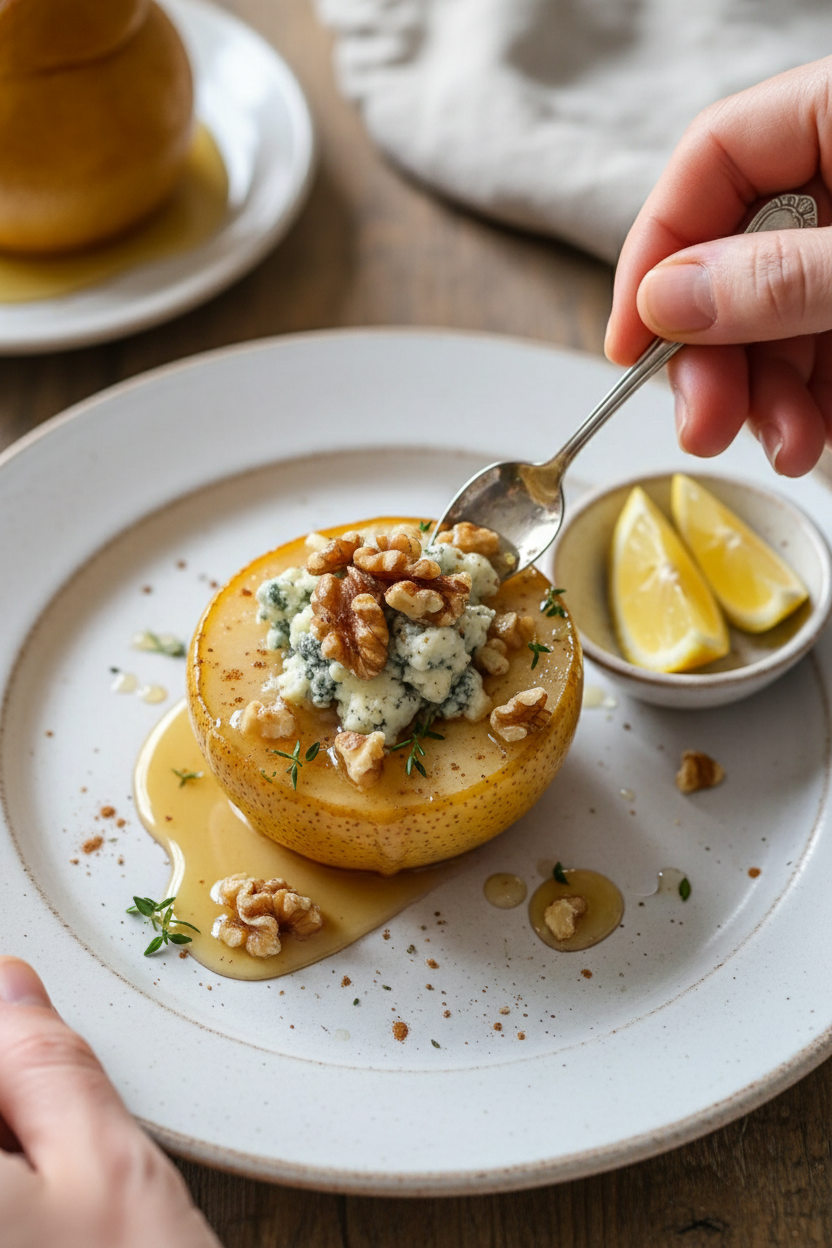
Elegant roasted pears topped with creamy blue cheese, crunchy walnuts, and a honey drizzle. A perfect sweet & savory appetizer or dessert.
Ingredients
Instructions
- Preheat your oven to 350°F (175°C).
- Wash and dry the pears. Halve each pear and remove the core.
- Brush the cut sides of the pears with melted butter.
- Place halved pears cut side up in a greased baking dish.
- Mix blue cheese, walnuts, honey, lemon juice, and cinnamon in a bowl.
- Fill the hollowed pears with the cheese and walnut mixture.
- Roast in the oven for 20-25 minutes until tender and caramelized.
- Remove from oven, drizzle with honey, and garnish with thyme before serving.
Notes
- For added flavor, top with spicy Sriracha mayo, mango salsa, or use marinated tofu for a vegetarian option.
The Pears of My Past
I have always loved pears. My grandpa had a tree in his yard. We would wait for them to get just soft enough.
Then we’d pick them for a treat. This recipe reminds me of those days. It mixes sweet fruit with fun, tangy cheese. I still laugh at that first bite I took as a girl. My eyes got so wide!
Why This Simple Dish Matters
Food is more than just eating. It is about sharing and making memories. This dish feels fancy but is very simple.
That matters because anyone can make it. You don’t need to be a chef. It turns a regular evening into something special. What is your favorite food memory? I would love to hear it.
Let’s Get Roasting
First, warm your oven to 350 degrees. Wash your pears and cut them in half. Scoop out the seeds in the middle.
Brush the cut sides with melted butter. This makes them golden. Place them in a dish. Now, the fun part! Mix the cheese, nuts, honey, and a little lemon juice. Fill the pear centers with this mix. Doesn’t that smell amazing already?
The Magic of Sweet and Salty
The hot oven works its magic. The pear gets soft and sweet. The cheese gets a little melty. The walnuts stay crunchy.
*Fun fact: The blue cheese veins are from safe, good mold!* It sounds funny but tastes wonderful. The honey makes everything sticky and happy. This mix of flavors is why it works. Sweet, salty, and crunchy all at once. Do you prefer sweet or salty snacks most days?
Make It Your Own
This recipe is like a friend. You can change its clothes! No blue cheese? Try feta. No walnuts? Pecans are lovely.
You can even use maple syrup instead of honey. That matters because cooking should be fun, not strict. It is about using what you have and love. What would you use for your filling? Tell me your dream combo!
A Dish for Sharing
When the pears are caramelized, take them out. Drizzle a little more honey on top. Add fresh thyme leaves for a pretty green touch.
Let them cool just a minute. Then share them while warm. They are perfect for talking over. The best meals are the ones we eat together. That is a truth as old as my grandpa’s pear tree.
Ingredients:
| Ingredient | Amount | Notes |
|---|---|---|
| Ripe but firm pears | 4 | Bartlett, Anjou, or Bosc varieties |
| Unsalted Butter | 2 tbsp | Melted for coating |
| Blue Cheese | 1 cup | Crumbled |
| Walnuts | 1/2 cup | Toasted, substitute with pecans if desired |
| Honey | 1/4 cup | Optional maple syrup can be used |
| Fresh Lemon Juice | 2 tbsp | |
| Cinnamon | 1/2 tsp | Optional |
| Fresh Thyme | 1 tbsp | For garnish |
My Cozy Roasted Pears with a Surprise Inside
Hello, my dear. Come sit at the table. Let’s talk about pears. They are such gentle fruit. Sometimes they need a little dressing up. This recipe does just that. We roast them with sweet and savory things. The kitchen will smell like a warm hug. I promise.
I first made this for book club years ago. My friend Martha was skeptical. “Fruit with cheese?” she asked. One bite changed her mind. She asked for the recipe right away. I still laugh at that. Now, let’s get our hands busy. It’s simpler than it looks.
Step 1: First, get your oven warm and cozy. Set it to 350°F. Now, wash your pears. Dry them with a soft towel. Cut each one in half from stem to bottom. Use a small spoon to scoop out the seeds. It makes a nice little cup. (A hard-learned tip: Use firm pears. Soft ones get too mushy in the oven.)
Step 2: Melt your butter in a little dish. Brush it all over the cut sides of the pears. This makes them golden and sweet. Place them in a baking dish, cut side up. They look like little boats ready for treasure. Doesn’t that smell amazing already?
Step 3: Time for the fun part! In a bowl, mix the blue cheese and toasted walnuts. The walnuts add a lovely crunch. Drizzle in the honey and lemon juice. A little cinnamon is nice here too. Stir it all together. It’s a messy, wonderful clump. Do you think the lemon juice makes it taste brighter? Share below!
Step 4: Now, fill each pear boat with your cheese mixture. Pile it high! Don’t be shy. Then, let the oven work its magic. Roast for 20 to 25 minutes. You’ll know they’re done when the pears are tender. The tops will be bubbly and a bit brown.
Step 5: Take them out carefully. Oh, what a sight! Drizzle a tiny bit more honey on top. Sprinkle with fresh thyme leaves. That green makes everything pretty. Let them cool for just a minute before serving. The wait is the hardest part.
Cook Time: 25 minutes
Total Time: 40 minutes
Yield: 8 pear halves
Category: Dessert, Appetizer
Three Fun Twists on This Classic
Recipes are like stories. You can tell them a little differently each time. Here are some of my favorite ways to change this one. Try one next time you make it.
The Sweet Tooth Swap: Use soft goat cheese instead of blue cheese. Add a sprinkle of dried cranberries to the mix.
The Nutty Adventure: Swap walnuts for chopped pecans. Use maple syrup instead of honey. It tastes like autumn in a dish.
The Herby Fresh Take: Skip the cinnamon. Add chopped fresh rosemary to the filling. It’s surprising and very grown-up.
Which one would you try first? Comment below!
Serving with a Smile
These pears are quite friendly. They go with many things. For a light supper, serve two halves on a green salad. The warm pears wilt the greens nicely. For dessert, add a scoop of vanilla ice cream. The mix of hot and cold is wonderful.
What to drink? For a special night, a glass of sweet Riesling wine is lovely. For every day, I love hot spiced apple cider. It just feels right. Which would you choose tonight?
Keeping Your Roasted Pears Perfect
Let’s talk about keeping these pears lovely. They are best fresh from the oven. But you can store leftovers in the fridge for two days.
I don’t recommend freezing them. The pears get too soft and watery. The cheese doesn’t thaw well either. Trust me on this one.
To reheat, use your oven or toaster oven. A microwave will make them soggy. Warm them at 300°F for about 10 minutes.
You can prep the filling a day ahead. Just mix the cheese, nuts, and honey. Keep it covered in your fridge. This makes dinner so much easier.
Good storage saves food and your hard work. It means a tasty treat is always ready. Have you ever tried storing it this way? Share below!
Simple Fixes for Common Hiccups
Sometimes our cooking needs a little help. Here are easy fixes. First, if your pears are hard, roast them longer. Cover the dish with foil so they don’t burn.
Second, is the blue cheese too strong for you? Try feta or goat cheese instead. I remember when my grandson made this swap. He loved it!
Third, if your nuts are not crunchy, toast them first. Just warm them in a dry pan for a few minutes. *This little step makes a big flavor difference.*
Fixing small problems builds your cooking confidence. It also makes your food taste just right for you. Which of these problems have you run into before?
Your Quick Questions, Answered
Q: Is this recipe gluten-free? A: Yes, it is naturally gluten-free. Just check your blue cheese label to be sure.
Q: Can I make it ahead? A: You can prep the filling a day early. Assemble and roast just before serving.
Q: What can I use instead of walnuts? A: Pecans or almonds work beautifully. Use what you have in your pantry.
Q: Can I double the recipe? A: Absolutely! Use a bigger baking dish. The cooking time stays about the same.
Q: Is the cinnamon necessary? A: No, it’s optional. It just adds a warm, cozy spice note. Which tip will you try first?
From My Kitchen to Yours
I hope you enjoy making these sweet and savory pears. They always feel like a special occasion. I love seeing your kitchen creations.
Please share your photos with me. It makes my day to see them. Have you tried this recipe? Tag us on Pinterest! You can find me at @AnnasCozyKitchen.
Thank you for cooking with me today. I can’t wait to hear your stories. Happy cooking!
—Anna Whitmore.


Leave a Reply